Advice on table design

Just been working on the design for my Lowrider table.

I am trying to keep it as simple as possible as I am not great with woodwork and don’t have access to many tools, I’m planning on buying a decent mitre saw for the table assembly. So basically making the frame with 2x4 and topping it with 18mm Ply with the overall size approx 1600mm on Y and 1425mm on X to give a workspace of half a sheet.

As this is the first time I have designed a workbench of any kind I would welcome any suggestions to changes to the design below.

Thanks.

I’m assuming you’re planning on joining the frame with screws through the face of those 2x4s into the legs?

If you don’t have a circular saw (the handheld type) then IMHO, that would be a better investment than a miter or chop saw. You can still cut pretty straight with a simple jig across 3.5" and you will be able to break down large sheets to fit your projects with a circular saw. Here is a construction technique I like and I used it on my LR table:

Comments I would give are:

  1. You will probably want to be able to sand high spots under the spoil board. Or use a hand plane if you have one. If you don’t have a power sander, you’ll want one soon anyway.
  2. The table is going to “rack”. If you imagine looking at one side, it looks like a nice rectangle in CAD, but it will want to turn into a parallelogram in real life. Adding one diagonal stretcher along the back and another along one side will make it much sturdier. Even smaller material, like a 1x3 would do that job fine. It just has to resist getting longer or shorter while the table tries to rack. Alternatively, you can put some corner braces in to make the corners more rigid. Those are a little trickier to make until you have the CNC.
  3. I’m tempted to say you don’t need so many cross braces, but they won’t hurt and they will hopefully be inexpensive. I’m also not sure how thick the spoil board and shelf is going to be, and if it is thin, then it will sag if you don’t have many cross braces.

At the end of the day, I think this will work well. It will certainly give you a CNC machine that you can use to cut some stuff with and it will get plenty dirty :).

Please post some photos and share how it worked!

2 Likes

I’ve built a lot of tables and “benches” with a similar design, although I would add another perpendicular 2x4 to each leg (so that it makes an “L” when viewed from the top"). This will go a long way to mitigate racking and will also give you more meat for your screws to bite into.

I also agree with Jeffe’s advice on adding going with a circular saw over a miter saw in terms of getting a much broader range of use and overall value for your money. I’ll also second the notion of diagonal stretches if you don’t plan on adding perpendicular 2x4’s to the legs. Even considering the strength that will come with screwing the plywood sheets onto the frame, which very well could be enough on its own. But just remember that this is the one step in the building process that you only want to do once.

So apart from any additional bracing, definitely be sure to cherry pick your lumber as best as possible before buying it. Especially if it’s coming from home center. 2x4’s will likely be twisted and bowed to some degree, while your plywood will often appear “bent” in the middle. This is where it’s critical to take your time picking out your wood. Especially if you’re new to the process, as warps and bows can quickly compound any inevitable human errors in any build.

I tend to opt for MDF over plywood when building work table tops. It’s a much more stable material that is far less likely to bend and warp on you than the alternatives. If you’re dead set on plywood, which is certainly understandable for some reasons, be sure to pay attention to the number of plies. Obviously, you’ll spend less money with fewer plies, but this plays a significant role in the stability of the material and how long it will remain flat in fluctuating temperatures and humidity. Again, MDF almost makes a non-issue out of those things, so consider that as an option. It’s cheap as hell, too.

Good luck to you, man!

I would add one caution:

If those are 2X4s in your diagram, the ones on the end being vertical might make the table a bit too thick for the LR. The build instructions state that the table should be a maximum of 4" thick. A 2X4 is 89mm wide, plus your 18mm plywood makes 107mm, which is greater than 4" (101.6mm) You may end up with clearance issues for the LR2 lower Z supports. I have seen a couple of people have issues using 2X4 structure like you show there.

Ryan stated that he made his table with 2X3s, so that is one answer. Putting the 2X4s flat for the table surface is another. Also, a bottom skin on the table will make for a FAR more rigid structure, even if it’s 1/4" plywood.

1 Like

Excellent catch, I did know about the 4" max thickness but totally forgot about it when i started drawing up this design.

Now to head back to the drawing board with everybody’s suggestions.

Thanks.

1 Like

I’ve added some angles pieces to the back and side to give it some extra support and doubled up on the legs.

I have also reduced the width of the table slightly so I could add some separate runners to the sides for the Y assembly’s as I may be doing some mods that would require the runners to be below the spoil board surface.

Pricing up the frame would cost just over £100 which doesn’t seem to bad for a sturdy workbench that I can use for general purpose work as well when the Lowrider is parked up one end.

Any other thoughts, suggestions or mistakes you have spotted?

Thanks.

1 Like

I was going to create another thread for a related question but after seeing this thread thought it might be helpful here too

I’m wonder what the trick is to ensure the table is as flat as possible.

1 Like

Flat is a complicated subject, haha.

First off, it doesn’t have to be that flat. If you are cutting out pieces from sheet goods, then just cut 2mm into your spoil board and don’t worry about flat. If you are carving, with a V bit. That is about the only time it really matters because an error in Z ends up being an error in X and Y.

Second, it doesn’t have to be level, or parallel to the earth or anything. It really needs to follow the gantry to have accurate Z height. The gantry on the low rider is riding on the table. If the table has a bit of a roller coaster along the direction the wheels move, then the error will be minimized because the wheels travel with the table…

Thirdly, once the machine is settled in a bit, you can use the machine to cut at a specific Z height to make very accurate Z. This is sometimes called surfacing the spoil board. You need to choose a homogeneous spoil board, like mdf to do that. I also like the idea of milling the supports under the spoil board and then plopping the spoil board on the surfaced rails to get a good Z height.

Don’t overthink it. You can do small carvings, or through hole work, and a lot of 2.5D stuff (pockets that go half through) with just a reasonably flat surface. Then in a year, when you want to challenge yourself, you can go back and work on making a super flat surface.

3 Likes

I was planning on building the frame then using my long spirit level to check for any major high spots on the braces so I can sand/plane them as level as possible.

Speaking of MDF and plywood, what would be the best sheet for me to use for the top of my bench?

Thanks.

Still for 2.5D work, flat is also really nice to have.

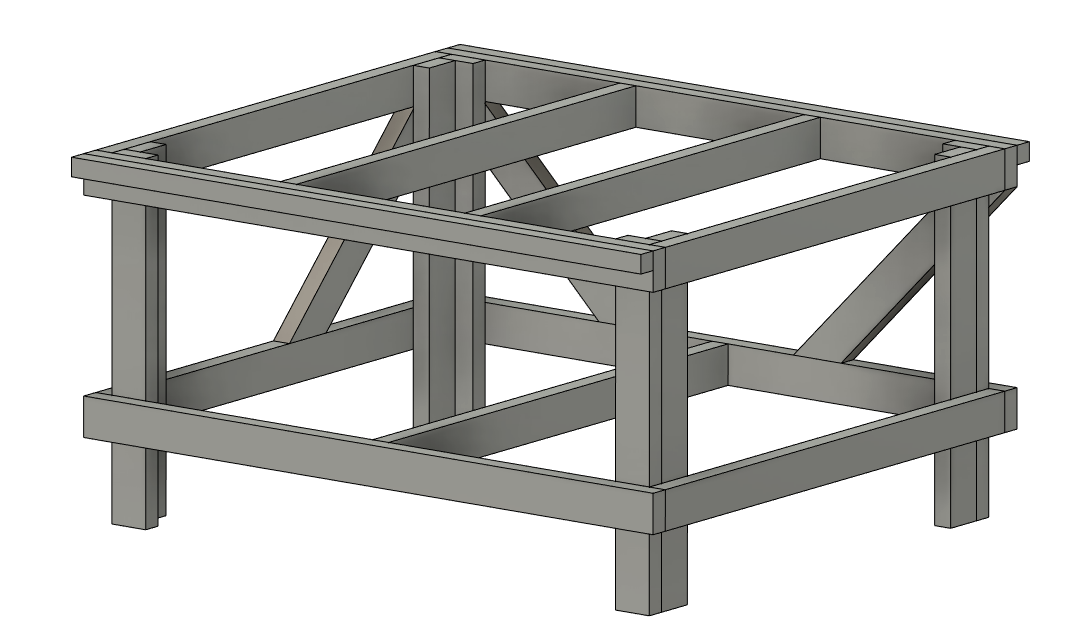
There are a lot of ways to make a flat assembly table. One of the most common is to make a torsion box. That is, a box with a “skin” on both top and bottom with a latticework inside. If you start with a good flat material, it will result in a very rigid surface. This might not be perfectly flat, but it will be close.

My last assembly table, I used a laser level and a ruler to spot check the frame at each junction of the torsion box, made adjustments, then glued and screwed it all together.

For my MPCNC, I’m starting a new torsion box, but I’ll just surface it with the CNC, so it’s probably not super critical, and in fact probably won’t really be flat when it’s done, as it will instead just conform to the CNC rails and gantry, all of which probably have some sag to them.

As a build surface, MDF has a lot going for it. It’s consistent, easily machinable, relatively inexpensive, and smooth. It’s downsides are that it’s very sensitive to moisture, and relatively soft.

Plywood is lighter than MDF, and generally stronger. It is more resilient against moisture. It also makes a good build surface.

Of the two, I most often end up with MDF, simply because of its versatility, and the fact that it’s so difficult to get an unwarped sheet of plywood at the local lumberyards. The only stuff that stays straight is furniture grade stuff, which is far more expensive.

Not sure - but in your last drawing for me it still looks like you did not change the maximal table thickness to be under 4" ?

I have added runners to the sides specifically for the Y assembly’s to run along.

1 Like

Ah, sorry. I was so fixated on the tabletop thickness that I totally missed the runners. :grimacing:

@jeffeb3
Thanks for good points.

I will keep these in mind as I build for the LR2. I’m thinking of converting from the MPCNC this summer.

Anyway, I feel like I highjacked the original post for a little bit. If I have more questions I think I will start a new post. :slight_smile:

1 Like

Cheers for the info here, and in similar posts. They’re helping me decide on how to build a minimally viable surface for LR3 with 49.5"x97.5" usable cutting area. In PNW moisture is a concern, will seal/paint everything.

Like the Paulk Worktops and glued/screwed Ply/MDF torsion boxes. Noticed mixed opinions on the forum. Maybe I’ll graduate to that, for now am planning to build a 2x4 glueless screwed surface…

  • ~9’x~5’ legless open top frame with 2"x4", spacing joists ~12" on center, fastening with 4-1/2 Headlock (predrilled).
  • Squaring up and minimizing racking with 1/2" leftover plywood on the underside only.
  • Fastening primed finger joint 10’ 1x6 rails either side for Y Belts/Rail. Seen LR3 folks use successfully melamine to support Y belts. I couldn’t find melamine lengths > 8’ though. Leaving rails 10’ long, if I have enough belt, ideally want router to be able to park proud of the table edge, easier bit change (idea from forum), maybe enable other carve scenarios too.
  • Rest/Level open frame on relatively flat aluminum scaffolding platform (14"x 8’) and benches until I decide on leg design. Table center will be the most rigid/supported where it’s clamped/bolted to the scaffolding platform.
  • Level corners using water and laser levels. Temporary 2"x4" for corner legs, prop with shims.
  • Tram using surfacing bit across tops of the 2"x4", before fastening any spoil boards. Think Jeffeb3 suggested this elsewhere.

Feedback appreciated! Pretty sure this is wrong, I just don’t know how.