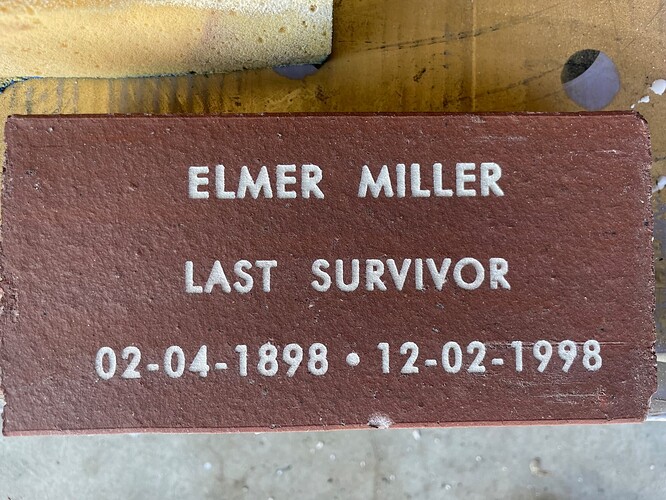
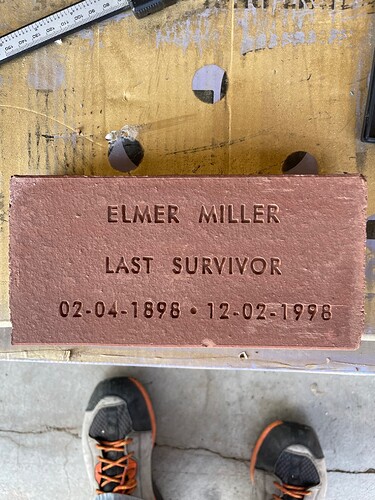
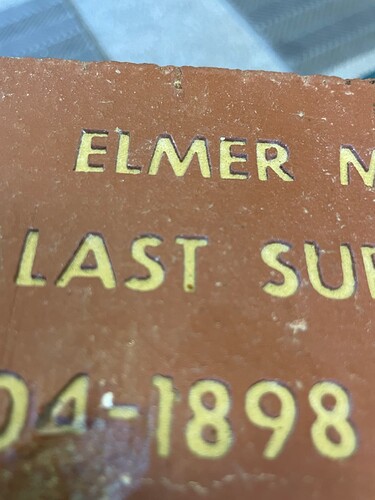
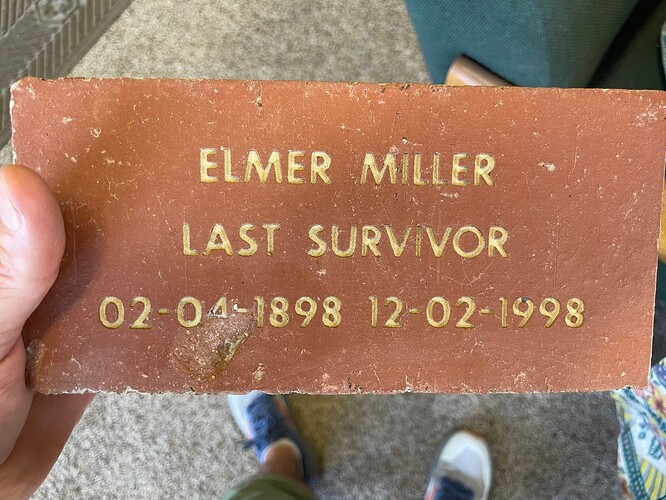
I am using an older MPCNC that I built in 2019. I am carving Brick for a job. I am trying to replicate what a previous carver has done and am really close. The lettering I have looks really good. Within the lettering, the previous guy laid in a grout and then, I am assuming he re-carved the lettering with less depth the showcase the colored grout but also give the lettering depth with clean inside edges. Any advice on how to accomplish the second pass after the grout? See pictures. My work is done with the white grout while his is done with the yellowish color.
In the last picture it seems like he did the same toolpath a little bit more shallow and with a V-bit.
That’s what I’m suspecting. I am also using a V-Bit to carve both passes, but I’m not getting the clean inside edges like he has. BTW, I have no idea what he used to carve. Laser, End-mill, etc… It was decades ago and I’m just trying to replicate it
If using a V-bit, but carving more shallow, won’t the paths need to be just a bit “bigger” all the way around? Otherwise the bit won’t be doing any cutting.
To get that effect with a V bit, set the Z zero a bit higher and carve exactly the same, or do the first carve with a smaller angle bit (say 45°) and a second with the same zero, but a larger angle (say 60°)
The same bit, same carve but higher will produce a uniform thickness of the grout.
The shallower angle bit will produce a result thicker at the center, and very thin at the edges.
I’m fairly sure a mason would just use a soft brush while the grout was green which will give the vee effect as the brush drags the grout towards the edge of the letter.
I would experiment with a soft toothbrush, a stiffish artists brush, or even a couple of different kinds of sponges.
There again, a mason would hand cut the letters and they’d be much bigger!


