So here’s where my experimentation has led me this week.
TLDR: I need a better heatsink.
I pulled the Endurance off the MPCNC and did some bench testing. The first order of business was measuring the stock current, which is more difficult than one would think because it uses a constant voltage driver. So as soon as I stick my amp meter in, the voltage (and current) drops. So I measured the diode voltage before, then put the meter in, then increased the voltage to the diode so it was receiving what it was when stock.
| Laser Diode |
A |
V |
| stock |
n/a |
4.6 |
| w/amp meter inserted |
2.25 |
4.23 |
| after V adjusted back to stock |
4.13 |
4.6 |
| at spec 4.9A@4.75V |
4.9 |
4.7 |
So out of the box, the laser current would have been slightly below the specification card that came with the laser, but not by much. At this point I have not validated the output power, as I do not have a laser power meter.
A warning about constant voltage drivers
Here is why you don’t want a constant voltage driver: I removed the cooling fan while on the test bench to see what would happen. Within a minute, the heatsink temp rose from 100degF to 110degF, and the current increased 100mA - then I shut it down quickly. With a constant voltage, more heat = more current, and the cycle continues until bad things happen.
Start of Heatsink Experiments
From here, I wanted to start experimenting with heatsinks, as that seems to be the critical part of the design. I swapped in a constant current driver, and made some measurements.
Test 1: Stock heatsink and fan
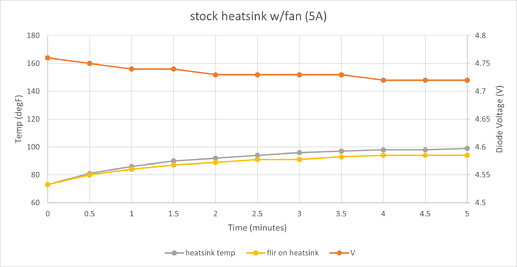
So here are some tests on the stock heatsink and fan:
After a few minutes, things level out and it seems to dissipate heat well.
Test 2: 12mm bearing mount
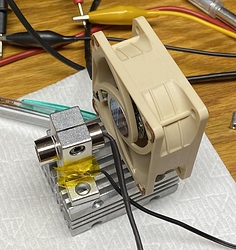
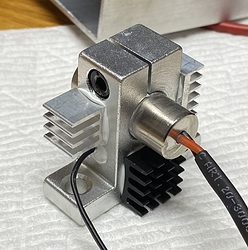
My first DIY attempt was with a 12mm linear bearing mount that looks like this:
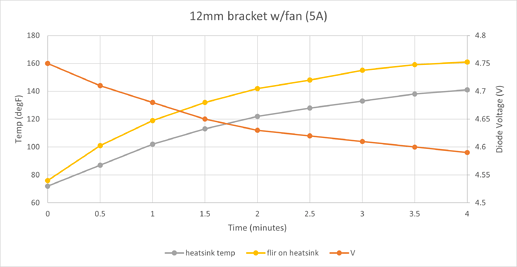
Not good. The temp keeps climbing, and the voltage keeps dropping because it is maintaining the constant current. If the voltage were fixed, the current would have kept going up. Note that this goes beyond temperature “spec” for the NUMB44. I say “spec” in quotes because I have yet to find a real spec sheet. Most information states 60C/140F max. I think the heatsink temp is a little low as compared to the FLIR because it is below the driver (under the kapton tape in the picture).
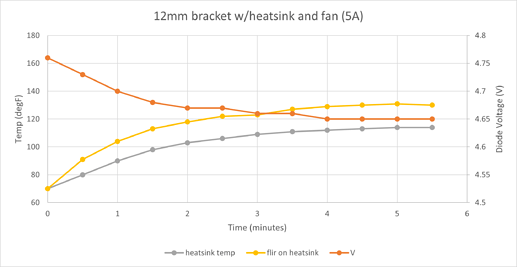
Test 3: 12mm bearing mount with heatsinks and better airflow
So after sleeping on it, I stuck some heatsinks on the bracket. I was doubtful it would work, but to my suprise it did. Here’s the modified mount:
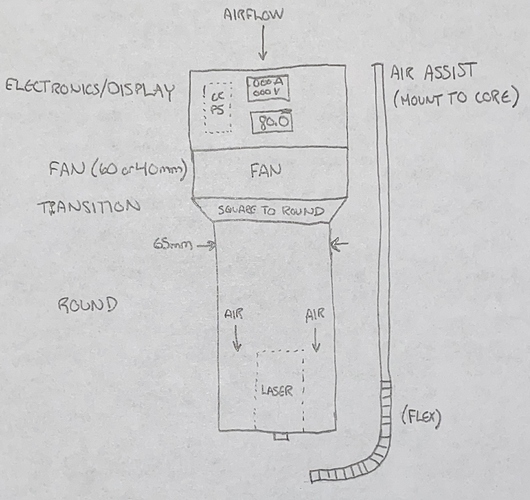
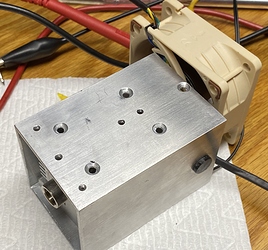
And improved airflow during testing: (you can see it inside the square tube)
While this did maintain temperature, it definitely wasn’t as good as the stock heatsink. I did change two things in this trial (heatsinks and airflow), but I think the heatsinks had much more to do with it.
Summary and next steps
I think all of the components for a DIY 7W laser are easily acquired, aside from the heatsink. My crappy heatsink does lead me to believe some of the smaller 12mm laser heatsinks might be good enough with a strong airflow. However, I don’t like how the laser module slides in and mushes all the thermal grease out, then its just held in with a set screw - I can’t image that has good thermal conductivity. But for a few bucks, I will order one and give it a try.
I am aware there are many heatsinks like in the Chinese lasers on Aliexpress and the like. My hope is to find something you don’t have to wait so long for.
