DR Frankenstein made a hybrid monster from human remains. I am …
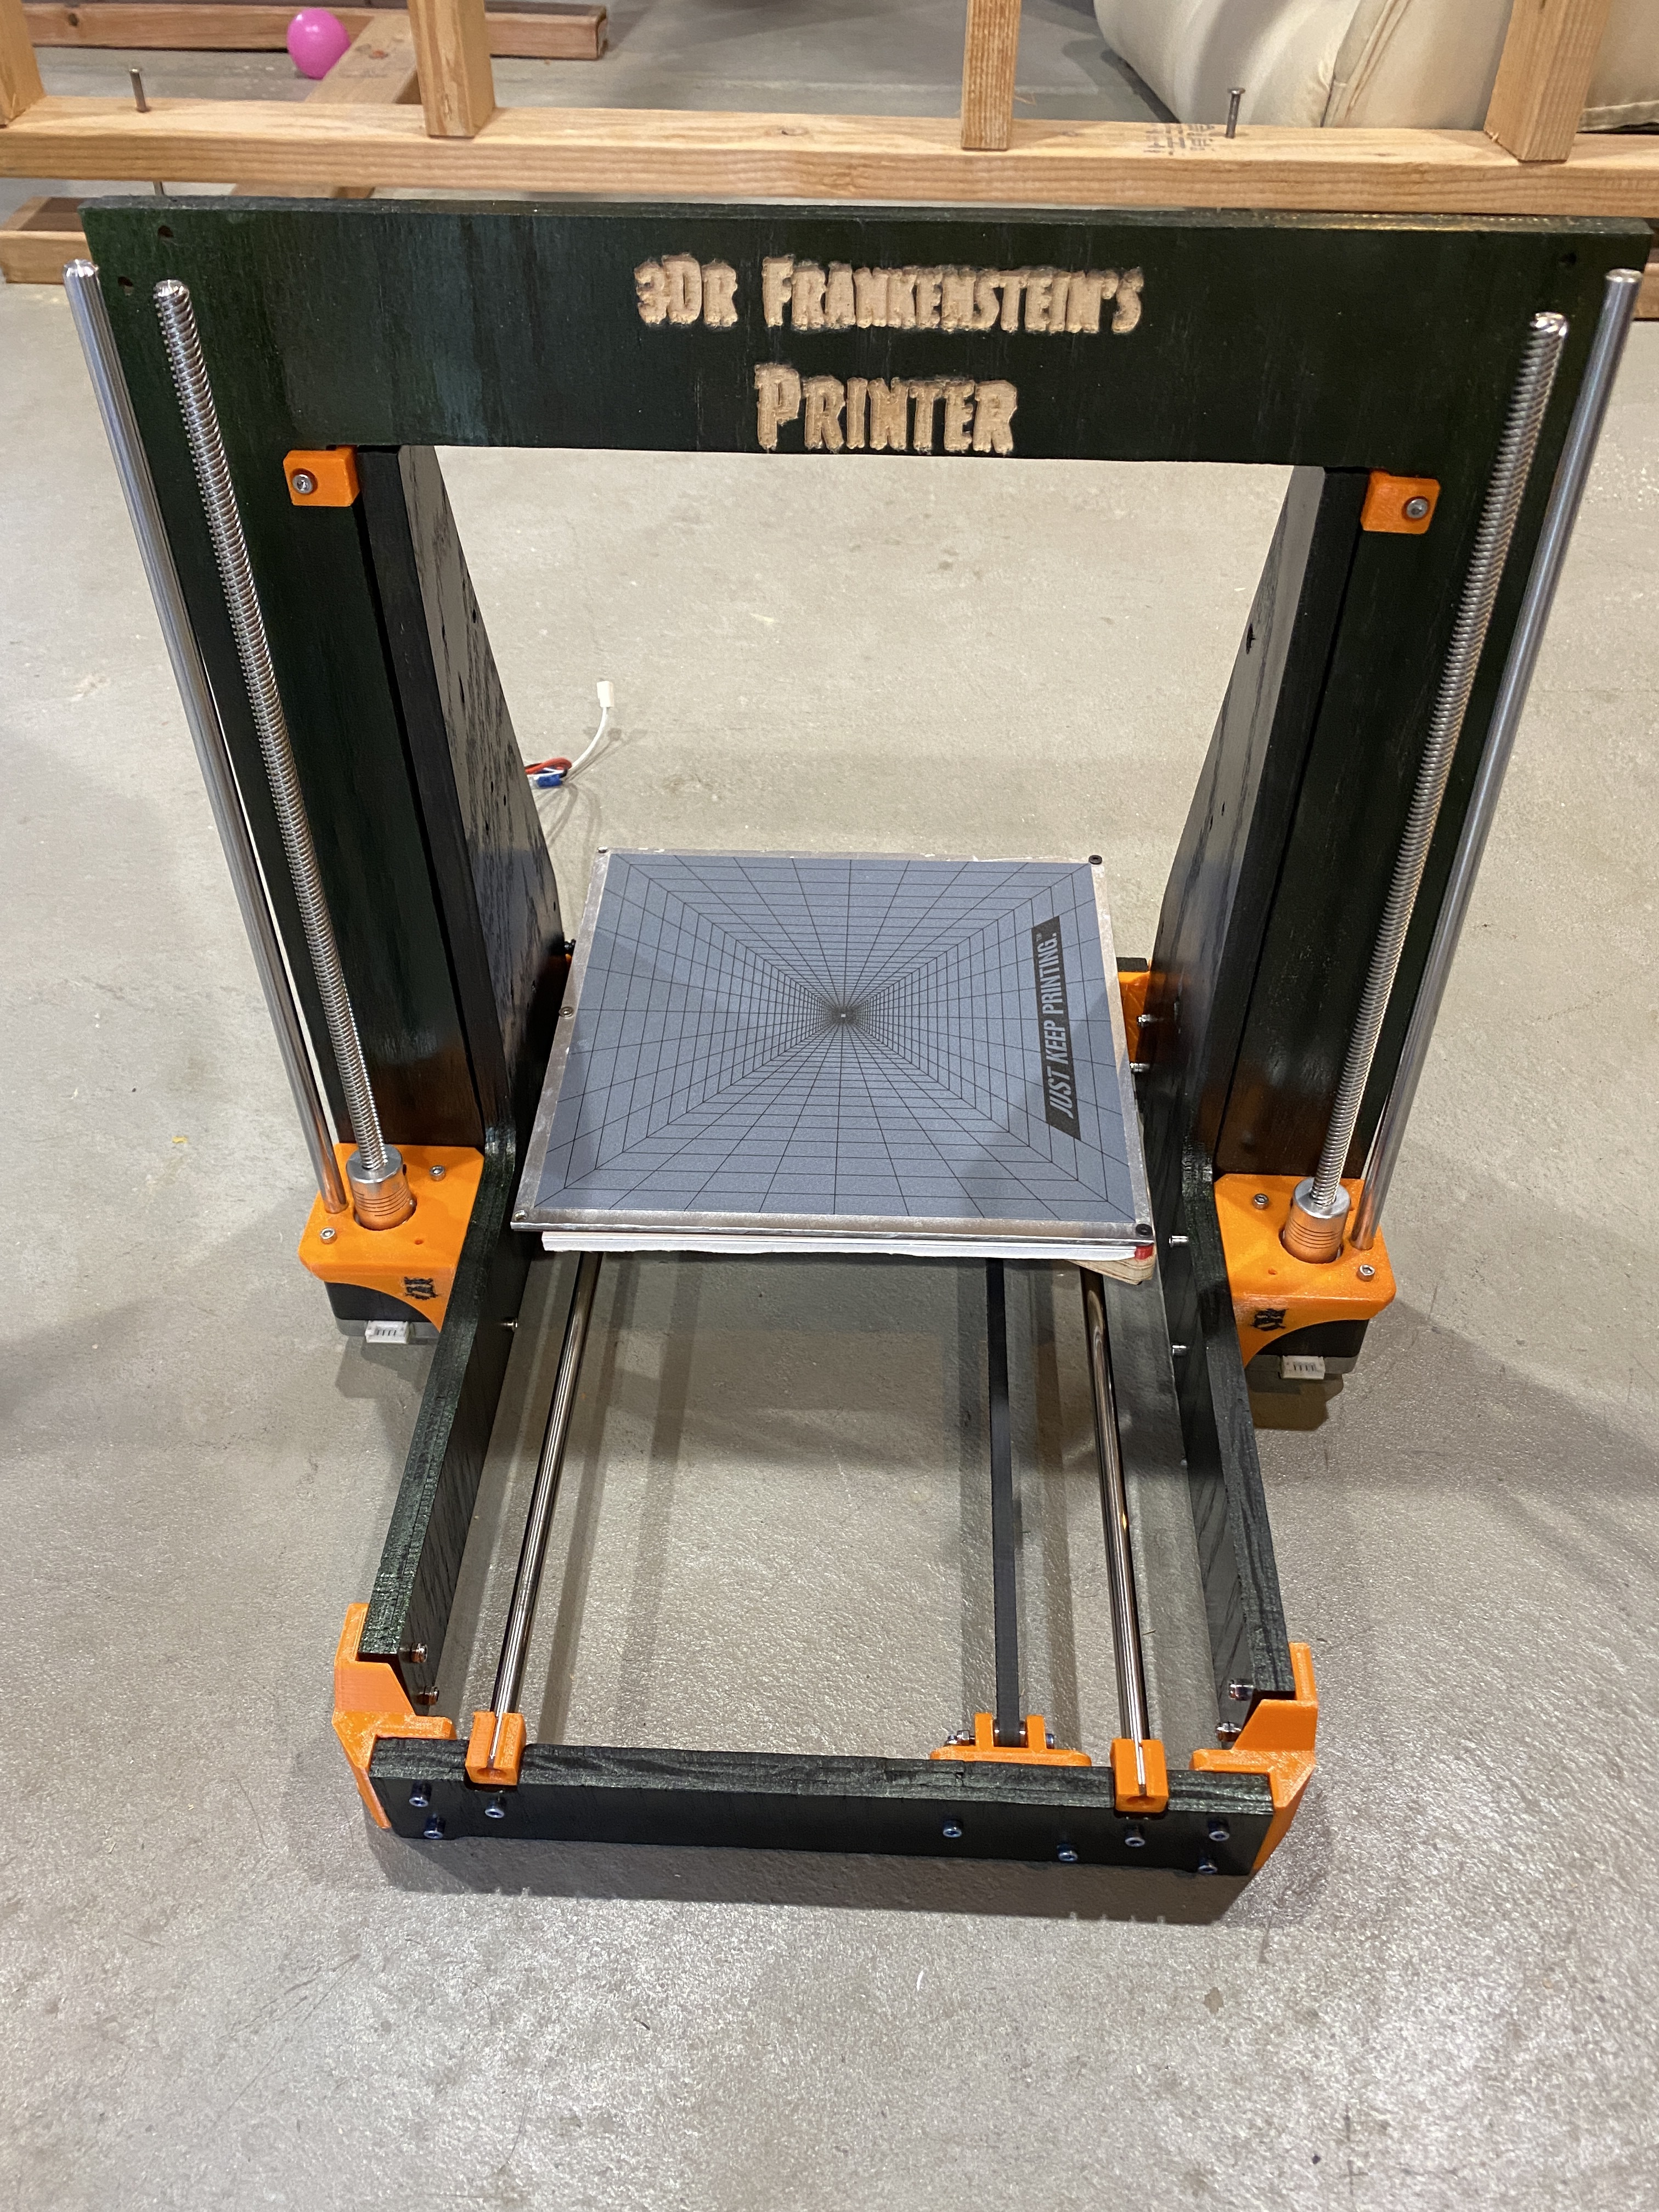
3DR Frankenstein making a Hybrid machine from 3D Printer remains.
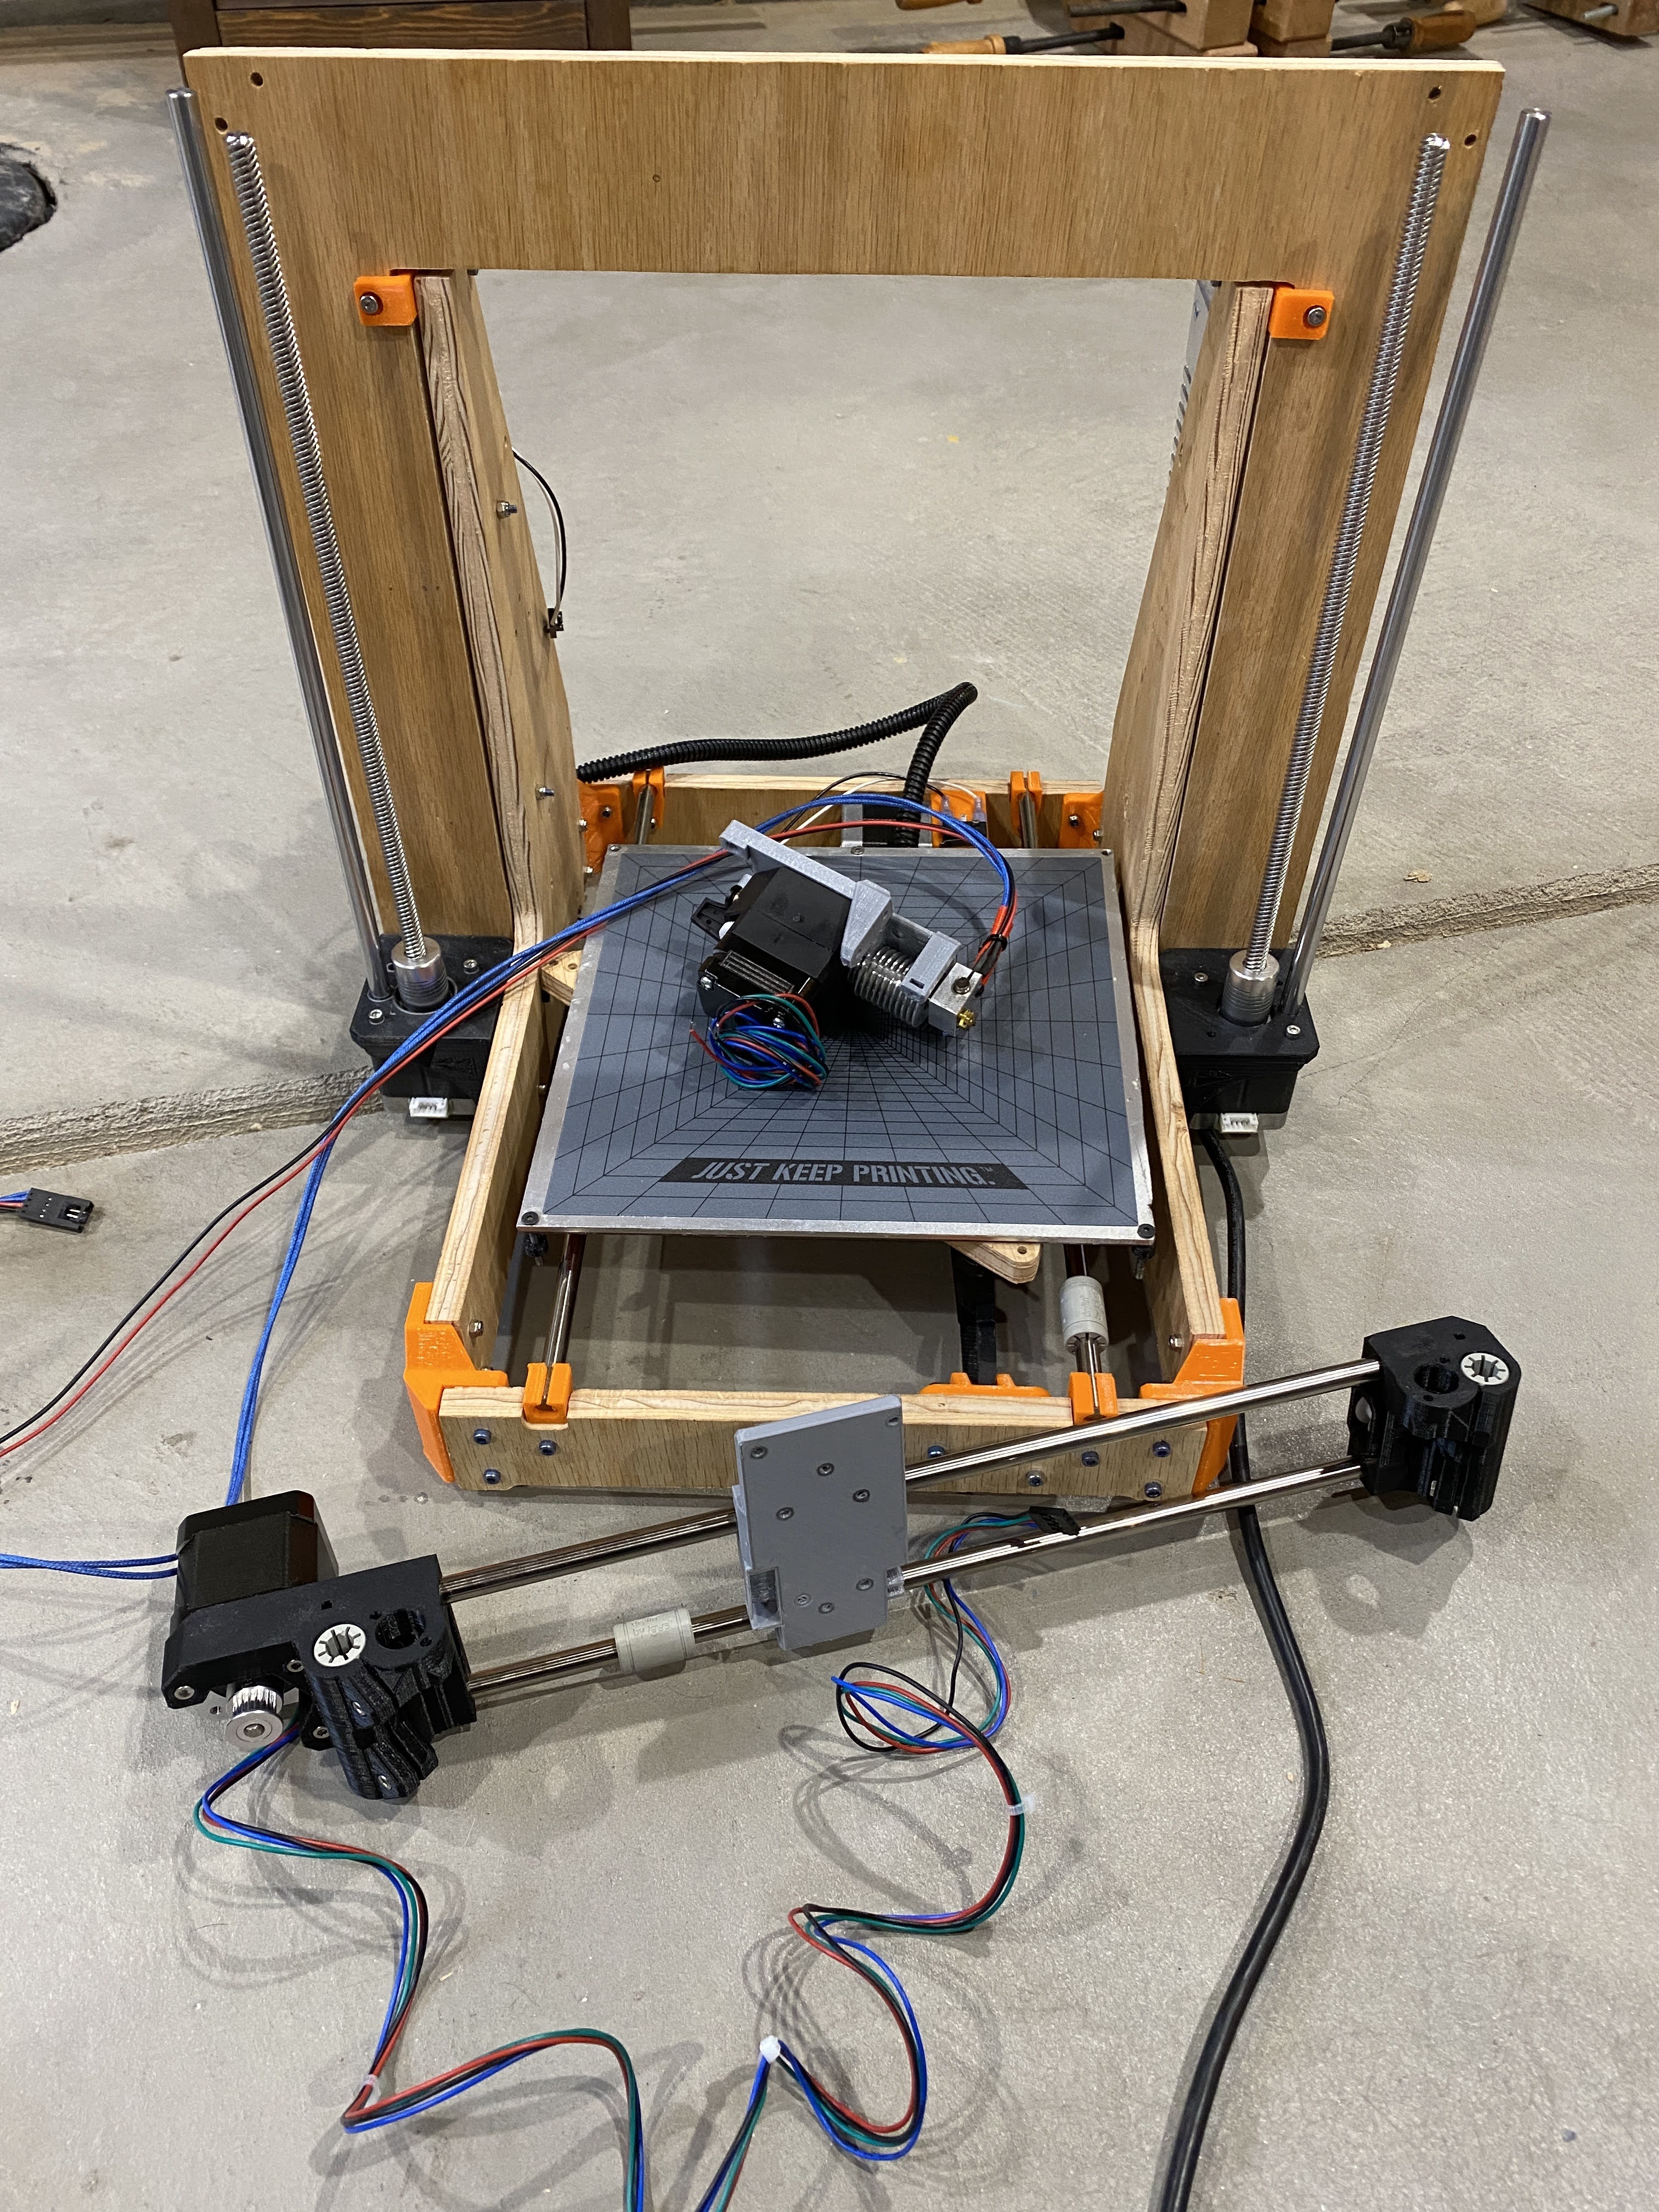
This is my fun little 3D printer build project. I am using what I have learned from the MANY 3D printers I have tinkered with and dismantled to build something simple with all the best features I have grown to appreciate. Why? Mostly because I have a lot of parts just sitting around but I also think it’s fun.
This is a work in progress and some things will change.
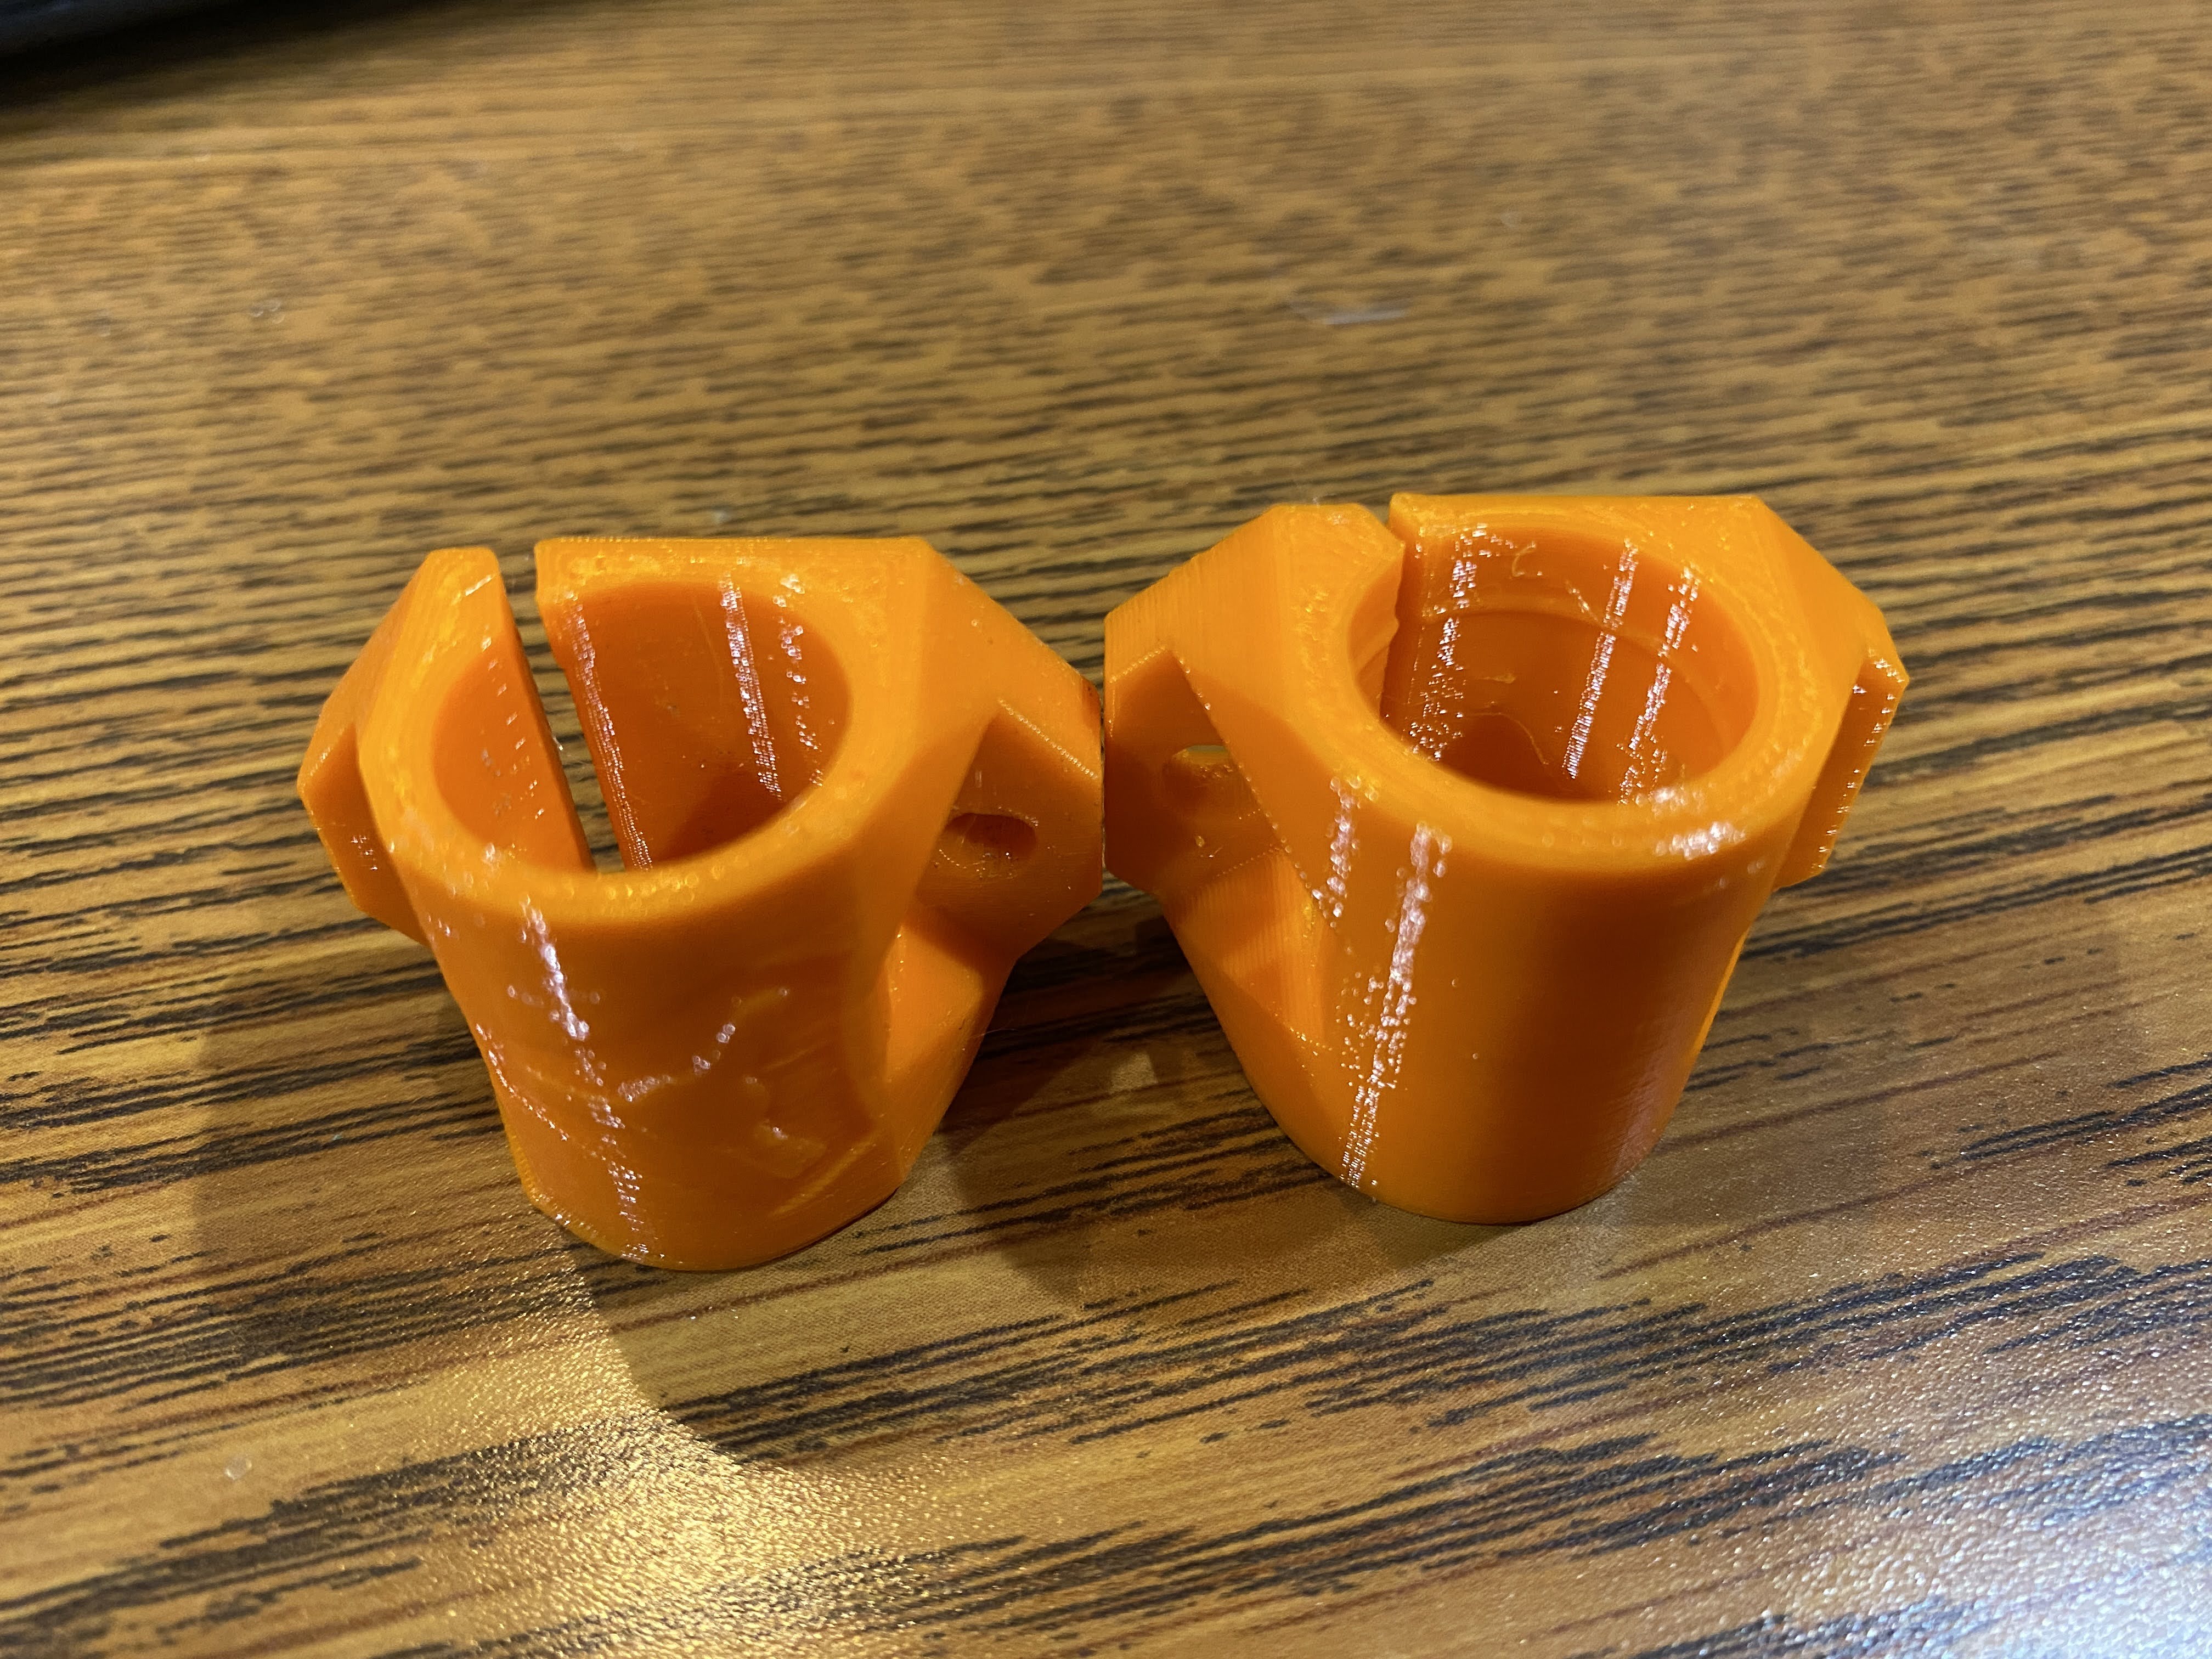
I decided to rework some of the pieces of the Y Axis on the MP3DP. The bed bearing mounts cause two problems. If I used the second bolt to hold the bearing tight or snug it would cause so much friction that the bed was hard to move along that axis. If I losen the second bolt too much then the bearings I am using will slide right out of the bearing mount.
All of this makes sense to me. Because ANY amount of misalignment can cause the tightened bolt to put pressure where it shouldn’t be. So if the Milled holes are out of alignment or the plastic printed parts are not perfect then the bearing will get a twisted pressure and cause friction.
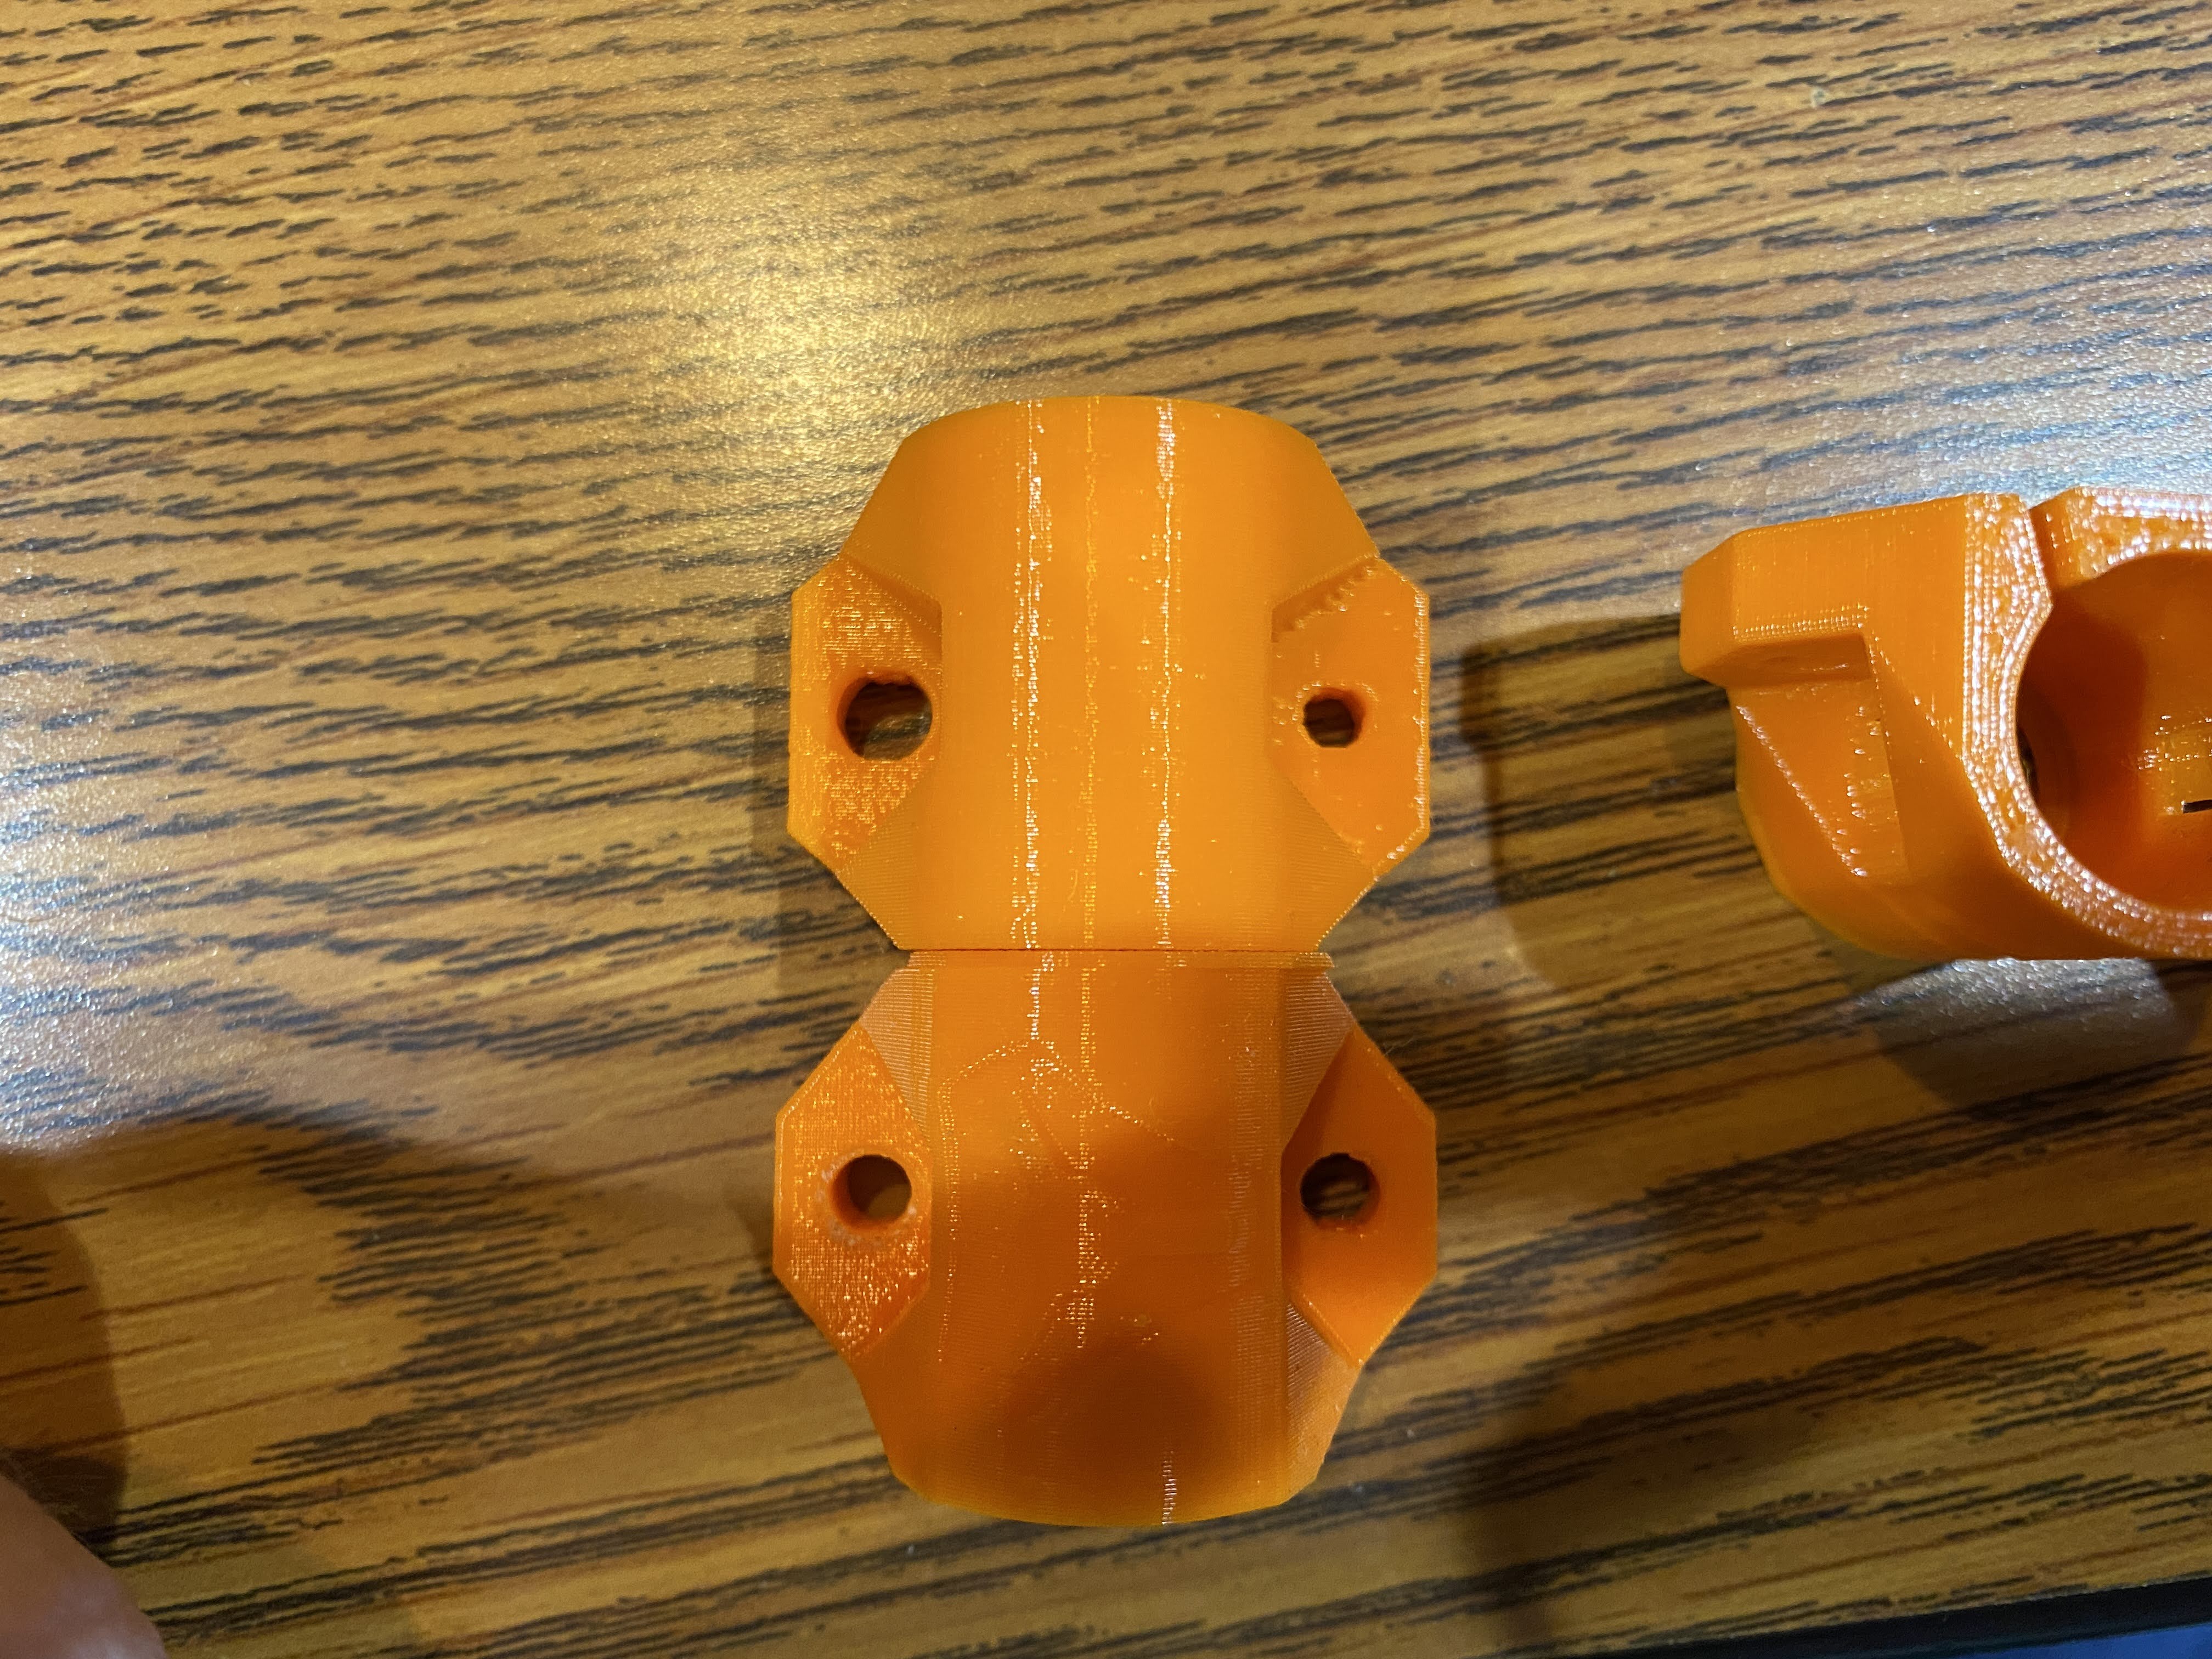
So I made a modified version of the bearing holder. This version has two features that I think will help. (Untested as of now.) The first is a set of ribs or rings that can hold the bearing in place so even if the second bolt is loose the bearing will not simply slide out of position. The second change is a much wider hole for the second bolt. So even if that bolt is not perfectly aligned it should apply less of a twisting pressure.
Ryan’s Original piece on the left. My mod on the right.
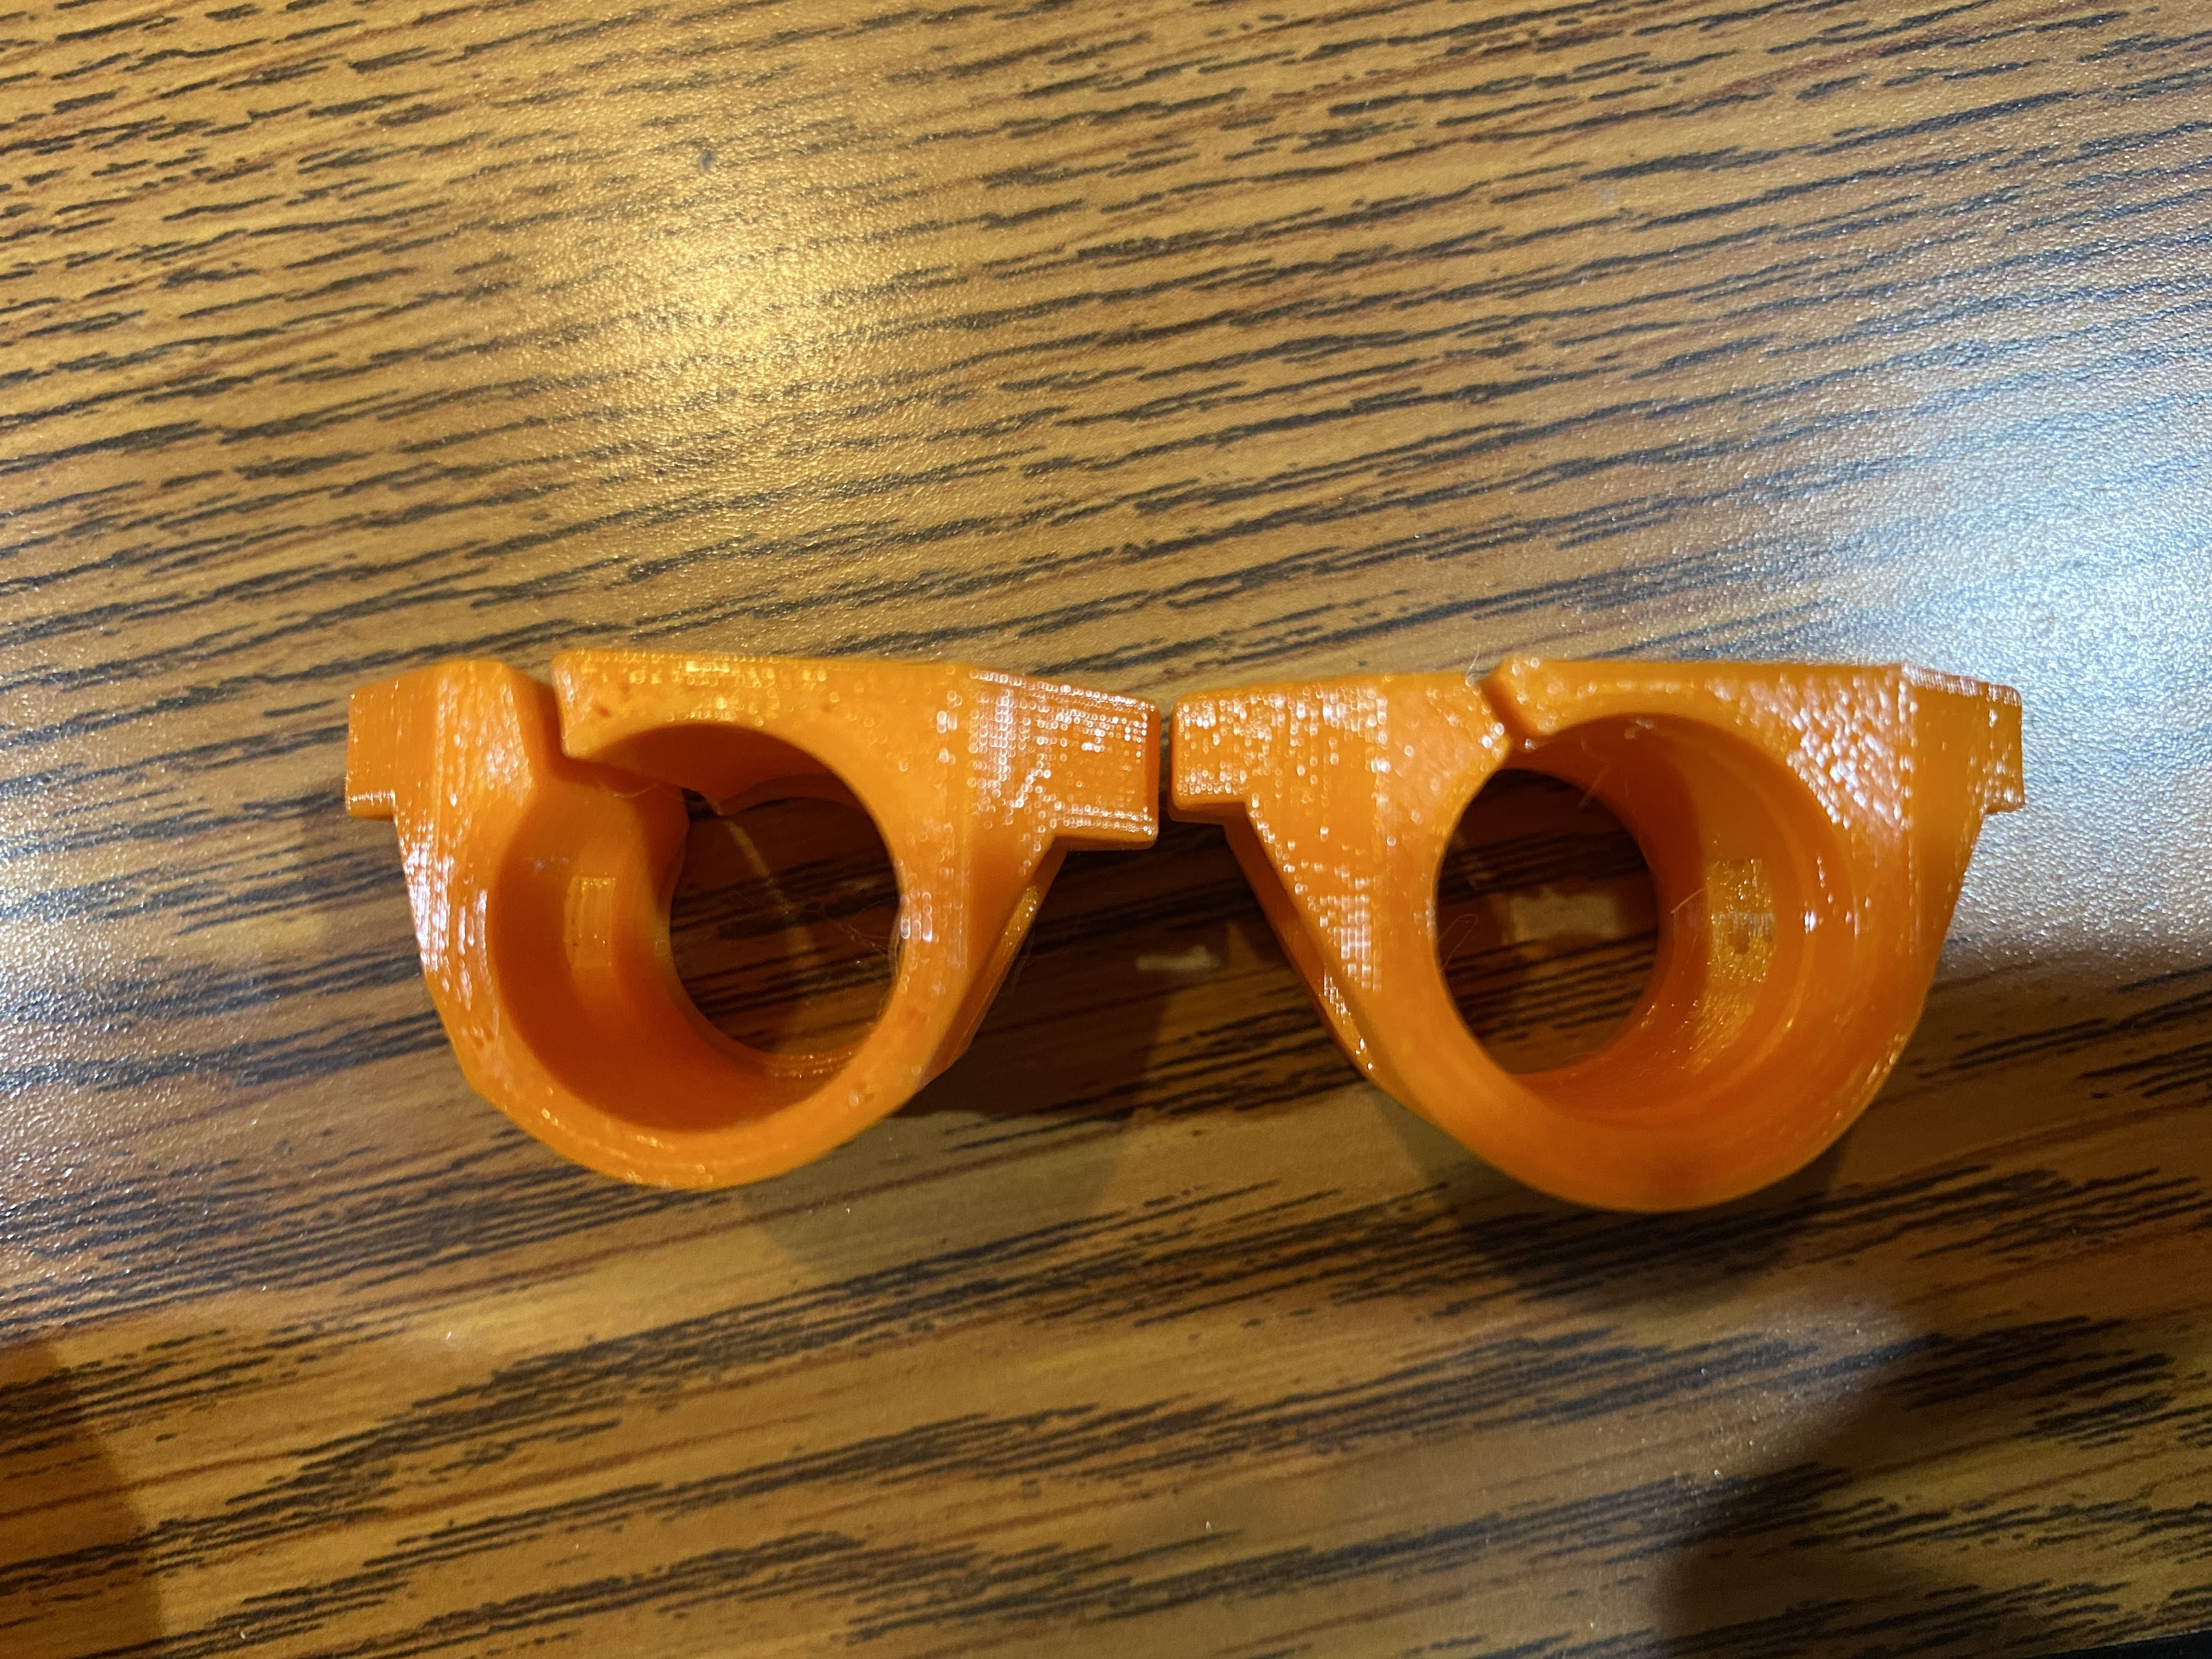
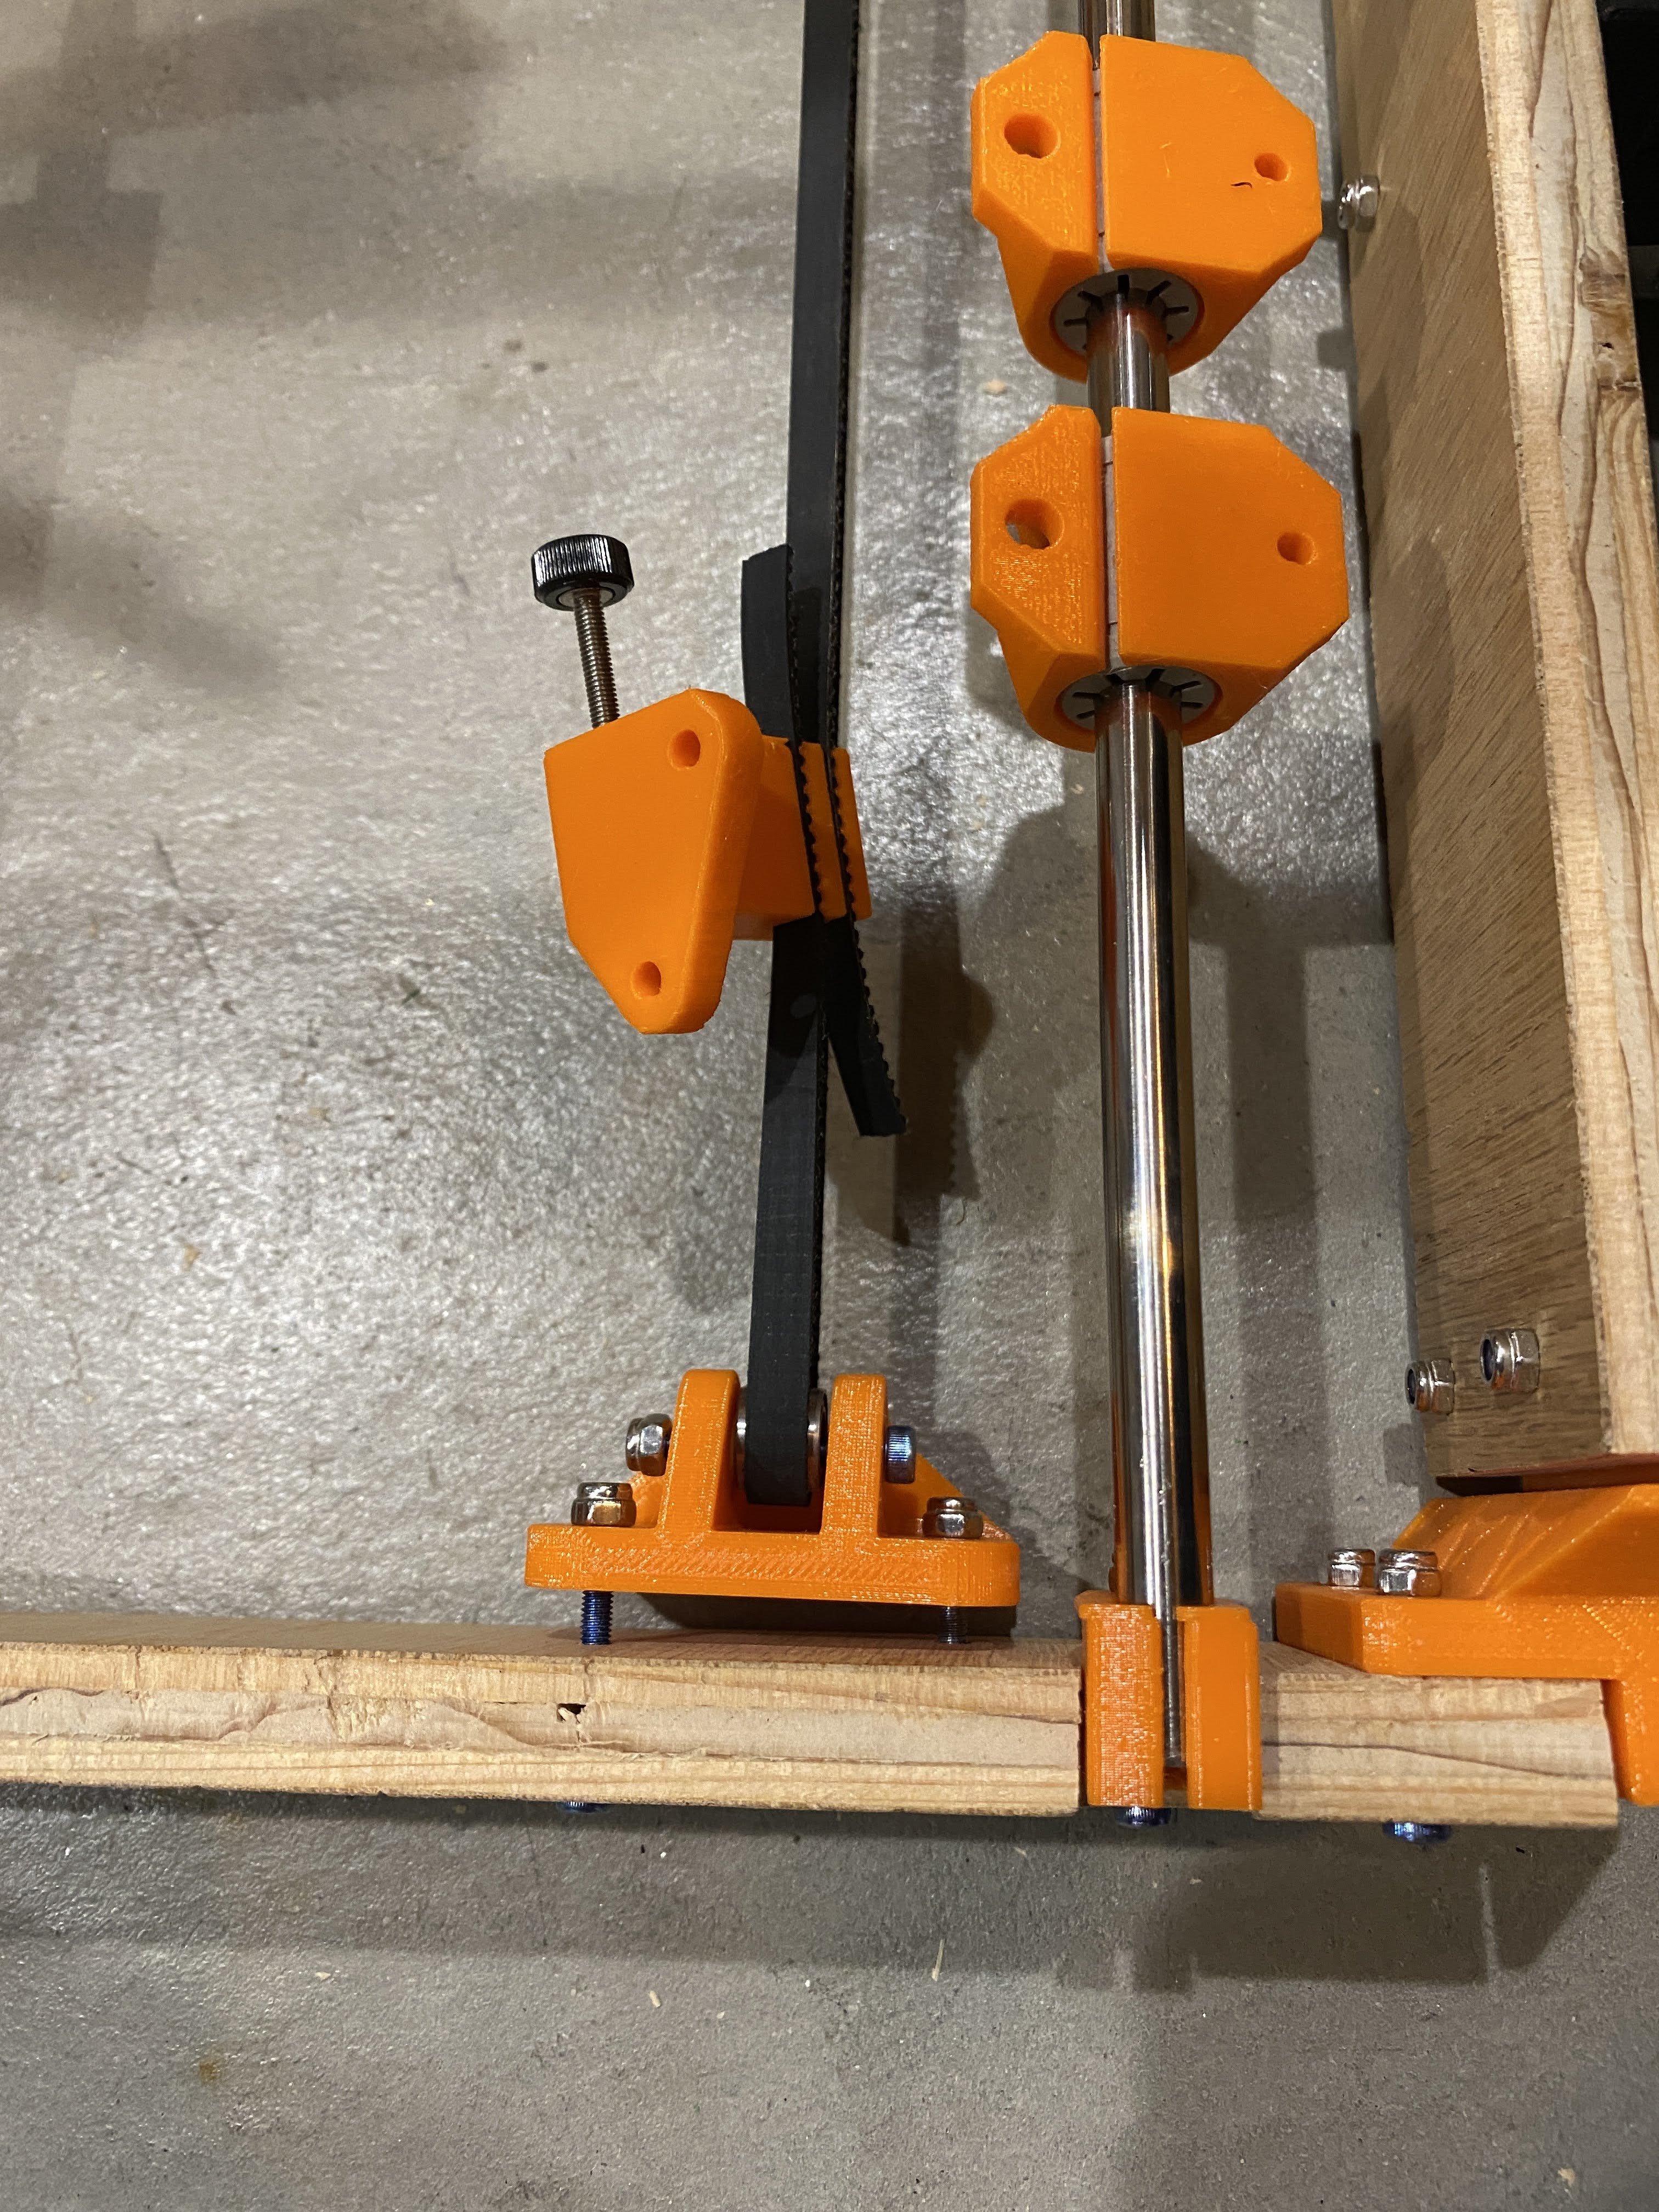
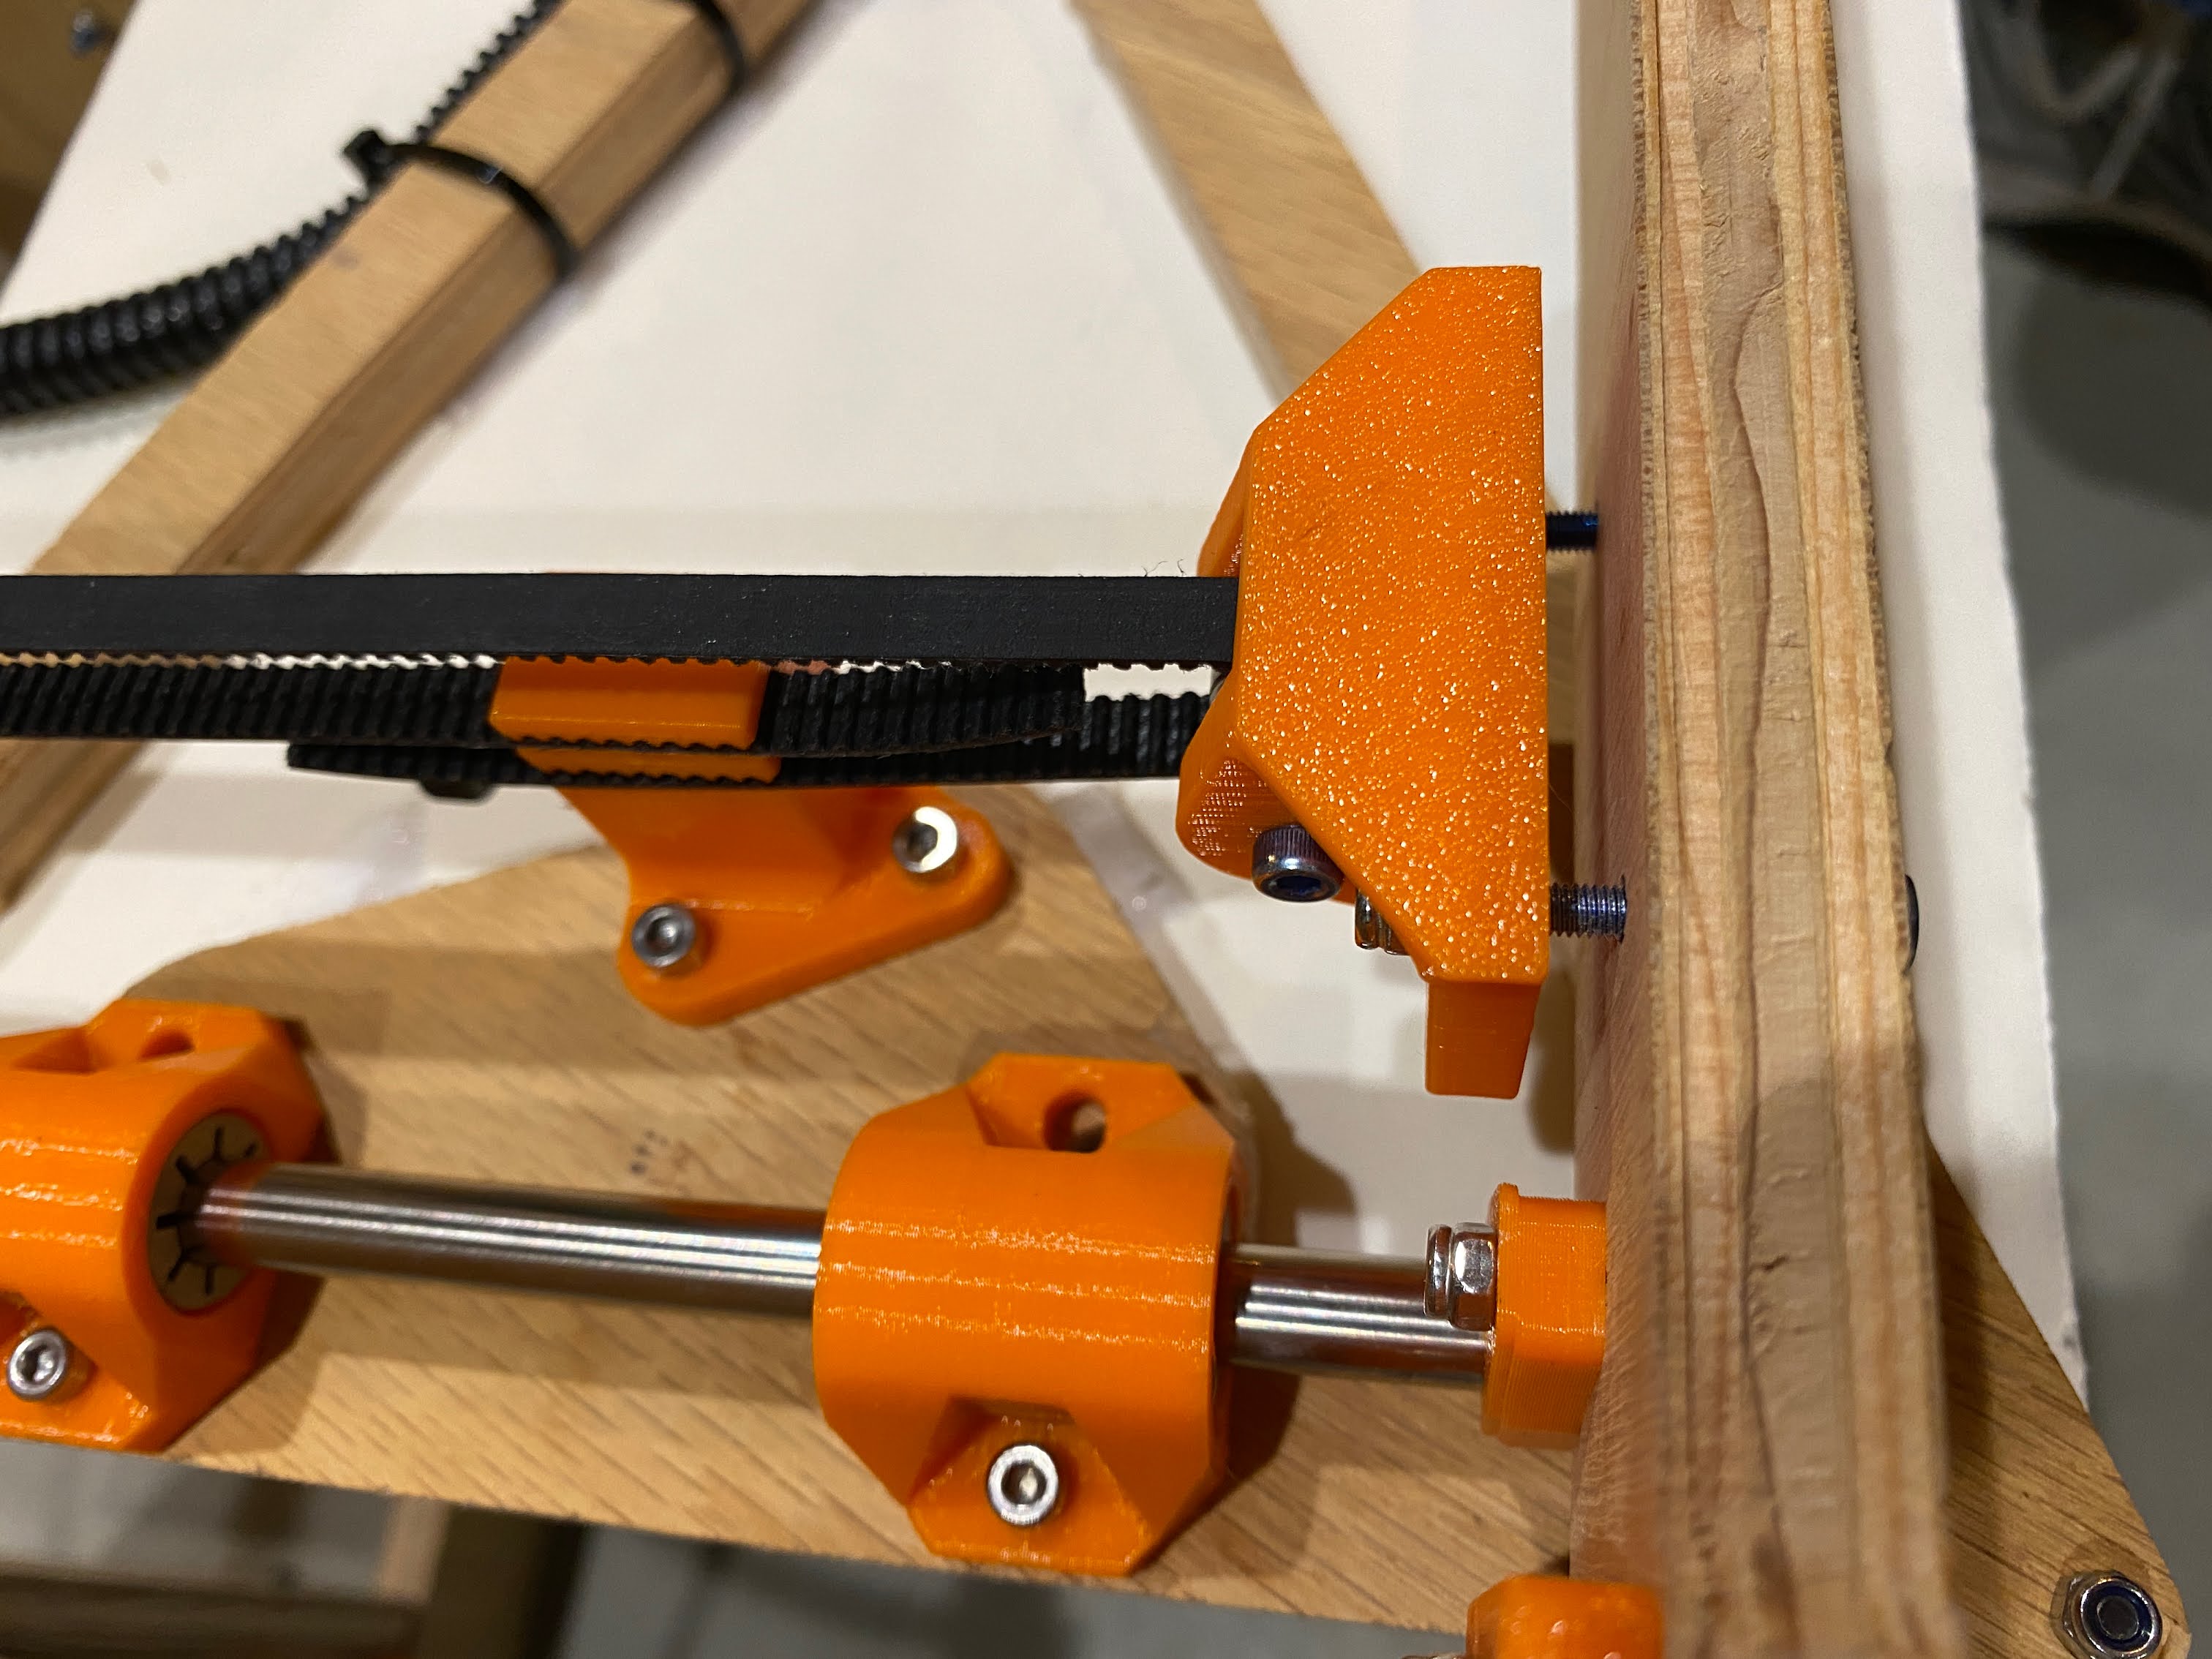
The belt block was the next piece I decided to mod. Nearly identical to the original except that I added a second path for the belt to rest in. I personally don’t like using Zip ties to tighten a belt because I feel like I have less control. The zip tie will slightly deform so after a week or so it will go a little slack. Also you can’t reverse it to loosen it up.
So this piece holds both ends of the belt. To install it I first make sure the Y Idler bearing piece is loose. I have 3-5 mm of extra space between it and the front frame. Then I insert the belt into the block and pull it snug before inserting the other end of the belt. Final step is to slowly tighten the bolts holding the Y idler. If I do it right there will still most likely be about 1 mm space between the idler mount and the front frame.
EDIT:
I should add that when you tighten the two bolt it is important to keep the pressure equal. Other wise the belt will wander from one side to the other and rub against a wall. Test moving the bed back and forth to see if the belt wanders or stays centered.
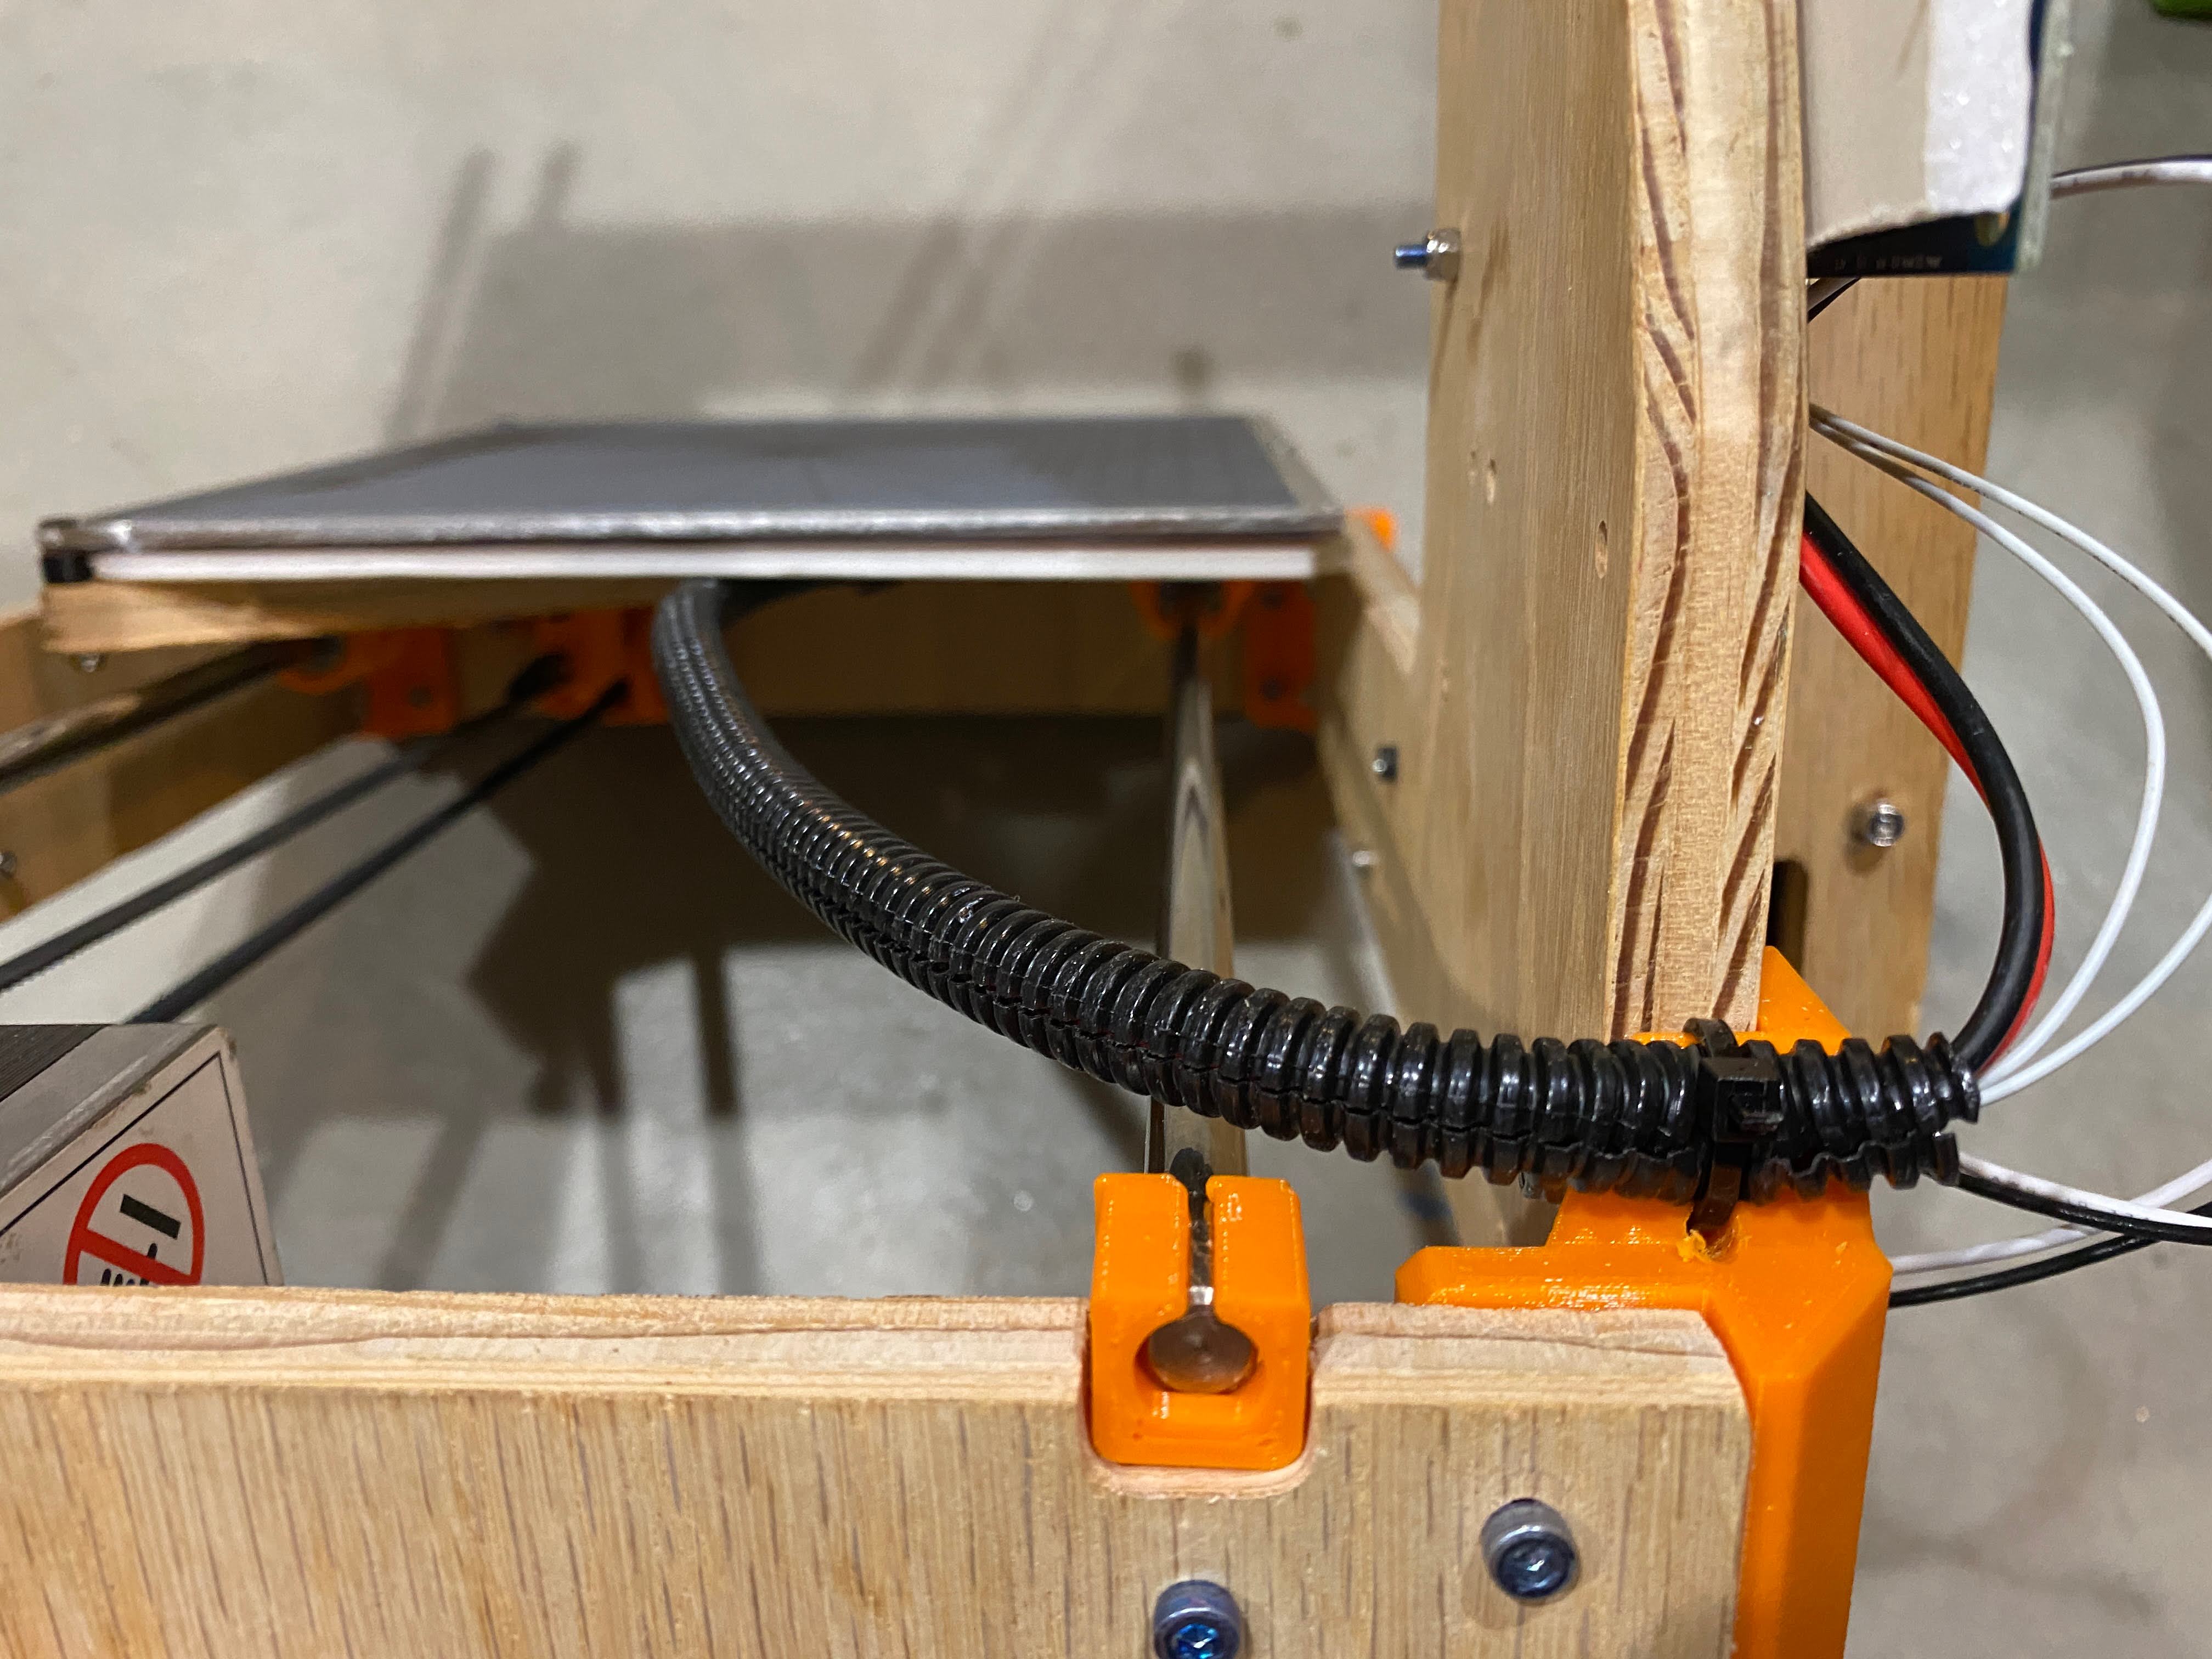
The heated bed went on next. I use foam core craft board to insulate under the heater. It is sandwiched between the heater and the wooden frame. I put in on once to smash it into place then took it off to see where the nuts and wires and made dents and impressions. I then used a blade to cut those areas out so it wouldn’t flex the bed or heater.
I used small (5 mm tall) printed cylinders as spacers instead of springs. Since I plan to use a BL Touch I won’t be spending time leveling the bed after the initial build.
The wires for the heat bed were another fun problem to solve. Some of the printers I have worked with have had horrible cable management. Some of those have resulted in the wires breaking over time. So I used Zip ties to secure the wires against the side of the wooden bed mount plate. Then drilled a hole in the rear corner piece. Sent another zip tie through the hole and now the wire is secured. Movement inside the wire should be spread out across the length of the entire thing.
LOL Thanks, Yeah it looks really rough right now. But eventually I will get it put together. I have already built it almost completely once. But most of the printed parts were printed on my sloppier TAZ and will be reprinted cleaner on my MK3 over the weekend. I have been building it, making changes, reprinting and rebuilding it over and over. Meanwhile my MK3 was busy working on another Important project for the last few days. Now that I know that I want to theme this build after the Frankenstein Monster I plan to cut new flat pieces with something to fit the theme. So I will be dismantling this build a few more times before I am done.
Also I need to come up with a better wood piece pattern to mount the Duet 2 Maestro board. It is an awkward and ugly fit right now. But I might just make a plastic case mount that fits the current holes like an adapter. Not sure yet.
It takes a lot of wires, but I wanted my power supply, pi, a d controller under the jeffeb3 plate. I wanted a fancy scissor lift thing to work on it too, but I ended up just making a very crude box.
The gif is very cool. This is getting me excited to work on a printer again.
I think if you were trying to cut mickey mouse’s printer into it, it would have not worked, but the frankenstein’s printer is supposed to be a bit jagged.
I don’t know what the original font was like, but it looks like maybe the angle was wrong on the bit, which causes dogbone features.
Yeah, the bit is slightly at an angle. Like 3 degrees off of plumb. But I truly think the real problem was that I homed the z about 1 mm too deep. Oh well. Live and learn.
I am having some slop in my Y plate. It is rotating a bit when the Y moves. I was reminded of this post. I may need to try your bearing blocks out. Hopefully I can tighten it enough to get a good part out. It is currently trying to print a replacement part for my other printer, which is currently on the table getting surgery.
I am almost done calibrating the new printer. That is taking a long time as I am learning how to use the Duet. Next time I get a chance to work on it I should be printing some calibration pieces and a benchy. I say that to let you know that I haven’t tested my custom parts a lot yet. But. From what I have seen the bed moves smoothly and only twists clockwise a little when it is homing and crashes one bearing into the frame. I guess that is to be expected. Other than that it seems to work exactly like I would expect. When I installed these I only used one mounting screw each.
Hmmm. I’m looking at this closer, and I think the bearing are being held tight, and the plate is held tight to them. There might be some flex in the 8mm rod, but there is also some rocking from the actual bearings on the rod. I think they need to be replaced. Darn.
It is printing roughly the shape I am asking, but the backlash is causing a mm or more of sloppyness in the XY. I think I have a part good enough to work on the wanhao, and I can order some new bearings in the meantime.
Those are what I’m using. It is nice that they don’t have tiny bearings that fall out, but they have worn out a bit now and are shifting on the rod. I don’t print 24/7, so it seems like they have worn out quickly. YMMV.