Ok, The word is to tune up the printer and reprint all the pieces.
Today I switched the nozzel from a .5mm to a new .4mm, put in brand new filament, and implemented the specs from this thread on ultimaker for engineering prints. I am using Cura 4.2.1.
I leveled the bed and printed a 20x20x20 test cube. The X & Y were both around .2mm oversize and the Z was right on. Close enough i figured.
I then printed a 20 x 50 x 10 block and things started to show the error again.
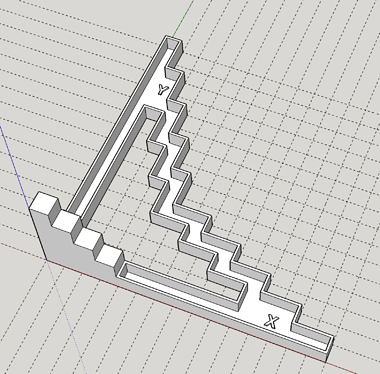
Finally I made a new calibration object, printed it out and carefully measured it in all its dimensions.
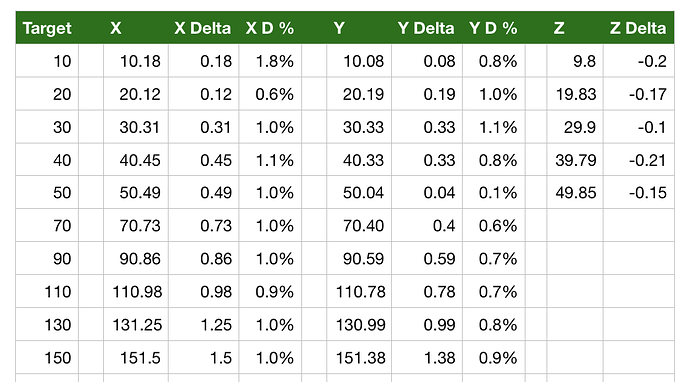
This print took around 4 hours at the settings in that thread and here are my results:
What it looks like to me is that my X and Y are both off by about 1% and my Z is consistently about .2mm undersize.
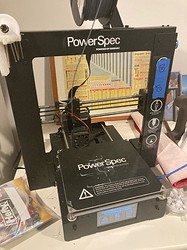
What is the best way to approach fixing this issue? I could scale the X and Y in my slicer and figure that the Z is close enough but I would rather have a better automatic fix. I am using a PowerSpec I3 Plus and have not tweaked it at all. Its still on factory firmware.
Possible a way to scale the Axis M92
M503 Return Data
Send: M503
Recv: echo:Steps per unit:
Recv: echo:  M92 X81.00 Y81.00 Z400.50 E94.30
Recv: echo:Maximum feedrates (mm/s):
Recv: echo:  M203 X450.00 Y450.00 Z5.00 E25.00
Recv: echo:Maximum Acceleration (mm/s2):
Recv: echo:  M201 X3000 Y3000 Z100 E3000
Recv: echo:Acceleration: S=acceleration, T=retract acceleration
Recv: echo:  M204 S800.00 T800.00
Recv: echo:Advanced variables: S=Min feedrate (mm/s), T=Min travel feedrate (mm/s), B=minimum segment time (ms), X=maximum XY jerk (mm/s),  Z=maximum Z jerk (mm/s),  E=maximum E jerk (mm/s)
Recv: echo:  M205 S0.00 T0.00 B20000 X10.00 Z0.40 E1.00
Recv: echo:Home offset (mm):
Recv: echo:  M206 X0.00 Y0.00 Z0.00
Recv: echo:PID settings:
Recv: echo:   M301 P33.41 I1.47 D189.27


