I am cutting a 3D model in acrylic. It consists of a rough cut with a 1/4 inch SPE tool https://www.amazon.co.uk/dp/B07NVL6KWT and a finishing cut with 0.5 radius carving tool https://www.amazon.co.uk/dp/B01LZNM13N.
I have done several practice cuts using different tools and speeds on a portion of the 3D model and have had really great results. The above tools have given a really smooth and accurate finish.
I am now trying to cut the finished article. It is 355mm x 249.25mm x 20mm. The cut is across the whole surface and the acrylic is secured with threaded inserts screwed to a sheet of MDF.
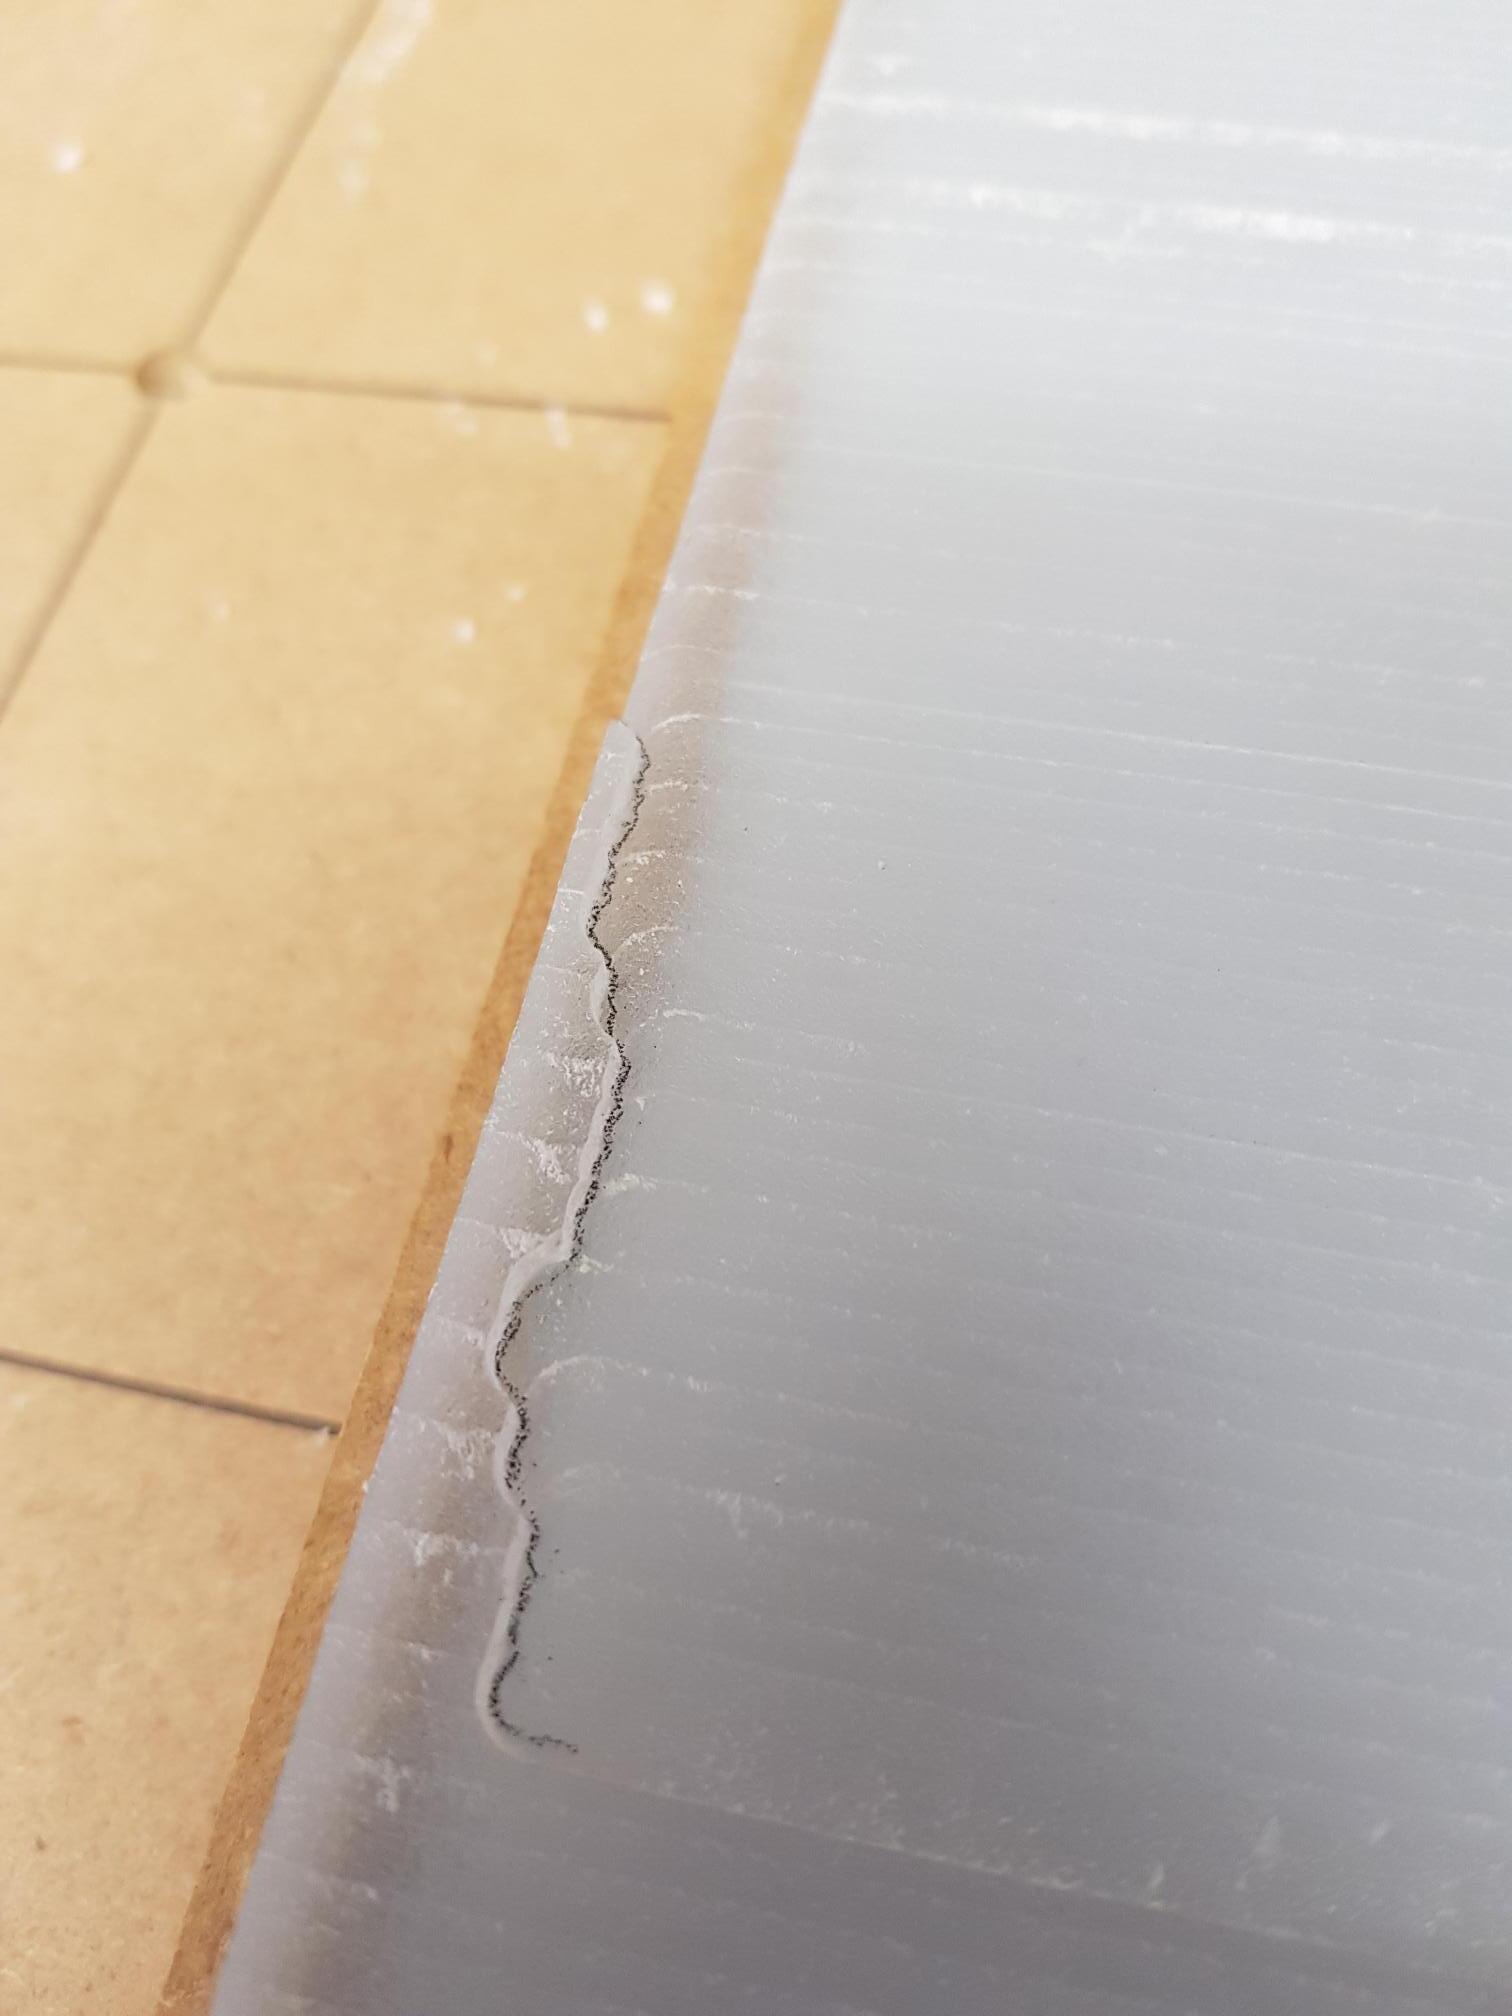
I ran the rough cut, but after 2 hours, on the second pass, the x axis has suddenly moved. As you can see in the following photo, it has gradually moved to over 10mm. It shows X0 as being over 10mm too far over.
The rough cut is being cut at 16000 rpm, Pass depth 0.1 inches, stepover 40%, feed rate 30 inches/min and plunge rate 10 inches/min. The Roughing Strategy is 3D Raster.
Has anyone any ideas while it would suddenly do that after two hours of running perfectly. It still has many hours to run, but I don’t want to start it again until I find out why it is going out of line.
The material has not moved and the tool was brand new before I started.
The tmc2209s can reduce their current when they get too hot. You can see the current setting if you have a connected computer. You can send M122 and see the current current value. It doesn’t work very long after the fact. There are also some prints to the console while it is reducing the current. I don’t know any way to tell that from the lcd screen.
It stinks, because this hypothesis can’t be confirmed unless it happens again. The best way to catch it is probably to run octoprint with serial logging and see the print statements. A fan blowing on the drivers is the best way to solve it.
Finding a loose grub screw would be nice.
It wouldn’t hurt to also manually move the machine in that area and make sure nothing is sticking.
Do you think having a domestic fan pointing at the controller would do any good?
I can cut some of the gcode and carry on just before the problem started. If it is a overheating problem, the finishing cut takes about 4 days, so that could be a disaster.
You can’t run the machine without anyone watching it. The 600W router will turn into a lighter if the bit digs in. You have a few dozen seconds to stop it before it will turn into a flame ball.
Things like it overheating are exactly the kinds of things that get it off track and then the bit can just dive in. Consider this your wake up call. Mine happened while I was installing a smoke alarm in the room. I had the smoke alarm in my hand, fully functional. I smelled the smoke and saw the collet was trying to start a fire. The smoke alarm didn’t go off.
You can split up the work, or look for optimizations to make it faster. But you need to be present and paying attention whenever the machine is running.
Thanks for that, I do appreciate your help.
If I split the job into parts so that it will not run unattended, is there any way to keep the x,y and z zeros after the cnc has been turned on again? As this piece of work has to be exact, I am worried that when I have to zero the machine it will not be in exactly the same place that it was first zeroed.
Also did you think the use of a domestic fan pointing at the control box would help?
Probably not? The thing that matters is the temperature of the air in the case. If it gets enough airflow to replace that air with ambient, then it should work. But if it is just making the air around the case doen to ambient, it probably won’t help.
Do you have any reason to think your drivers would be warmer than most? It should be ok without a fan. It would be nice to have some real data about what is happening with your machine.
Dual endstops should do this for you. After you home, you jog to where you want to set the 0,0,0 and write down the xyz offsets. Then after lunch you would home again, jog to the same spot, and zero the coordinates at the same place.
Trying to do 4 days of milling with high precision is really asking a lot.
Sorry to be a nuisance but I have my Y Home set to 1 in the Marlin firmware, and my endstops are at Y max. They are not working. In fact only Y2 is showing, Y1 is not listed when I run a M119 command, although both are plugged into the board. Should I change the firmware to -1, and place the endstops at Y min? Would the fact that I was trying to home to y Max be the reason they do not work?
It is so long since I updated the firmware, I can’t remember, can you update the firmware from a memory card or do I need to connect my pc to the board?
The skr gets flashed by compiling the firmware to make a firmware.bin and then you put that on the microsd card and restart the skr.
Homing to max is weird when you have dual endstops. The Y1 endstop switches to ymax. But my guess is that ymax is already explicitly set to the y2 endstop in the configuration_adv.h. i am honestly surprised it built. But the fix is probably to set the y2 endstop to another endstop. You could try ymin, but that didn’t used to work. That is why the LR z2 endstop is set to xmax.
I am trying to home to Ymin now. I have altered the configuration.h and configuration_adv.h files but am getting an error showing on both files #include errors detected - please update your include path, which seems to relate to #pragma once.
Have you any ideas?
Are these errors in the terminal after you try to build? Or in the editor (the red underlines)? If it is just in the editor, it is because vscode is trying to understand the code, but platformio is going to be the one building it, and has the final say on what errors matter.
An include error in the editor is 100% a problem with the way the editor understands the code, and not a problem when you actually build.
My Y1 endstop is not listed with a M119 command. Would this be a problem in the firmware? i.e. if the firmware was correct but the wiring was wrong, the Y1 endstop would show in the M119 command but not work. If it doesn’t appear at all, I guess that must be a problem in the firmware. Is that correct?