You need to be careful going down this rabbit hole. If you want to cut big things…say more than 2"…, then consider other solutions for the MPCNC like a drop table. As for the swappable spoil boards, I had some struggles like figuring out how to create identical mountings for both boards that kept the boards flat, and having to surface two spoil boards, and more. What I would suggest starting out is to build a minimal machine but to add 1" to 1 1/2" to the tubes for the Z axis and to the lead screw. The amount tubing in the legs is minimal, and the change to taller legs is quick. And there are a lot of things you will learn using your machine that might impact your final solution for the kinds of things you cut.
The projects I have in mind for this machine are based on 2 inch thick material being used and cut. I just wanted to go up to three for the sake of being able to if needed… not knowing how much of a difference that actually made. If I can do 2 inches of drilling/routing + a half inch for flip sided milling, I still don’t know what length I need to cut my pieces for the machine. How long of a lead screw does that equate to? How long do the z-rails need to be? Until I actually get this thing assembled I don’t think I can visualize how the work area translates to the lengths of all the pieces. I just don’t want to do it twice lol
I don’t see it mentioned in this thread, so I’ll link to the the MPCNC Size Calculator in the Docs section (please forgive me if you’ve already seen it). It should be able to help you visualize the setup and get to answers for Z rail and leadscrew length.
The “workspace” in the calculator assumes the Z tubes just barely clear the top of the workpiece. Assuming the bottom of your spindle/collet is aligned with the end of the Z tube, you’ll still need to decide on bit “stickout” relative to material thickness and add that to your desired Z height.
No, not at all. The most common is 3/4" or lower. What are you cutting that is 2" thick and what bits are you going to use?
I feel like I have seen a few examples of people engraving on material more than 1" thick, but I can’t recall a single example of someone cutting through anything thicker than 3/4"
Makes me curious what your project plans are… are you willing to share with us what your cutting 2" material for?
I too am interested in what pab-IO will be making with material that is that thick. I built my machine to allow for cutting props in 2" foam panels. I don’t do it frequently, but it is nice to be able to do. This Dawnguard War Axe from Skyrim is cut from 2" foam. The cutting is done, but it is waiting on my daughter to be home from college to do the texturing to turn panted foam into metal and wood.
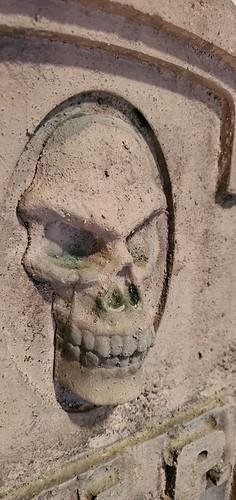
And I carved the face of a skull for a Halloween tombstone decoration:
I also like to use the machine on scrap dimensional lumber which is 1 1/2" thick as well.
And while I have no near-term plans, I have discussed doing a guitar body for a friend someday. I believe the stock needs to be around 1 3/4" thick for an electric guitar body.
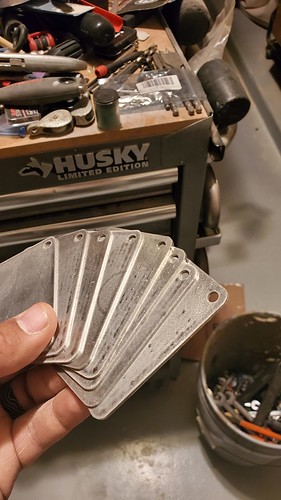
Gonna jump in here because I have a 24x48 primo and I cut these out for powder coating…
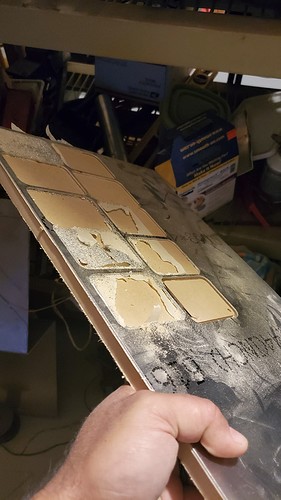
Keep the aluminum work near a corner if possible, at least near a rail if not, and attach it to a stack of boards.
This is the piece I cut out on, and that was on another piece of mdf, which was on my spoilboard, which is on top of the base, which is on top of the desk, lol.
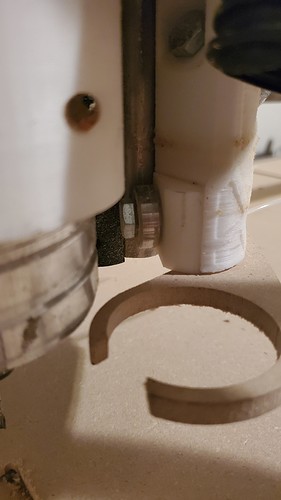
The idea is to keep the z tubes in the core, close to the bearings while cutting, right around here…
Not so low it lets the router get leverage on the z, not so high it pops out of the bearings on retracting to the safe plane. This also forces/allows you to choke up on the endmill…the more it sticks out, the more it flexes, too. Maybe not as important for 1/4, but I think it helps somewhat for 1/8.
If you want to cut aluminum in the middle at the bottom of travel, it’s gonna be tough, but do those two things and you get a LOT of your rigidity back. When I was cutting those, I noticed more flex coming from my 611 mount than anywhere else.
Wouldn’t you guys like to know, huh? 
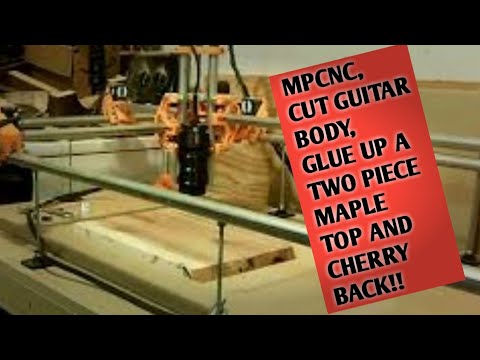
I was planning on being able to rout/mill out custom guitar bodies with this machine. I’m not sure whether this is possible now though… 
I have no idea what bits I would have to use. That’s what you guys are for 
I saw a guy on the Facebook group cutting guitars. You can do it.
Would it be possible to cut it out of 2 or 3 pieces of thinner wood and glue them together?
Possible? Yeah. That’s not how they’re made though. The closest thing people do to that is have a veneer of a different, highly figured or decorative wood, glued on top of the main body. But that’s very thin. I was looking at doing something in one piece. Does it struggle doing a ton of passes to get through the material or something? I don’t need it to cut through 3 inches all at once or anything. I know you all know that, but maybe I’m just not getting the drawbacks of the machine until I build it. I just don’t know if I want to build it if I’m not certain it will work for this application.
No I don’t think it’s an issue with the machine as much as an issue finding bits, can’t say I have seen bits that are 3 inches long that fit in the 660 or 611 but I have also never looked ![]()
I would love to know what you find for that, could open up all new ideas for me.
Well I don’t think I’ll need one that’s that long. In the videos linked above, he flips them and mills both sides. Those bits do look long though…
That helps a ton. I just looked through them briefly… I’ll have to watch more in depth later. Wondering what the specs are for the machine as I would like to build it the same way (z-height at least). Thank you for this
I did a quick bit of reverse engineering from a screen shot from the first video. This machine is incredibly tall. I estimate there is 200mm of working distance in this machine compared to 81mm for the minimal machine. I’m not sure of his performance with all that height…how much deflection he has to deal with nor how much he has to slow down.
I look at the problem from the other side and asked what is the minimum Z height that I could use to cut a guitar body. So with 1 3/4" stock, 5mm of clearance, boring through the stock 10mm for the pegs for double sided milling, I get 105mm of working space…just over 4".
I’m hoping to do guitars/bass as well as aluminum so I’m going with the minimum leg height and a drop table (~24”x24” working area). Unfortunately I’m about 75% done building my table so I can’t tell you how it works yet.
Another thing to note is that both of those videos had older gen machines. The Primo design should be stiffer from what I’ve read in the forum so that will help.
I did a 24"x24" build for my first machine(the original MPCNC). I had a large z height because I used it for a 3d printer too, and I had no issues. I used EMT for that build. I had to cut slow, but it worked great. I would think the newer builds would be much stiffer and better. I’m planning on doing a larger Primo build now with either stainless or DOM. Whatever I can source.
Thank you everyone!

