Repurpose LR2

2 years ago I built a LR2 and it has served me really well, but I have some issues with reliability and general ease of use + I’d like to be able to mill aluminium moulds in the future.
My build is 1.5m x 1.2m usable space.

When I first built the machine I wanted to mill some pieces for furniture, but I just never got it to work on such a large area and I think I would prefer to go smaller (desktop?) if that means it’s more rigid and perhaps faster to finish a job.
Another issue I’m having is that the plate is very large and limits the amount of Z-travel that I have, so I need to split up deeper objects like glass blowing moulds. Improvements on that front are very welcome too.

Does anyone have any recommendations on what to change about the machine (it’s pretty much ‘stock’ LR2 right now) or repurposing the parts for a MPCNC build? Would I have better luck converting it to a LR3? Non v1-machine suggestions are also welcome!

Thank you in advance for any advice!

1 Like

I find the LR3 is more flexible, but if a lot of pocketing is required, a Primo might be a better fit.

For non V1 machines, you get a lot less in the way of re-use, most of the machines on cnczone.com use NEMA23 motors, for example, but your LR is at least good for making use of many of those plans.

The LR design is mainly aimed at cutting sheet materials. Doesn’t mean you can’t do other things. The LR3 doesnt have as much in the way under the router, and you can definitely see the cutting area better. Most of the hardware that you need to upgrade is already there, I know I bought a box of 1.5" 5/16" bolts, and a box each of M5x30 screws and locknuts, and thst was about it. The LR3 uses fewer skate bearings than the LR2 did. Oh, and I had to buy the 4 MGN12H linear rails.

2 Likes

I built a LR2 a few years ago and have since built a couple other CNC types. I’ve recently repurposed my machine for spindles. It can now do pieces a little over 5 feet long . I wasn’t happy with the usual skateboard wheels so I put DIN rails on the sides and use deep V bearings to ride on those. I had to print a thin bushing to fit the 3/8” bearing ID to my 5/16” bolts. The Nema17s are just fine for this work. I ended up changing to a Mach3 board and separate stepper drivers for this project. I run both X axis motors off one stepper driver, and the same for the Zs. Since I wanted Zero Y axis movement off centre, I hose clamped the router mount in place.

The frame is a 2 x 6 cut in half with some plywood strips at each end. I drilled two 3” x 3/16” flat bar pieces every 2 inches to bolt the headstock and tailstock to.
A rotary axis headstock and adjustable tailstock complete the setup. Sawdust doesn’t collect on the thin rails and the V bearings stay put. I set it on sawhorses.

This workpiece is about 4” diameter birch.

This is a fairly inexpensive repurposing that has worked out very well for my purposes.


6 Likes

I really like that. Do you have any pics of the finished pieces? What about videos of it working?

2 Likes

Might be hoping for too much here, but is there a good conversion guide from lr2 to primo?
I do think I was a bit ambitious/delusional when I built the LR and I know better now what I would actually use it for.
I get that I need to reprint all parts and maybe get some new tubes, but electronics wise and bearings and stuff… Anyone any idea if I’ll have to get more or if I’m going to have extras?

1 Like

There is a list of what you need when going from LR2 to LR3, not to the Primo though. Maybe this list helps anyway, though: LowRider CNC V3 - V1 Engineering Documentation
What I can definitely tell you is that you are going to need a lot of M5 screws. :smiley:

3 Likes

Not that I’m aware of.

I think the LR2 uses 44 608 skate bearings, the Primo uses 45. (2x for each wheel = 8, 6x for each Z tube = 24, 6x for each X tube = 12) So you may be one short.

The LR2 only uses 6 of the GT2 idler pulleys, the Primo uses 8.

The LR2 only uses 3 of the 16T motor pulleys, the Primo uses 4.

Most of the LR2 5/16" bolts are too long, or too short. The primo uses pretty much exclusively 1.5" (40mm) bolts, where the LR2 uses some 1.25" and many longer bolts. You will need 44 of these, you can probably pick up a box of 50 at the local hardware store. I don’t know about the nuts, you can re-use the ones you have, but I don’t know if there will be enough.

The LR2 uses a lot of #6-32 screws, the Primo doesn’t. However it is possible to substitute the #6-32 hardware for the M5 screws in many locations. The nut traps for the belt tensioners, for example are sized for the 8mm wrench M5 nuts, but #6-32 nuts are 5/16" which is pretty much the exact same size. You can therefore re-use many of your 1.5" #6-32 screws for things like the leg locks, feet, and belt tensioners.

The Primo does call for 60 sets of M5 hardware (screws and nuts), so you may still need to buy a box, but you can probably get away with a box of 50 instead of 60.

Some things you will have left over:

You will have extra of the leadscrew, coupler and drive nut. The LR2 uses 2 for the Z axis, the Primo uses only one.

The wiring may not work quite the same, and you should be prepared to re-do some of the wiring extension. If you build the machine smaller, then you might not need more wiring, you can just re-purpose what you have.

If you were not using endstops for your LR2, they are a nice-to-have on the Primo, but not strictly speaking needed.

So that’s my armchair analysis. Given that I no longer have an LR2 (I went to the LR3, and already had a Primo) it’s pretty much academic for me.

Now a quick comparison for the LR3, just because…

Let’s say that you’re scaling down, and that’s the reason why you’re looking at a Primo.

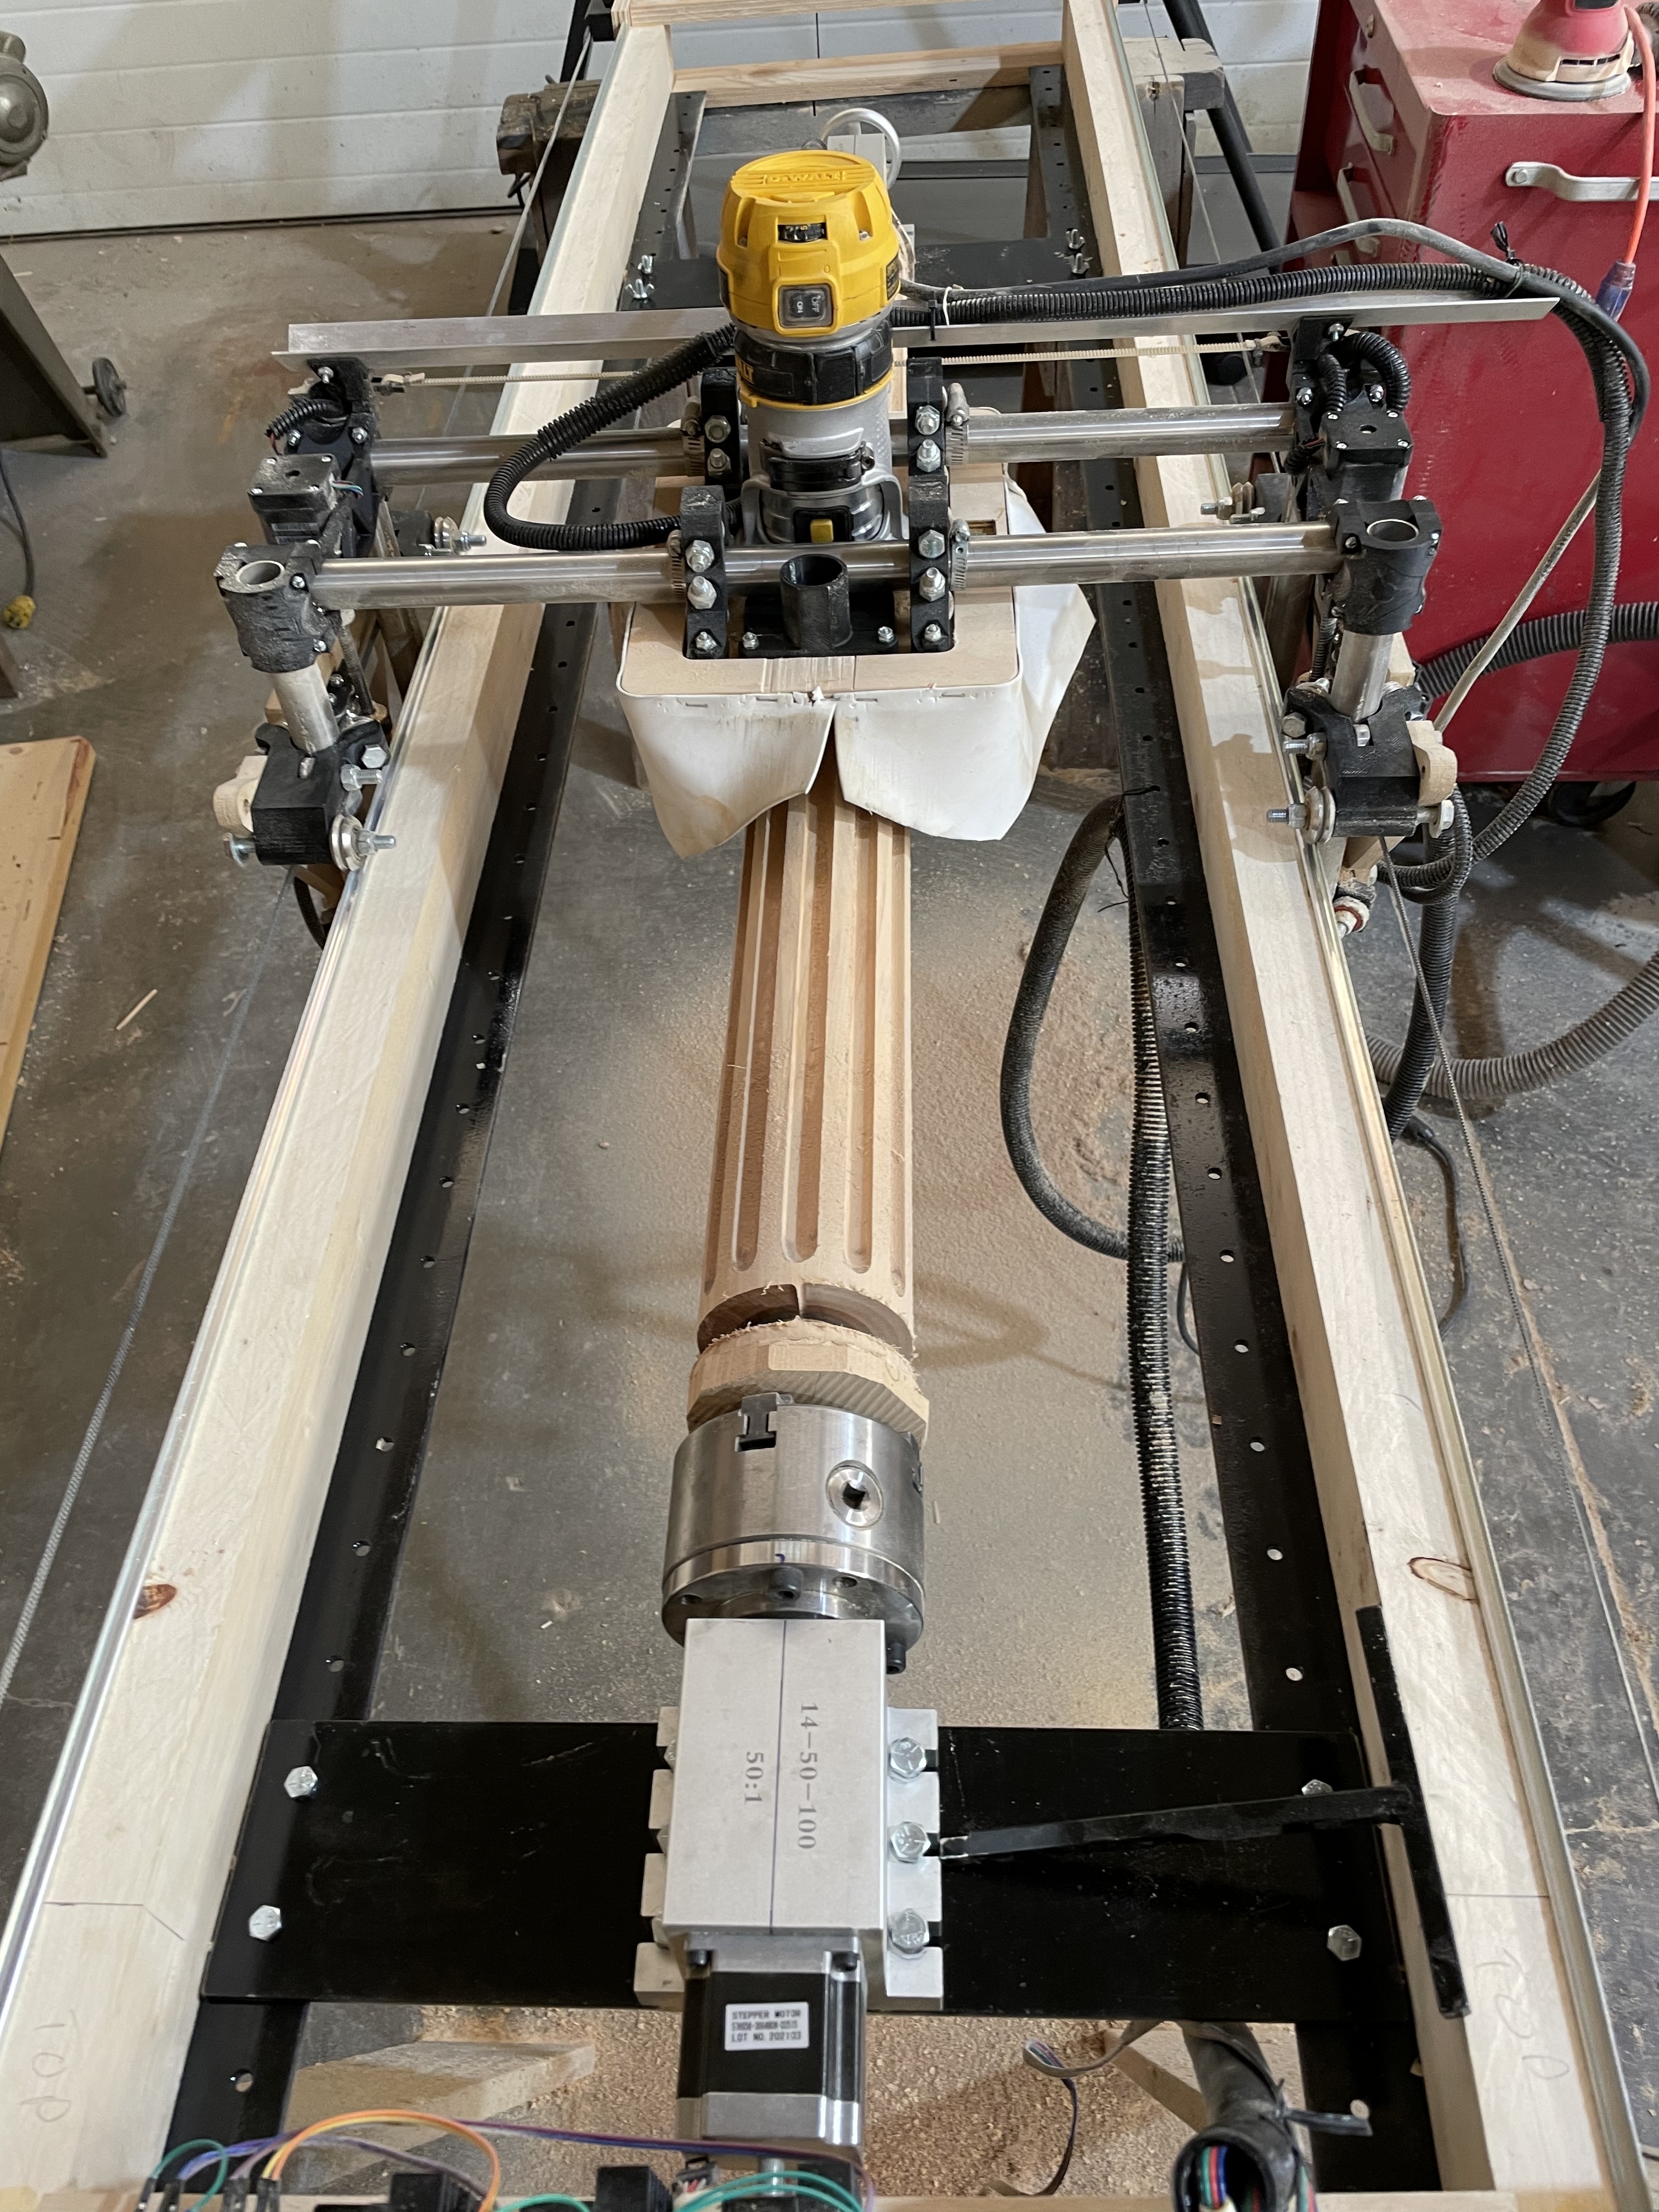
The LR3 uses roughly the same configuration, so you won’t be short on GT2 idlers or pulleys. You can also re-use much of your tube. Though my LR3 is actually wider than my LR2, I actually had to cut my X span tubes shorter.

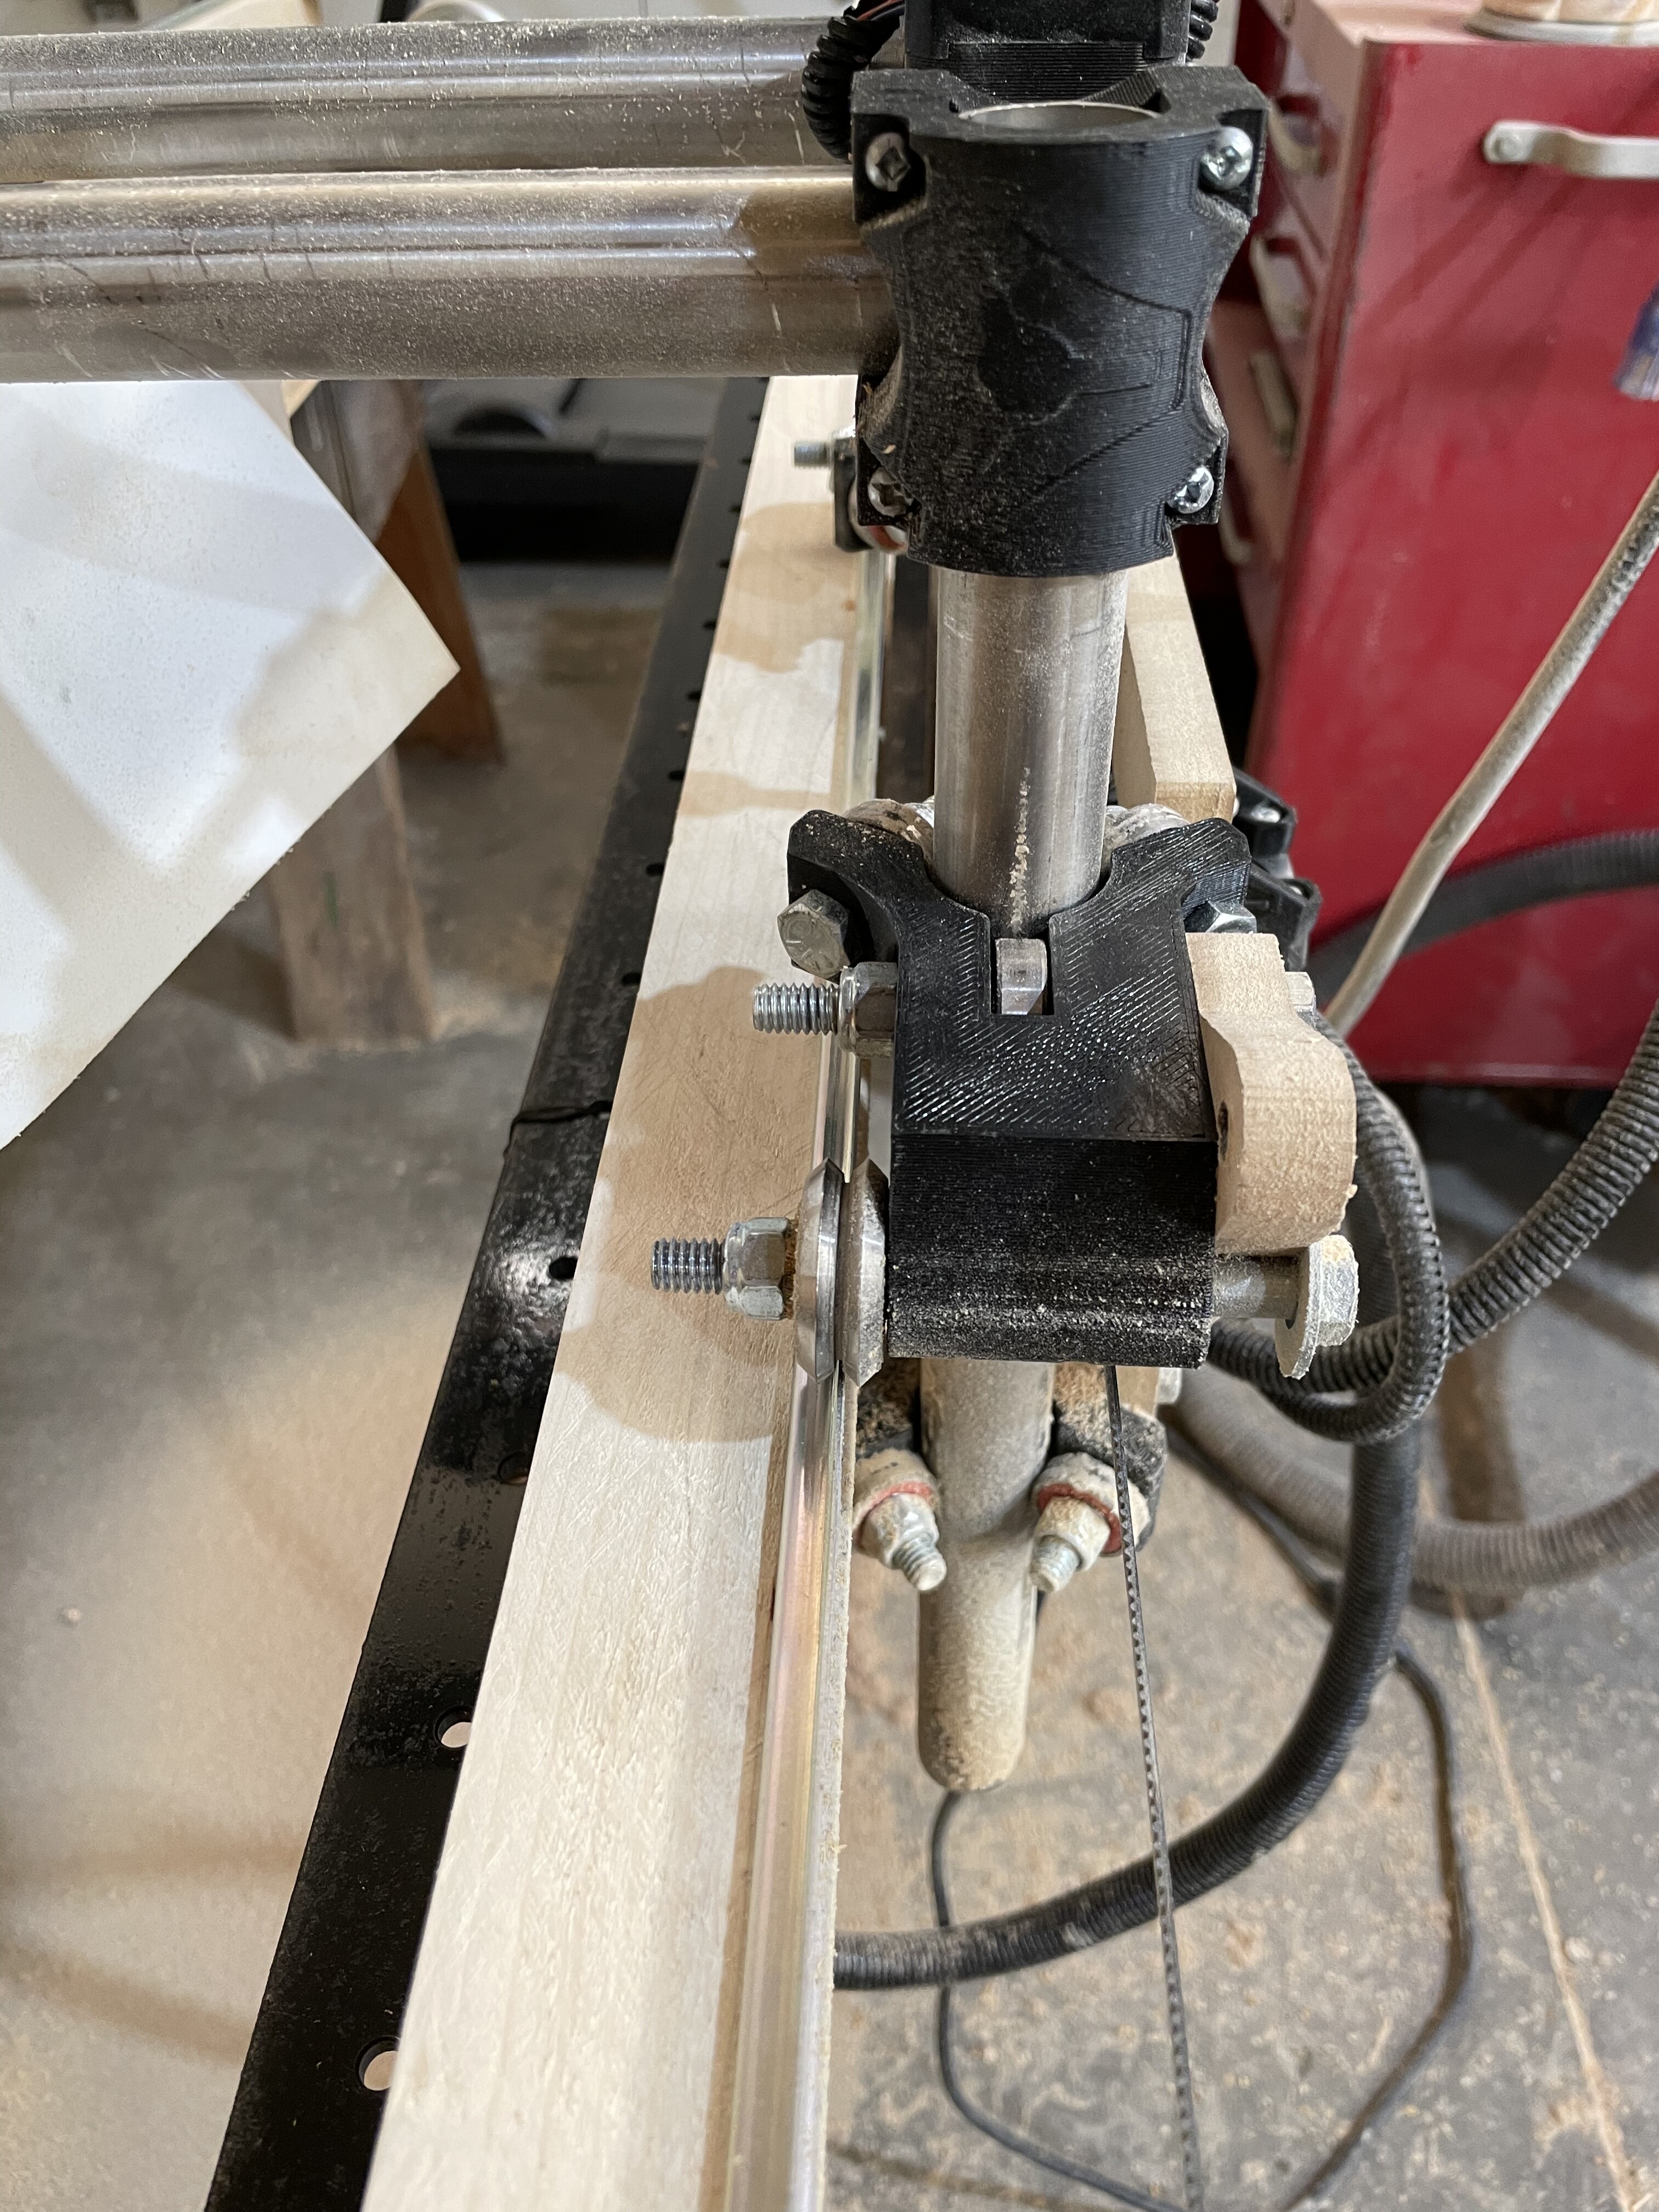
The LR3 uses significantly fewer 608 skate bearings. This is because it does use the MGN12H linear bearings for the Z axis, so you would need to buy those.

You still don’t get to re-use any printed parts, and you will need to buy a lot of M5 screws and nuts. Some of the re-use of the #6-32 hardware still applies, but now we’re talking about a box of 100 either way, so you might as well just buy it all. you will also need the 1.5" 5/16" (M8) bolts.

If your LR2 is functional, you can use it to cut the flat parts beforehand.

You still get to re-use all of the motors and control hardware.

Hardware cost wise, this is probably a bigger investment, if for no other reason than the MGN12H rails. For a smaller footprint machine though either way will be a nice upgrade.

3 Likes

Thank you so much, that’s a great overview for anyone wanting to switch!
I think I’ve decided that I want to go primo.
Still going to lurk around here on the forum a bit to see how other people built theirs, but this really calmed my nerves on the switch. Thank you!

2 Likes

@SupraGuy, Dan, you win the Internet for today, for that amazingly helpful post!

I haven’t finished making the final pieces. I cut several prototypes like the one shown for a church project. With my dust shroud in place there is little to see on a video I’m afraid.

The final paschal candle holder will look a lot like this:

I also made the tall processional cross at the back with a pair of matching processional torches (candles). All from paper Birch. There are a couple of bases and another column nearby. I did straight and spiral fluting to see how they looked as well as different height columns.

Most of the sawdust dropped to the ground after I put the shroud on. I had to adjust the router speed vs feed to get decent sized sawdust instead of just dust.
The brushes finally gave out on my router but they are readily available on Amazon. Easy to change by taking off the top of the router.

1 Like