Yeah, they can be foot-operated, unlike the magnetic ones i originally had.
1 Like
So I started with a Primo, built an LR2, upgraded that to a LR3, and now have an LR4.
The Primo is a bit more traditionally built. It is at its most rigid and stable at the TOP of its cutting volume. The Z coordinate is a little more tightly controlled and the X/Y coordinate is held by 2 motors each. Tramming the machine is more tightly defined and less prone to issues with the table. I found that carving with the Primo was less trouble than with the LR. It can certainly be done with the LR, but it’s an easier operationnon the Primo.
I had an easier time with things like circuit boards on the Primo. Things that were finicky in Z.
My Primo is somewhat oversized. I mean to rebuild it smaller, bit have not yet done it. As such I had some stability issues, particularly near the center of my long span (37" Y). Plunging there often would vibrate and make a bigger hole than intended. The LR does not have that problem, with a longer axis.
Both were good with through cuts, but I’d give the edge here to the LR. This is probably because of the too long span, but it is also true that the LR is at its MOST rigid at the lowest cutting point while the Primo is at its LEAST rigid at that point. (Also why when I was doing circuit boards they were propped up to be as close to the top of the Primo’s travel as possible with the tool clearance plane.)
Certainly for the things I wanted the larger work area for, the LR is a superior machine. Cabinetry, large sheet goods cutting. For the small, work fine carvings and the like I like the Primo.
Oh. One more difference. Work holding.
With the Primo, I have a series of insert nuts in the spoilboard. 3.5" lengths of threaded rod go into the spoilboard, and hold clamps, and a hand knob on the stud to clamp the work to the table. So long as they are kept away from the actual toolpath, the threaded rod never contacts the gantry tubes and the clamps hold the work.
With the LR, the gantry lays across the width of the table, a handful of mm above the router chuck. I tried T track for the LR3, it’s no good. Anything long enough to hold a clamp will get hit by the gantry. So work holding on the LR is more troublesome. I was using screws into the spoilboard. I found that painter’s tape and CA glue got expensive. I have been using woodworker’s tape lately. I like it better but it’s still more than the clamps on the Primo. Screws into the spoilboard are cheap, but harder on the spoilboard.
1 Like
Gotta say that I’m tempted by Home Depot’s sale for $169 on the speed bench. Seems like my 30" x 60" machine is just the right size!. I walked right by it this morning in HD and didn’t buy it! But boy is it tempting…
So many questions. How stable is it? Would it need additional legs to keep from swaying? Could I engineer a table low enough for ergonomics.
Funny how something gets the mind racing. ![]()
1 Like
Sorry, late to the party, due to grant writing season. I am overjoyed to hear your brain fog issues are decreasing.
On the portable idea, I have to finish my lr4 upgrade before I bring it on the road, but it’s a good idea!!
1 Like
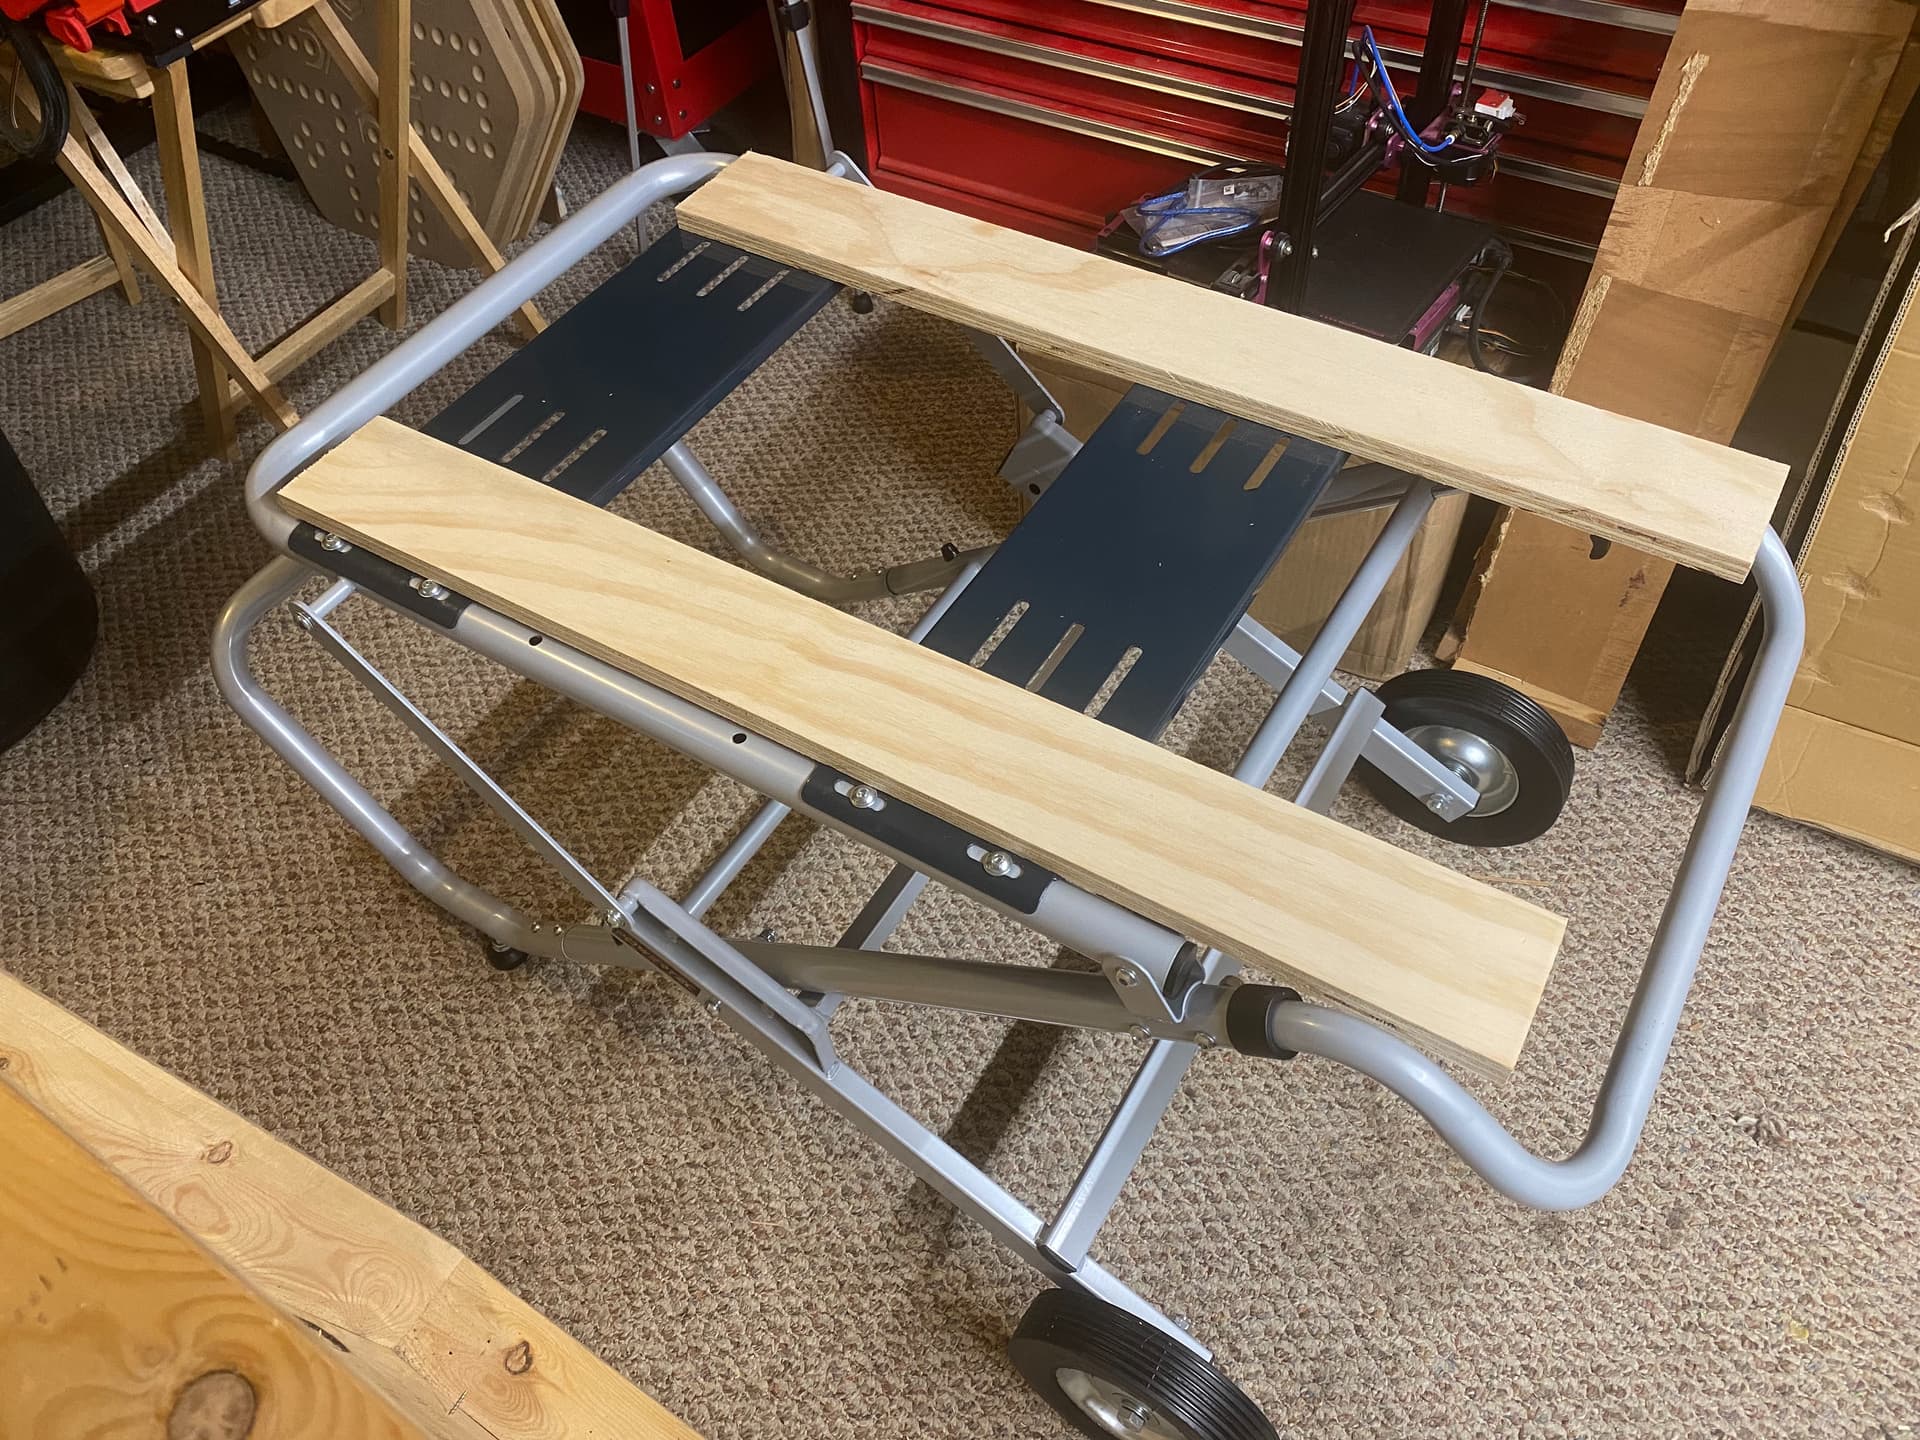
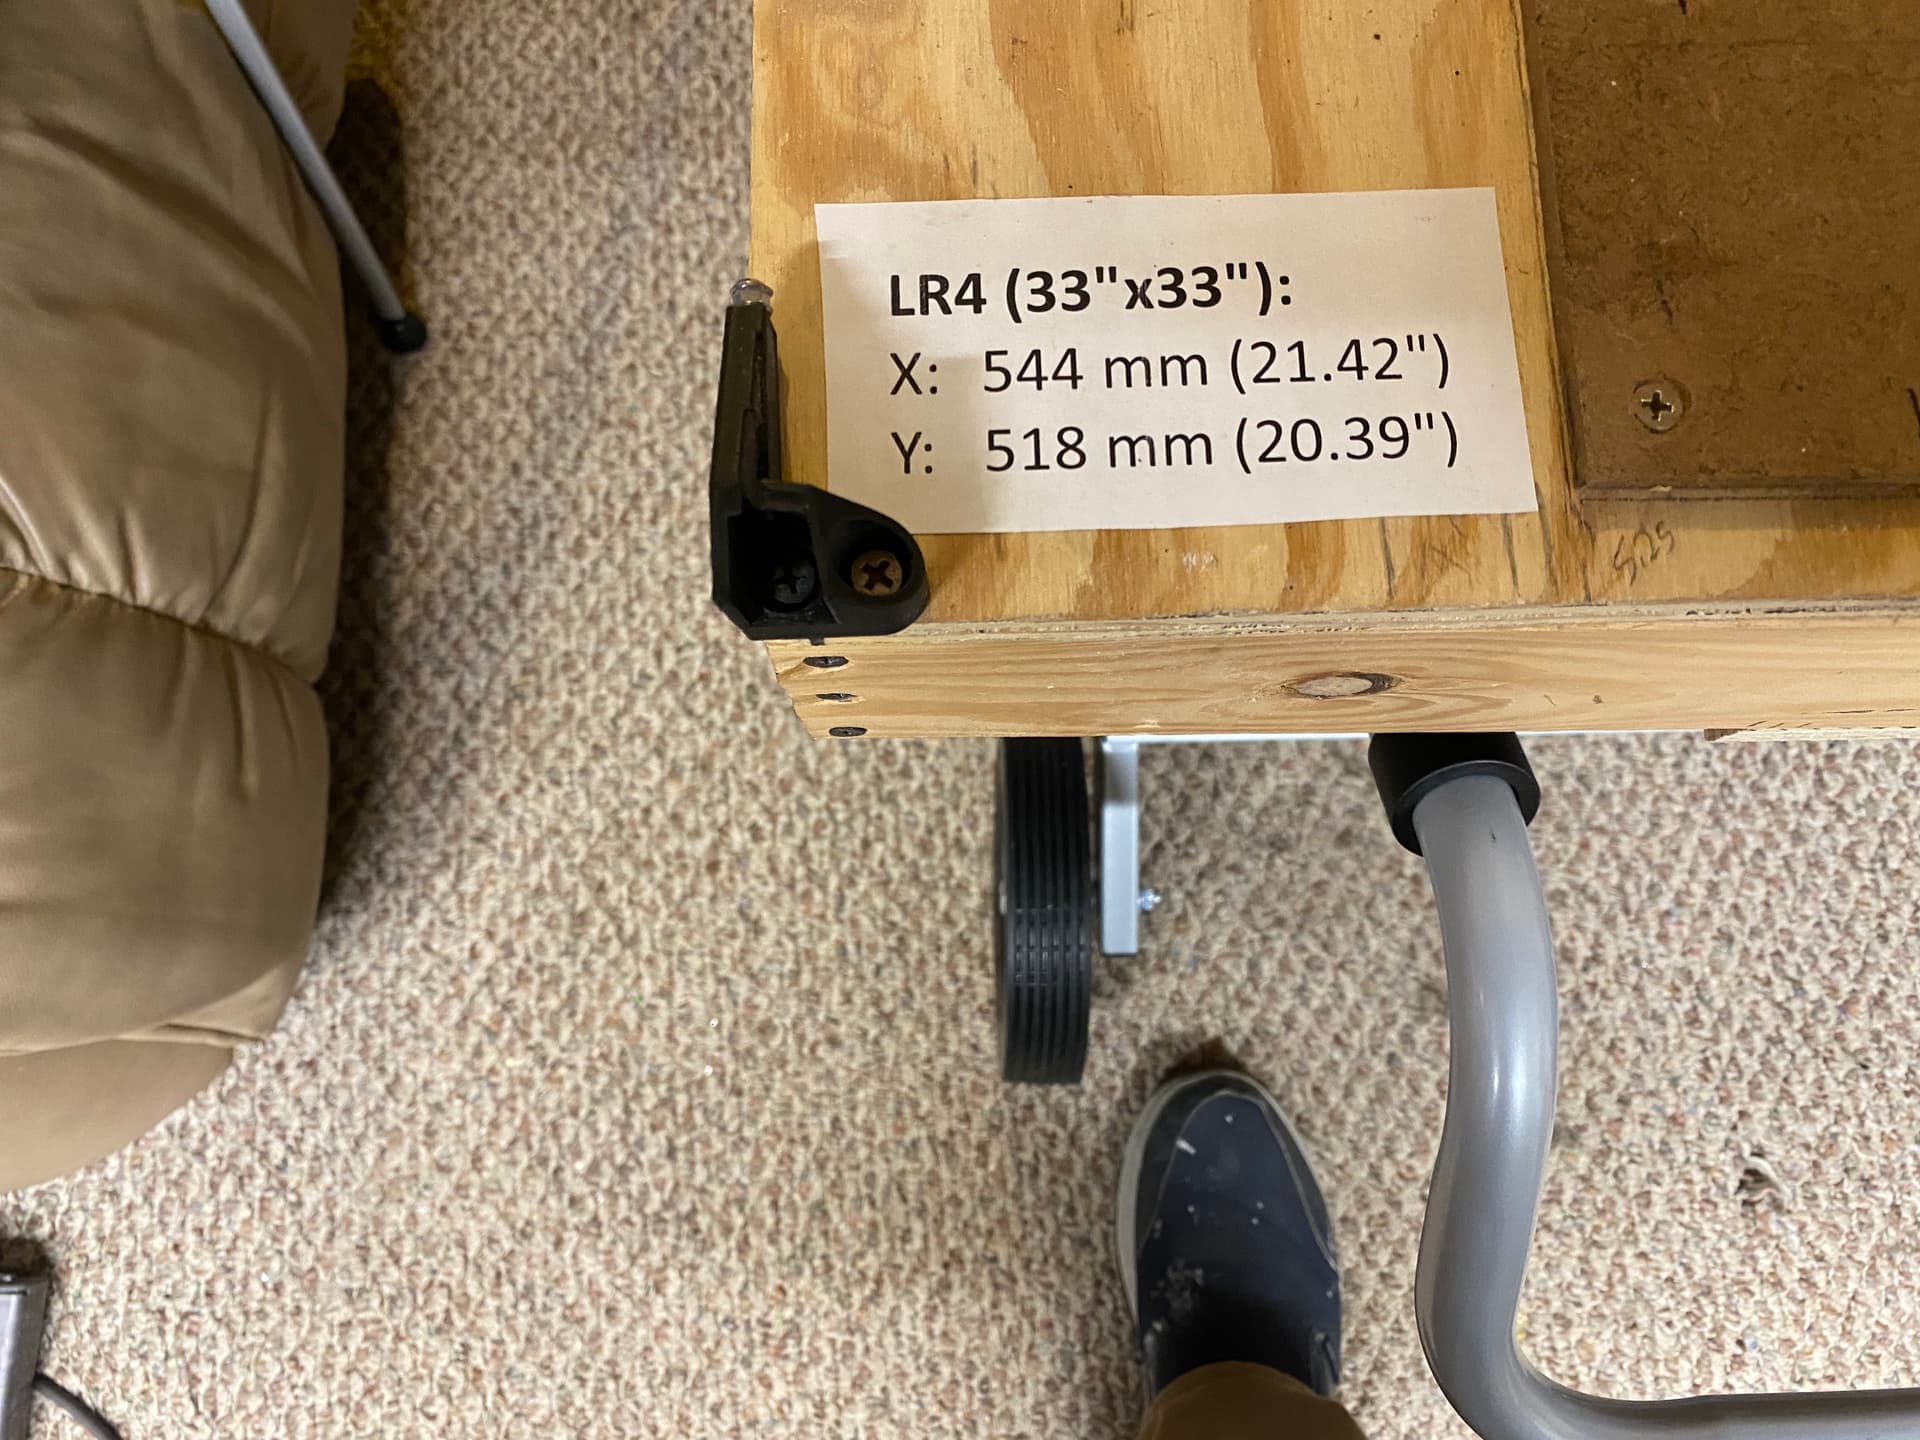
OK, so my foldable table saw stand arrived today, and I made quick work of cutting up two strips of “3/4” (18mm) plywood, about 4 inches wide and 33" long (same length as my small LR4’s table, which is 33"x33"), and it is going to work quite well.
Here the plywood strips are laying in place for sizing things up and measuring where to drill bolt holes.
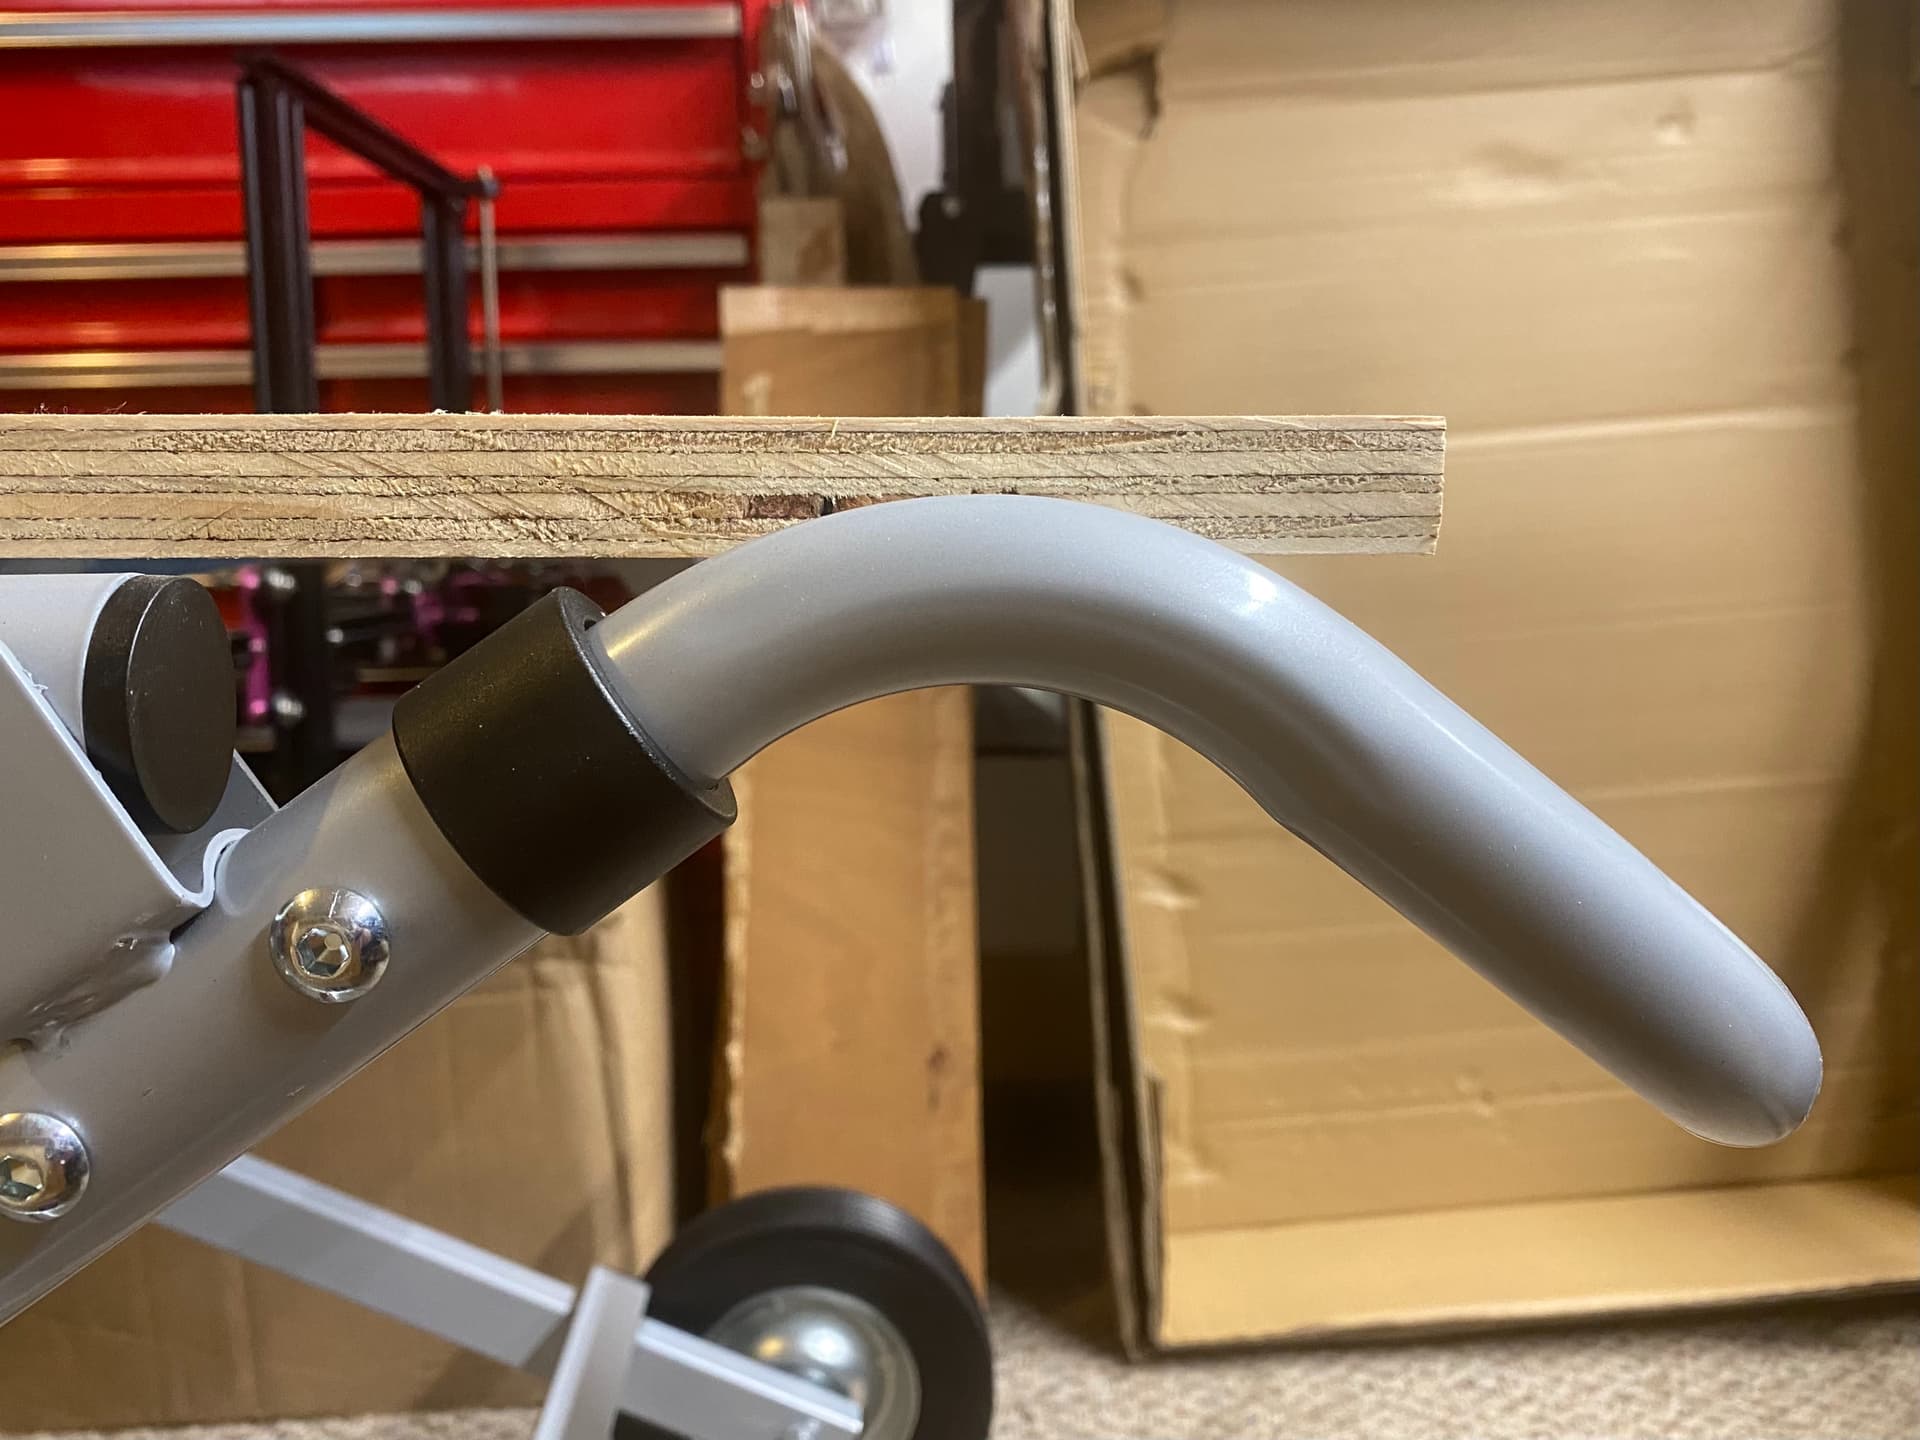
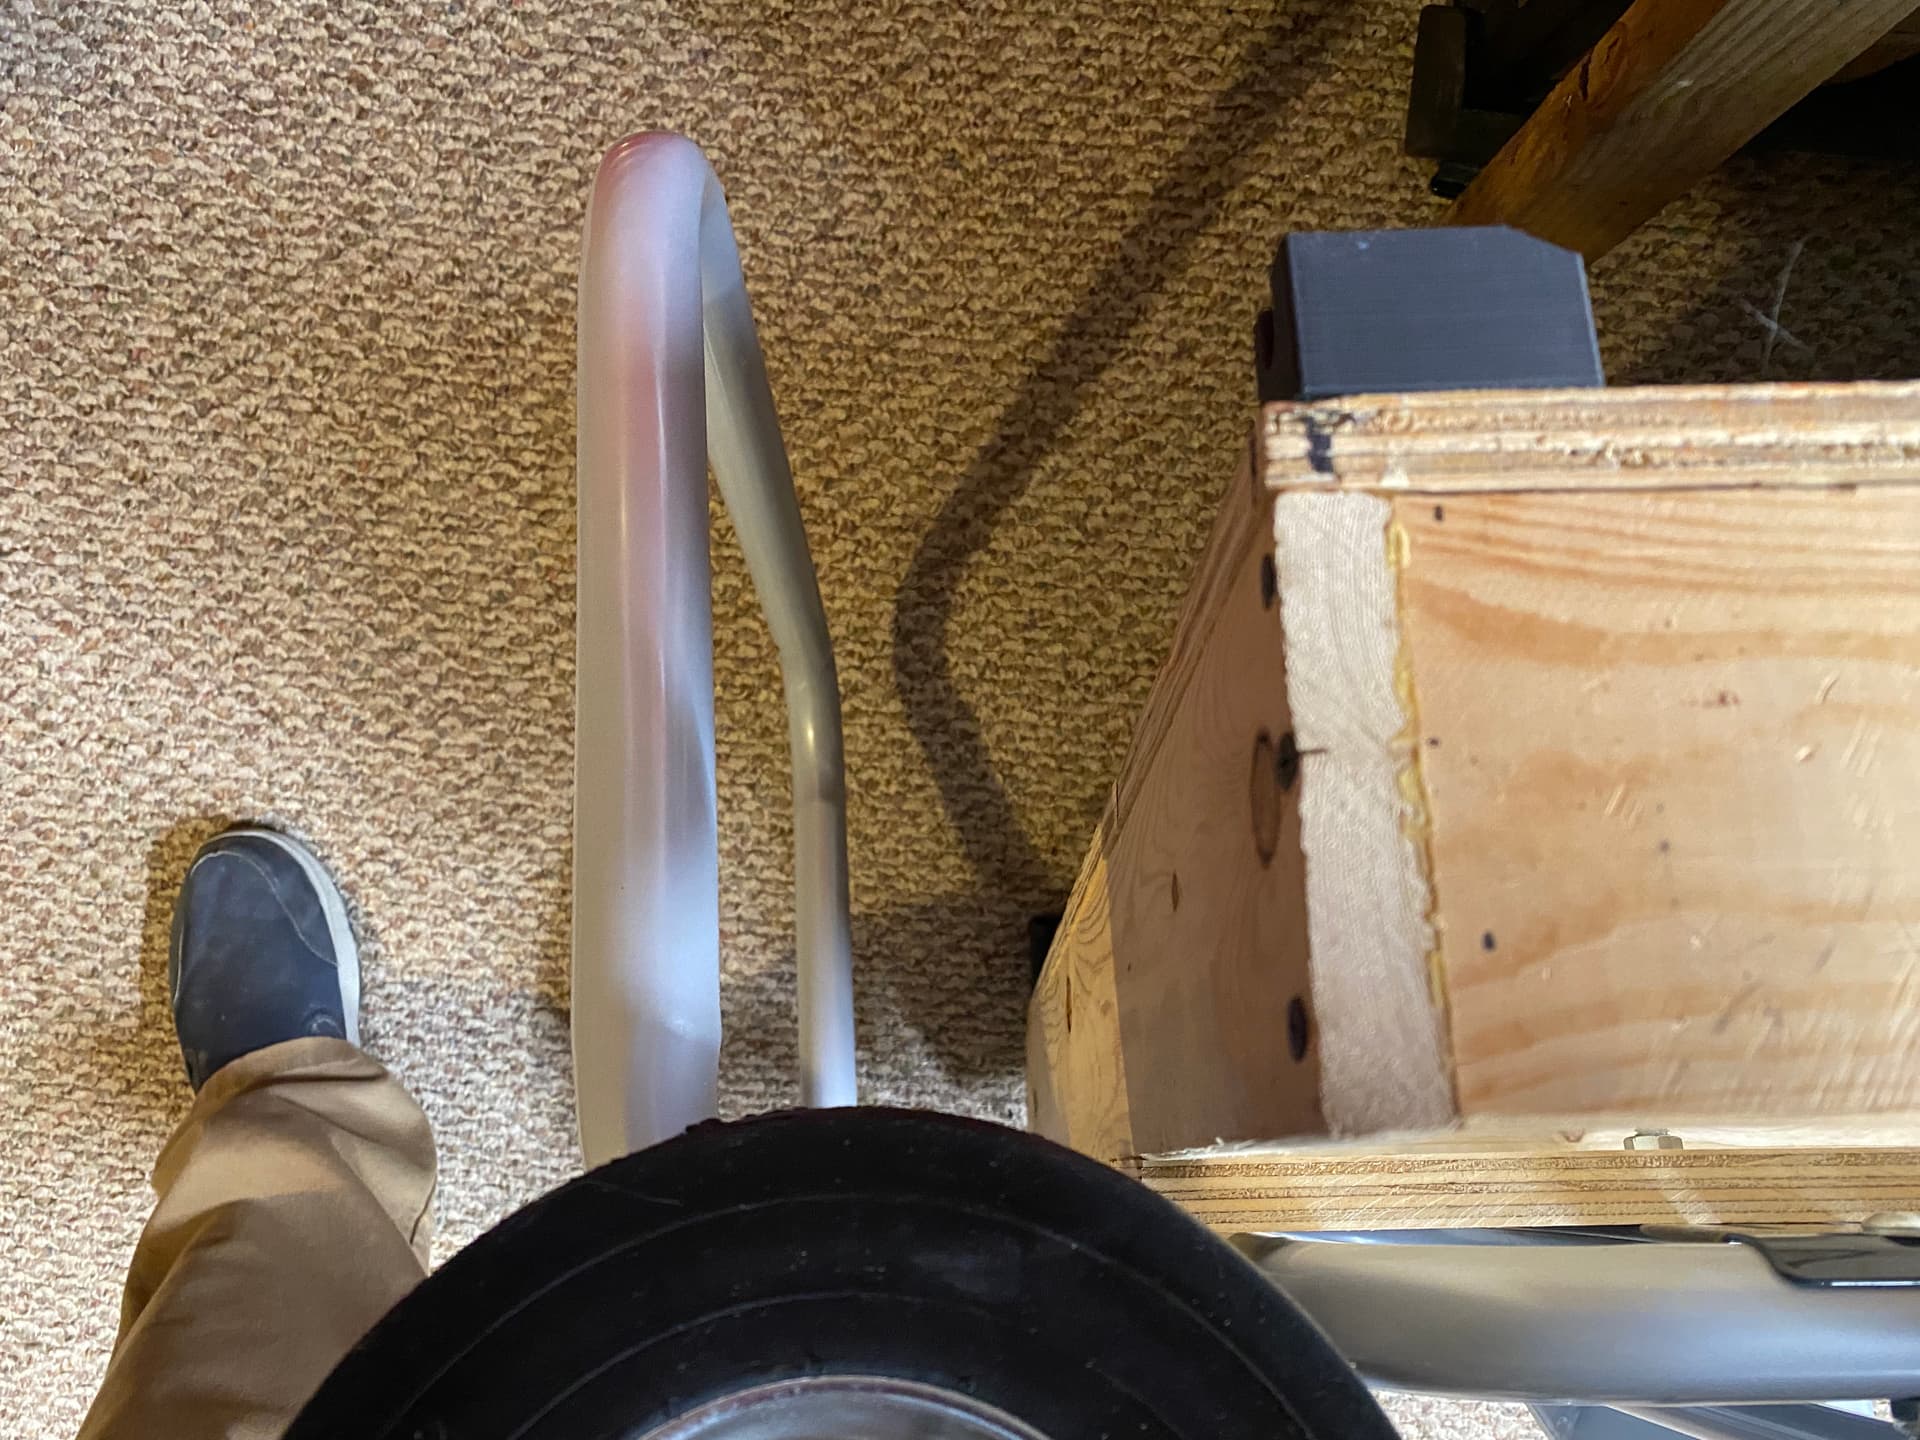
One of the questions above was about whether the handle protrudes into the plane of whatever is on top, and it does, but only by about 8mm or so, and even that did not interfere with placement of my small LR4. But just to show the intersection, here are some pics of that:
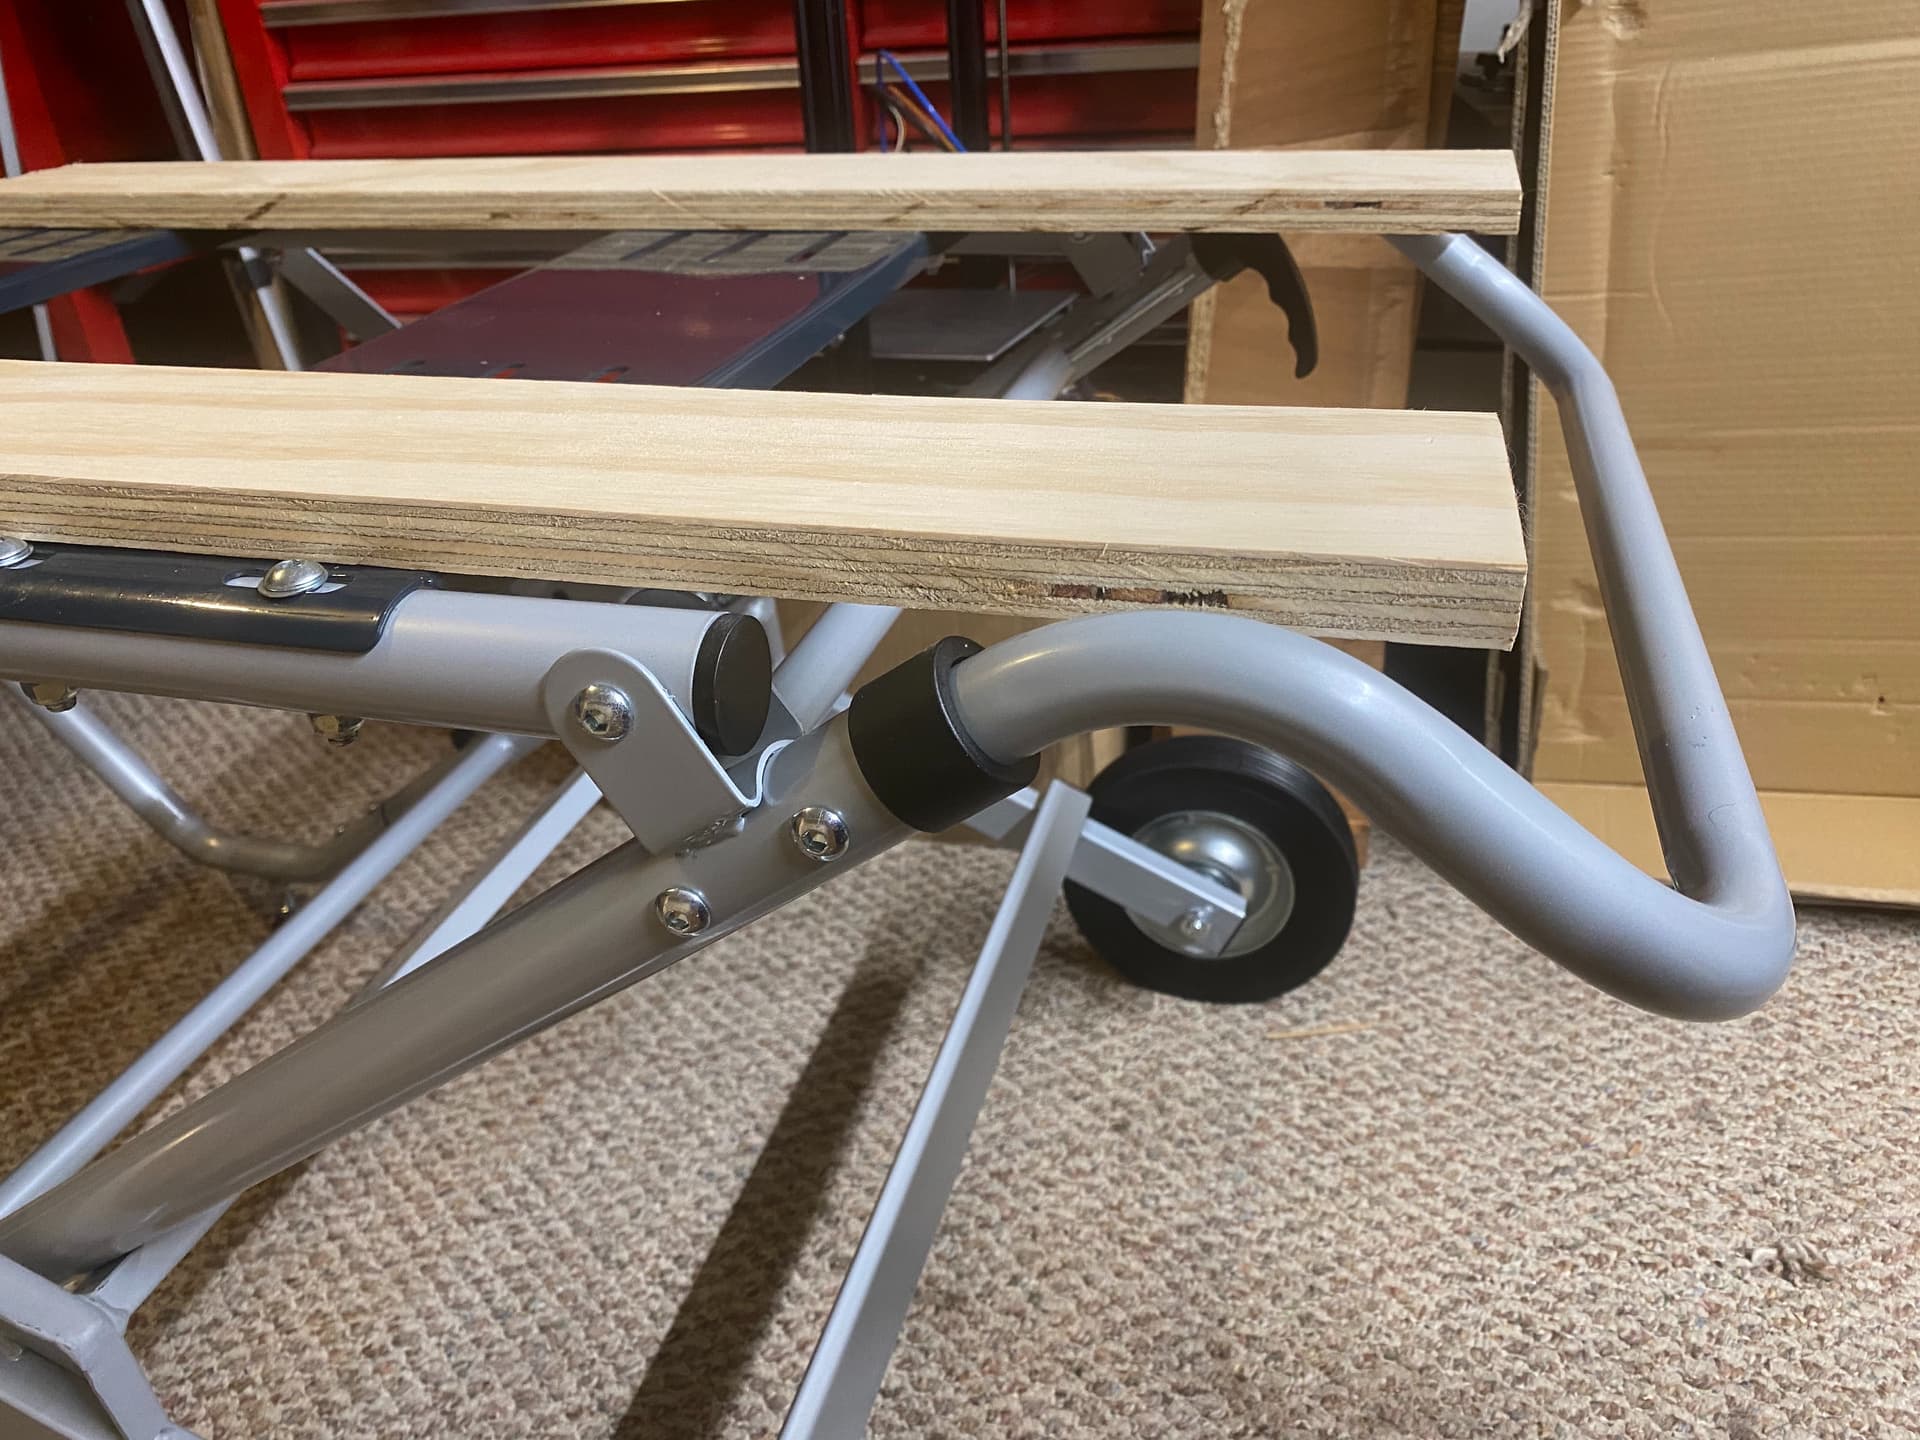
The plywood strips are about 18mm thick…
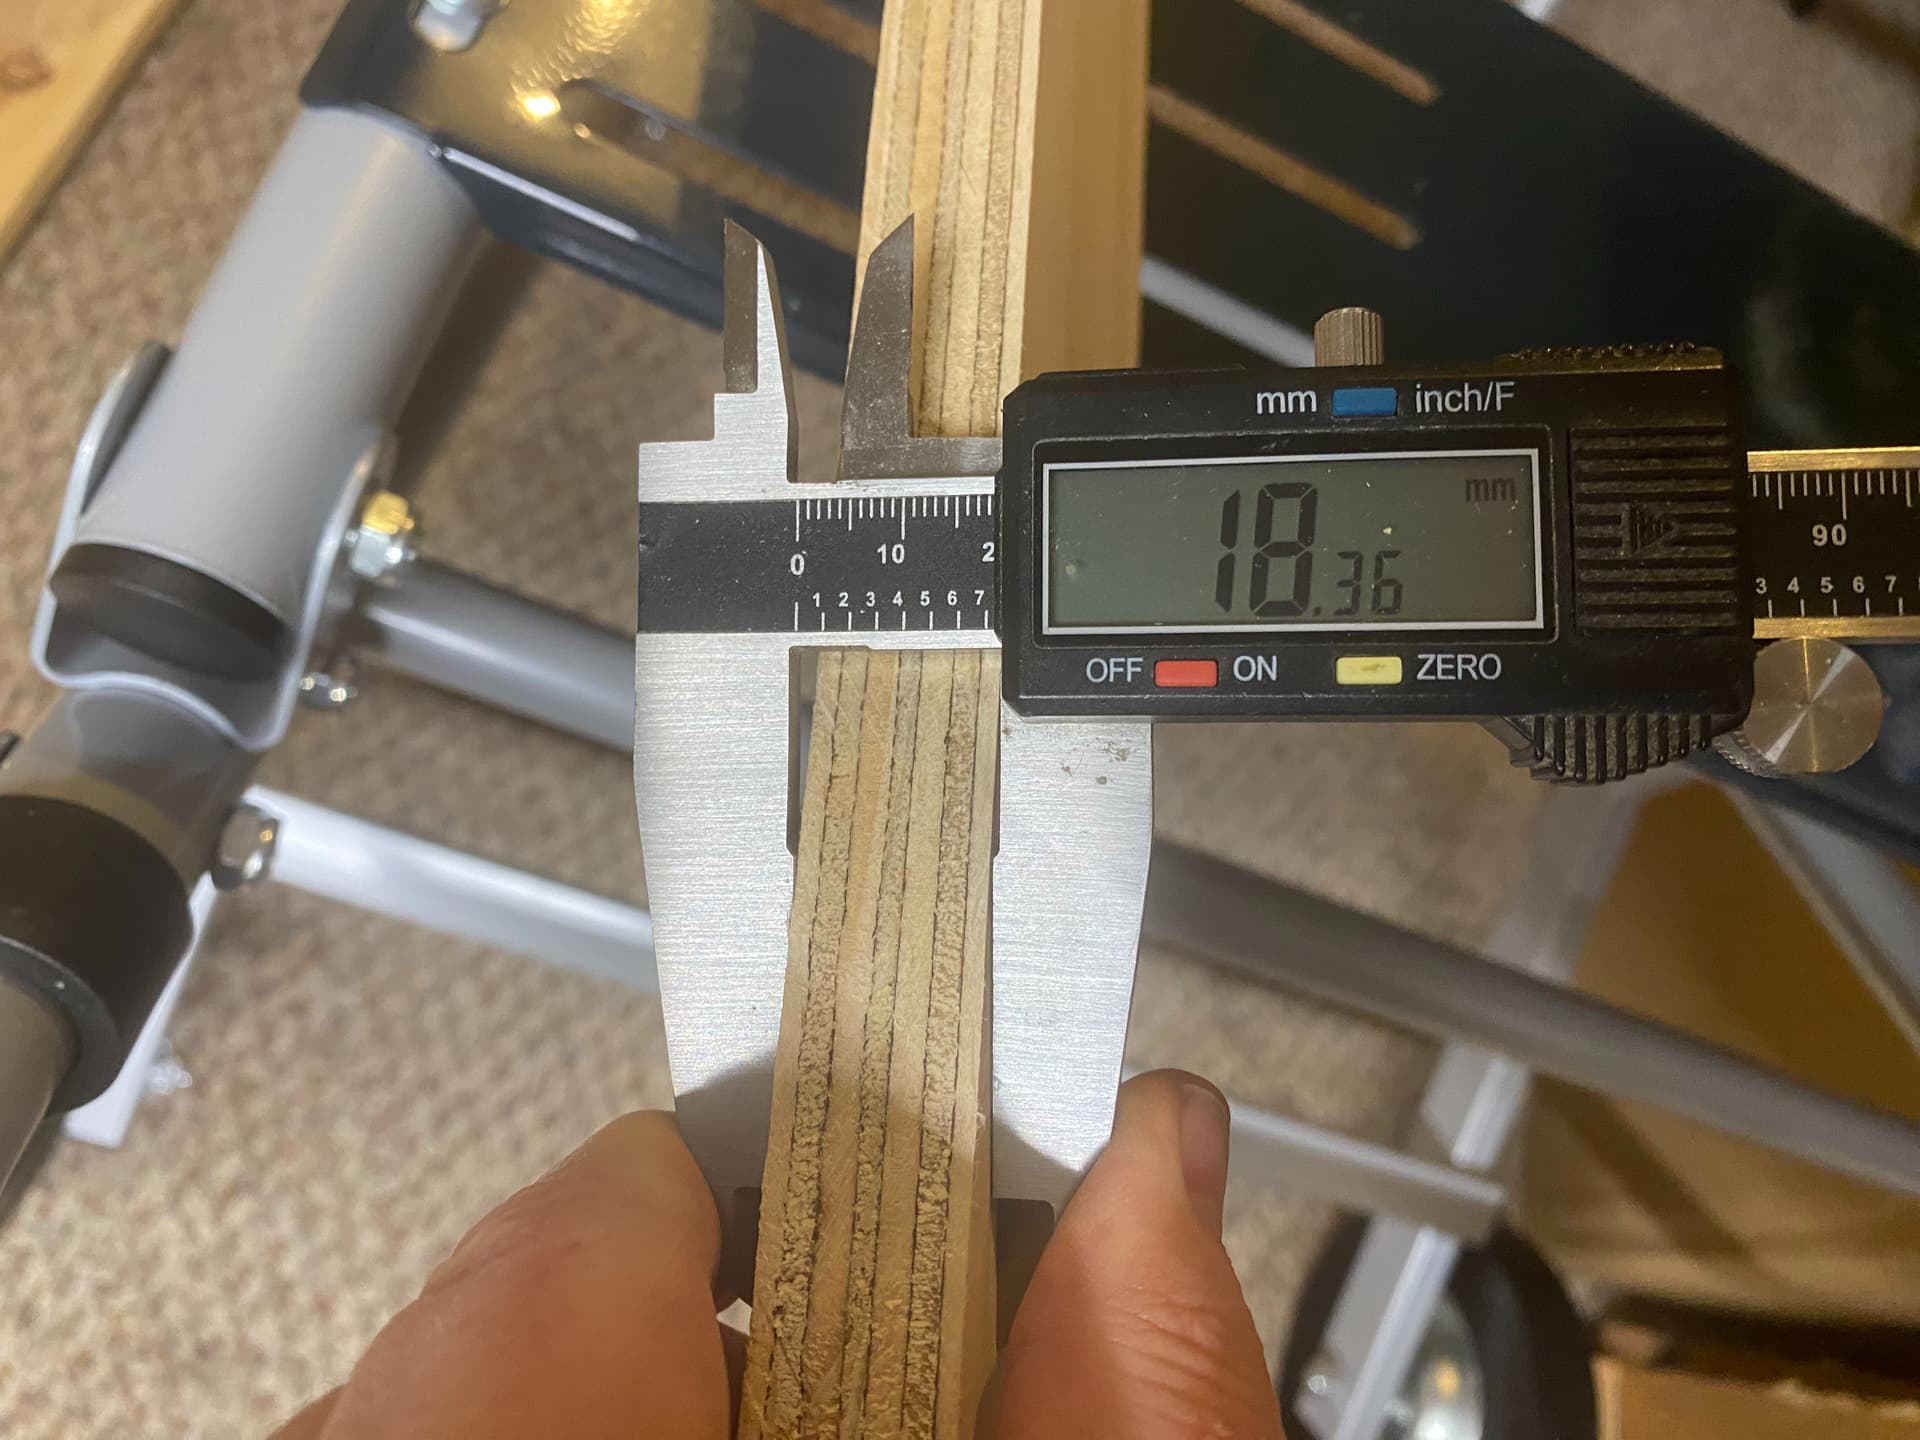
… and about 10mm worth of plywood is above the intersection point:
The two columns of bolt hole slots on the metal strips on the top of the stand, at their nearest, are about 40mm apart (nearest hole center to nearest hole center) and the outer column holes and inner column holes are staggered by about 20 mm.
I got the bolt holes measured and drilled in the plywood, got the strips bolted in place, and then, with the stand folded up and standing in place, I positioned my 33"x33" table against the plywood strips and attached it using course-thread tapered-head screws:
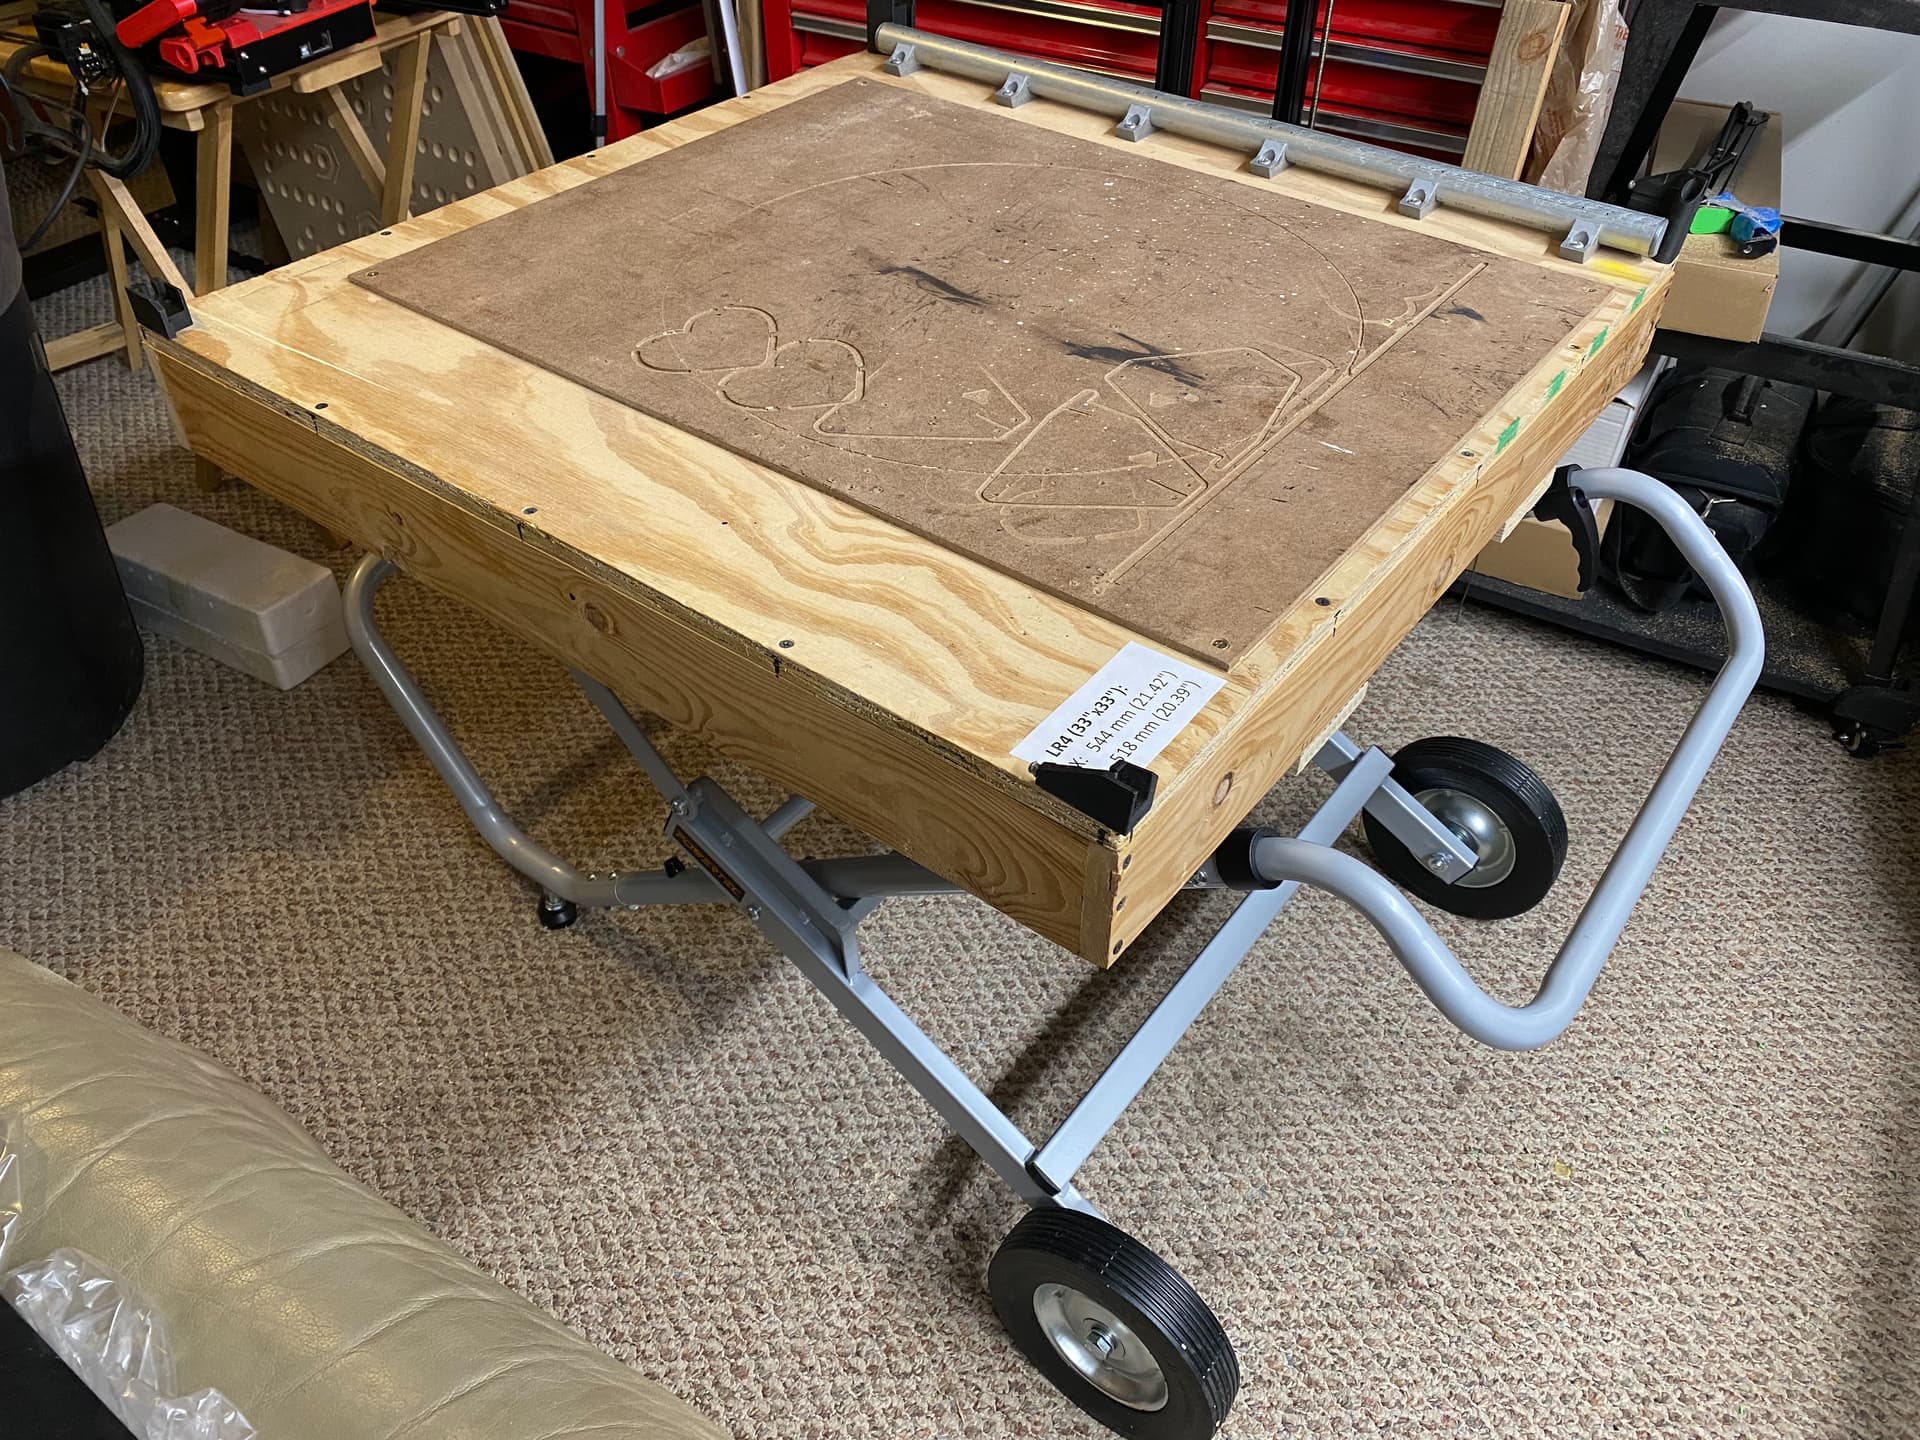
I don’t yet have the small-gantry LR4 attached to it yet, but that’s quick and easy. I’m liking this!
The Ryobi Speed Bench table would be an even better thing to use, I think, but I had already bought this and it will suit for this purpose nicely.
8 Likes
That looks wicked!
1 Like
Out of curiosity, how much longer do you think it could be without getting too unwieldy? That just looks awesome, and would stow so neatly out of the way. Do you think you’ll need to add additional stabilization? If you made the Y running areas longer (creating a bit of an “H” shape) do you think you could get additional cuttable area (thinking that it would reduce the weight a bit and allow perhaps a bit more length for the part that folds “down”.
So many questions - I look forward to hearing about your experience! A video perhaps?![]()
![]()

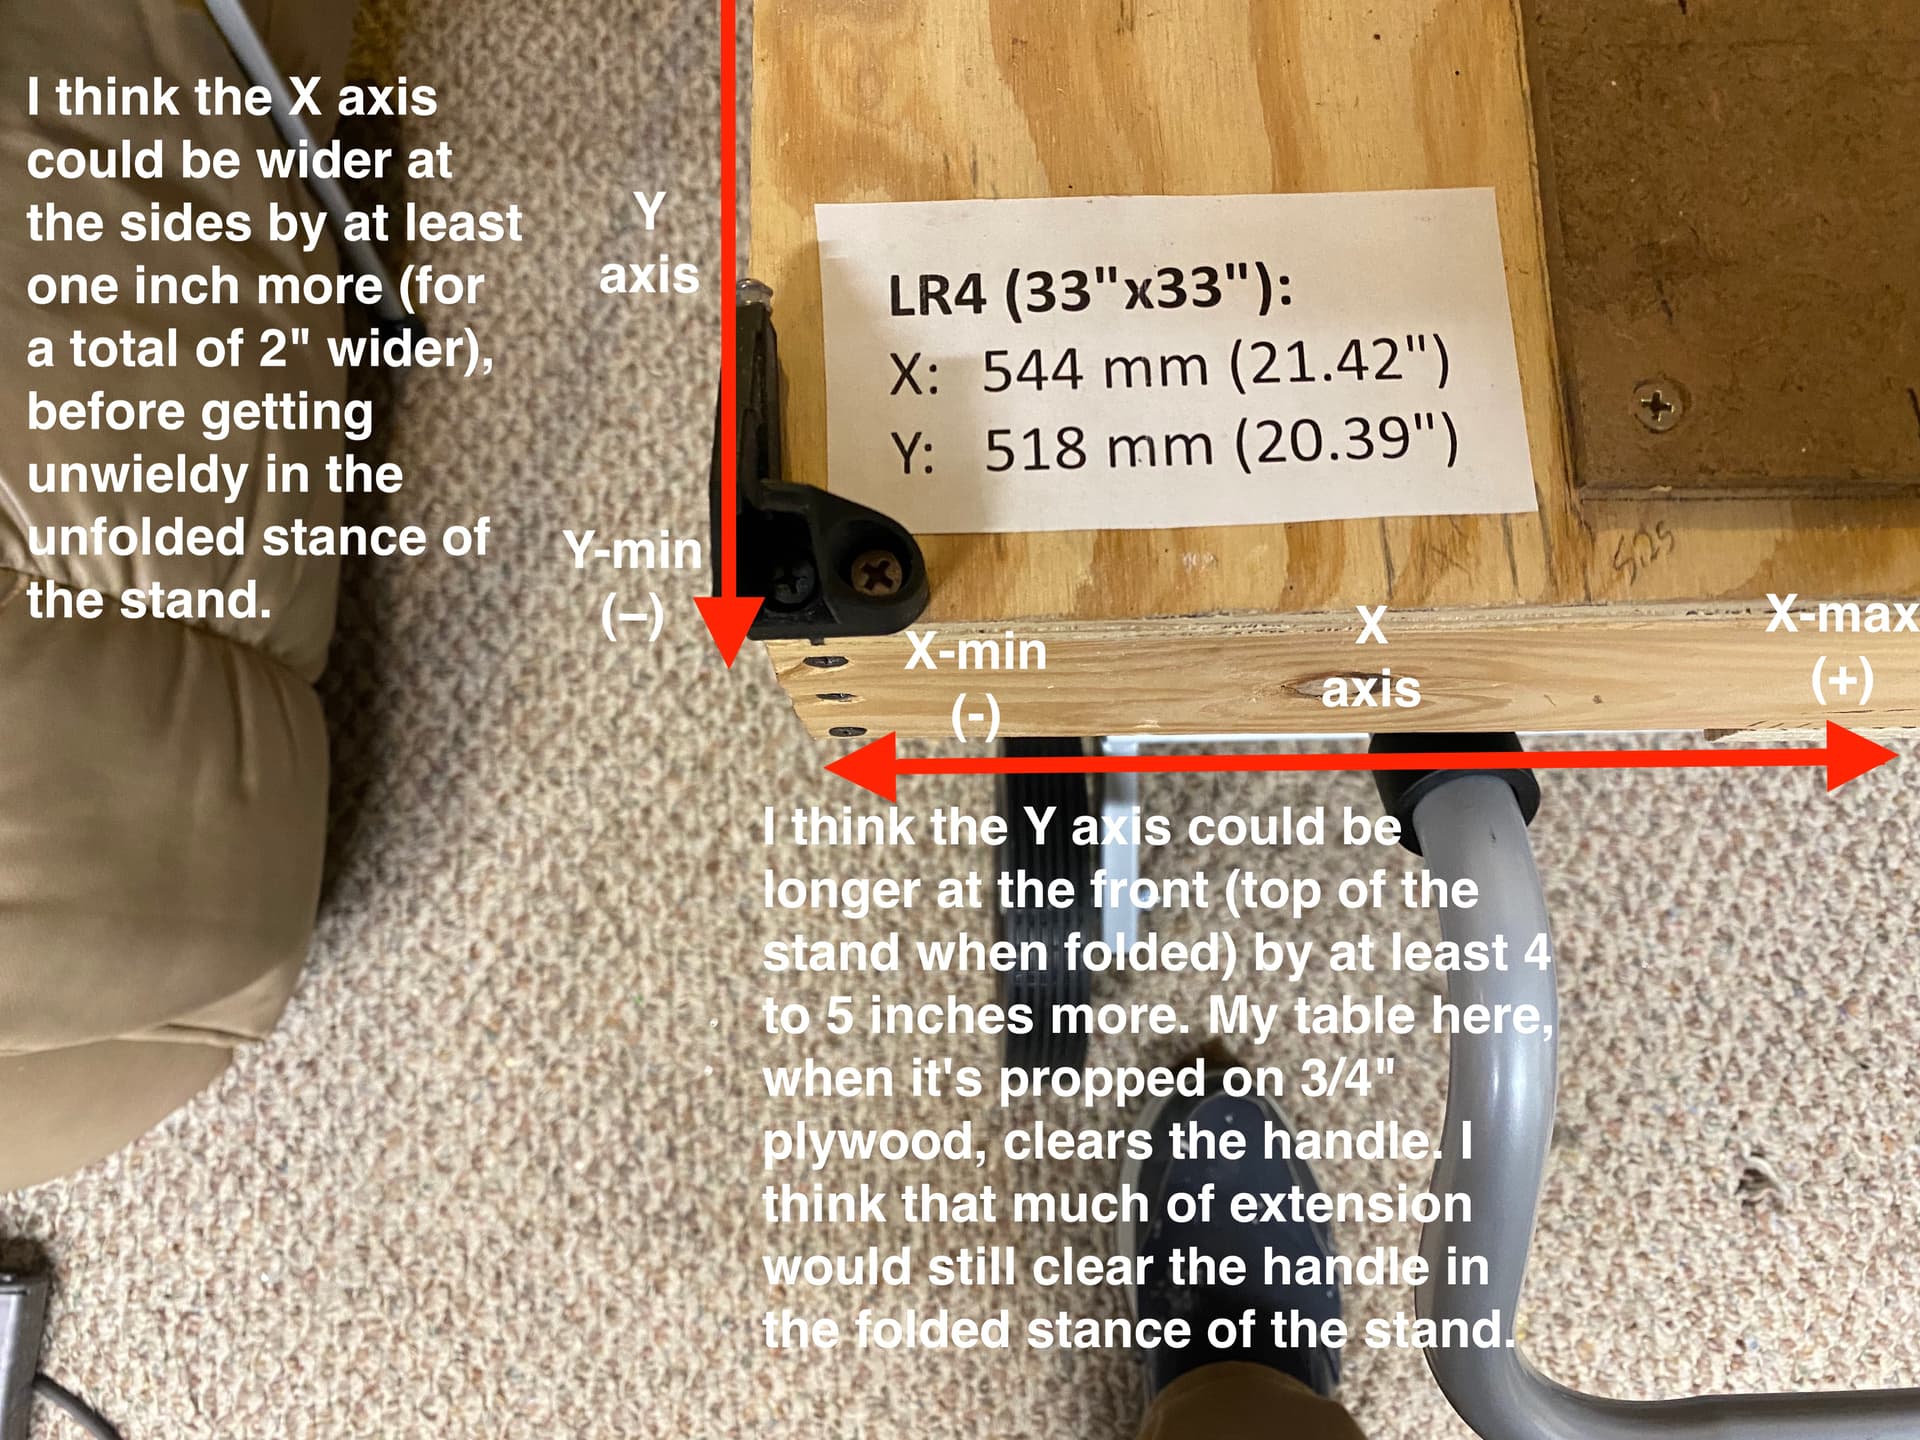
My little table here is 33" x 33". Based on what I’m showing above, I think it could be 35" (X axis) by 39 (Y axis) and still be OK. But for being able to run it without any additional stabilization, might not want to go much wider than the 33" width I’m using here.
5 Likes
Thanks for looking at it. That looks like you could squeeze in 24 x 27" cutting area, which is respectable!
1 Like
Hi Doug,
Thanks for this idea! I am just getting back into life from a Mental health crisis and part of that is making a new LR4, and although I loved my LR3, I made it too big for my needs and i love this idea.
The space i have was reduced due to my brother moving his factory, and although he is being very generous with what space i get the area is much to small. So you idea is a great one.
I will start looking into getting a version of this trolly in the land down under.
so a bit of looking at FB market place and other similar places yielded zero hits. the Ryobi one is not sold down under. But vevor does do a light/ medium duty one.

But is a bit lower than yours. My first thought was to make a set of storage draws for under the LR4 to raise it up a bit, plus the added benefit of the storage for the bits, spanners etc in one draw and then hold-down’s etc in the other.
1 Like
I had this very same idea, although I had neither mentioned it nor had time to pursue it, would assuming the structure around the storage area is strong, it’s a great potention solution!
I am thinking that the size of the machine, the weight will be probably the same as the table saw or drop saw.
I am not really taking into account the weight of the stock as the trolley would have to take that into account as well.
The thing that ‘worries’ me is the vibration.
But I love the idea, so might look at purchasing a trolley from Vevor as it’s all I can get. The smaller size might get a bit problematic, but the folding nature of it will make my whole area more usable as i can store it away.
I will be very interested in what you come up with doug.
1 Like
If you’re up to it I’d love to see some pictures of the completed build.
It’s inspiring to see what you are able to accomplish, helps motivate me to stop procrastinating and just make something.
But if you don’t have the time and/or energy with whatever else you’ve got going on that’s fine, you’re under no obligation to some stranger on the internet ![]()
It’s just the LR4 late-stage beta (release candidate x) CNC gantry I made during the beta test phase, attached to a wooden box frame with plywood on top, with some MDF on that for spoil board, all bolted to a foldable wheeled stand made for holding a contractor style table saw! I will try to (sometime) put the gantry back on for pics, if I did not already get pics.
closing old topic to help fight spambots