Random question - Should I buy an LCD? I’m planning having a “shop laptop” to run the cnc all the time, so I shouldn’t need one, right?
I don’t have one on mine. I always run it with the barn laptop.
Love the color combo of sky blue and black.
2 Likes
Future home of my MPCNC and workshop! Still waiting for some finishing details (I.E. electricity) but can’t wait to get my MPCNC built! Just ordered the kit of parts a few mintues ago!

7 Likes
Are the the same as free range nuts?
Cage free nuts are better.
1 Like
Core printed, was pretty close to my last part. Started having some serious artifacts at about the 80% mark (where it seems a lot of people had failures). Had several layers either skip the perimeters or print sections of them over thin air, and there was a tiny .5 mm layer shift at the top as well.
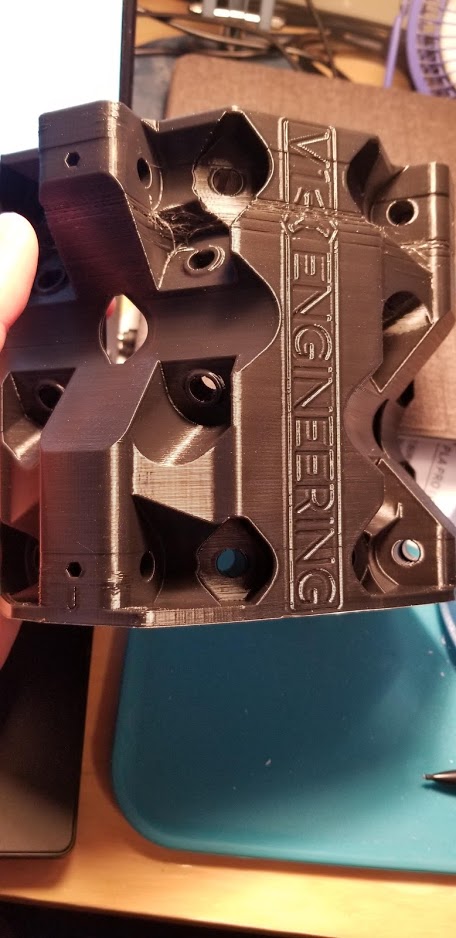
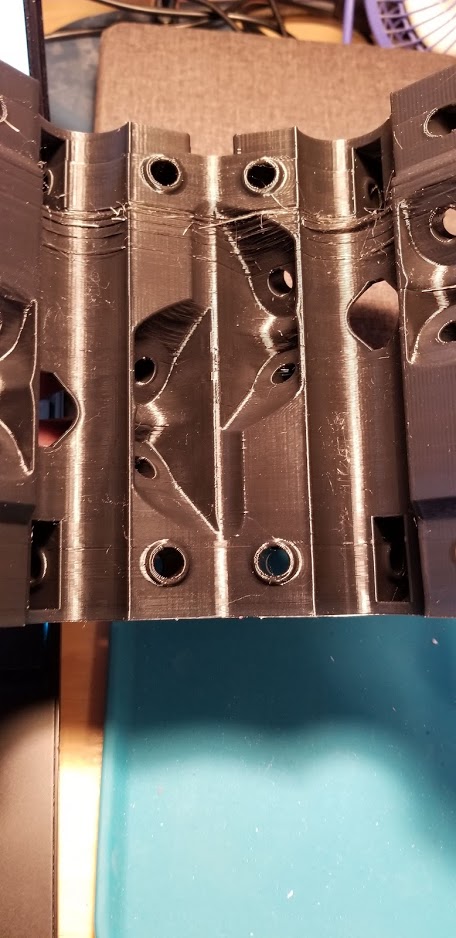
Other than the visual issues, it actually feels pretty sturdy still.
I’ll probably wait for some better quality filament to arrive and try a reprint, though I might try an initial assembly with this (unless y’all think it would be a complete waste of time)
I’m going to go in with a 3d printer pen and add back in the perimeters where they are missing, and hope that I can assemble it.
1 Like
Wait. So is this the full Primo kit (not the upgrade)?! Am I crazy, but this wasn’t available a couple days ago, was it?
https://shop.v1engineering.com/collections/parts/products/mostly-printed-cnc-parts-bundle-primo-version
So after this, and an LCD, Rambo board, tubing, the printed parts, and a router, I’m all set?? I can finally start?! Woo-hoo! Pulls out credit card
1 Like
It wasn’t available last night even…
If you want to check out the build, it will be kinda okay. The end result is a Z axis that leans and who knows what will happen to the gantry rails. Unfortunately that is a pretty critical piece in terms of accuracy.
4 Likes
In that case I’ll do some printer tuning and see if I can’t get a better one to come out.
Been waiting for the new build kit. Now that it’s available I don’t know what board to get 
Direct dual endstop and Rambo board the standard?
Go for the Rambo full. For wiring I’d get the standard, but also purchase the dual endstops so you can upgrade later.
It’s best to start simple but have the option to upgrade later.
1 Like
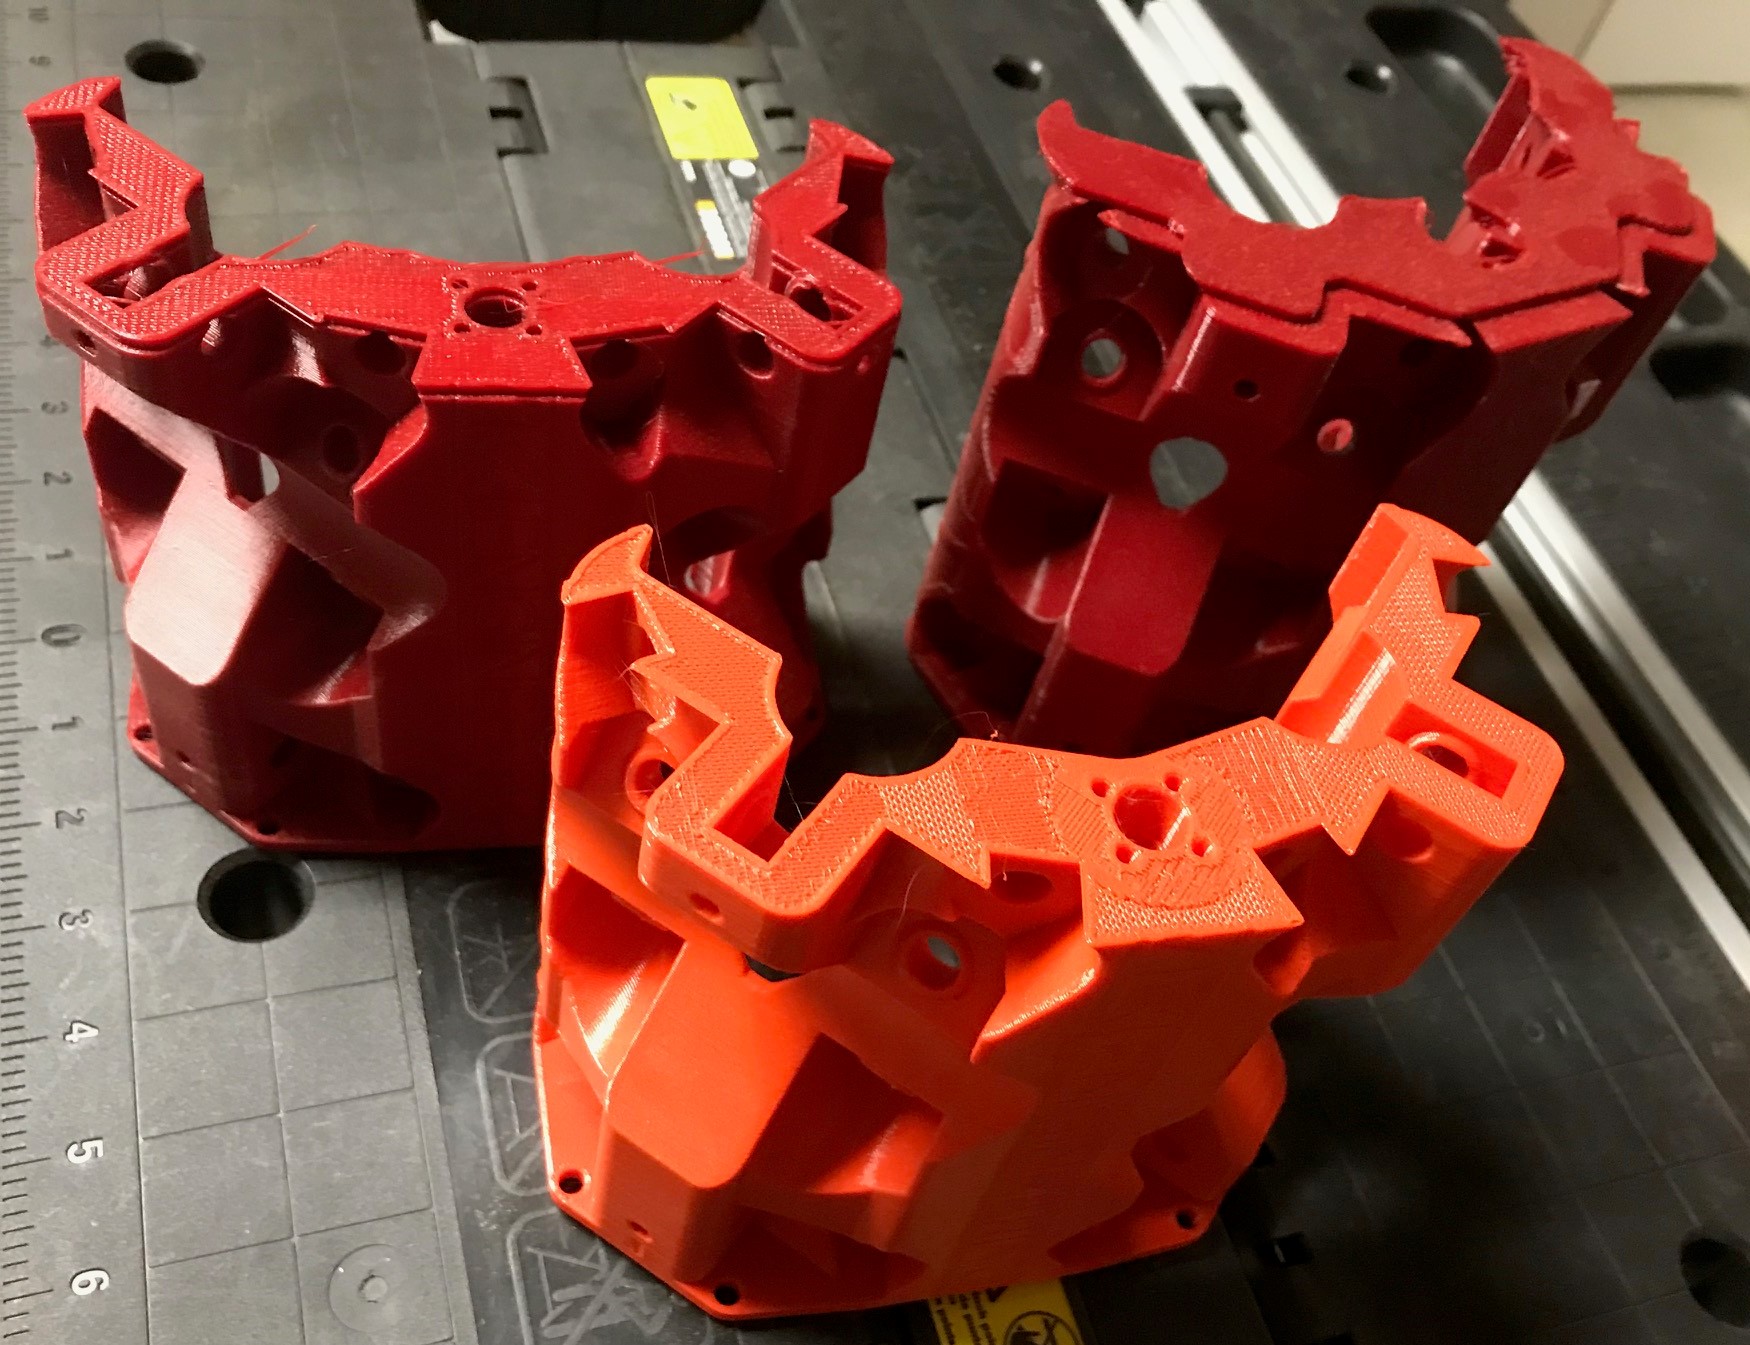
Forth time is the charm. Below is a picture of three failed attempts. The first one and probably the second was a result of a defective hot end thermistor that caused overhangs to curl up and momentarily catch the extruder causing a Y axis skip. The third failure may have been caused by OctoPrint even though I was printing from the SD card in all cases. I have seen OctoPrint send sperious bytes to the controller before.
The forth and successful print (foreground) was with the printer cable disconnected from the controller board. I also increased the layer height to 0.3mm so as to be a little more tolerant of overhangs curling up. Print time = 21 hrs.
The printer used in all cases is a Prusa I3 MK2.5S/MMU2.
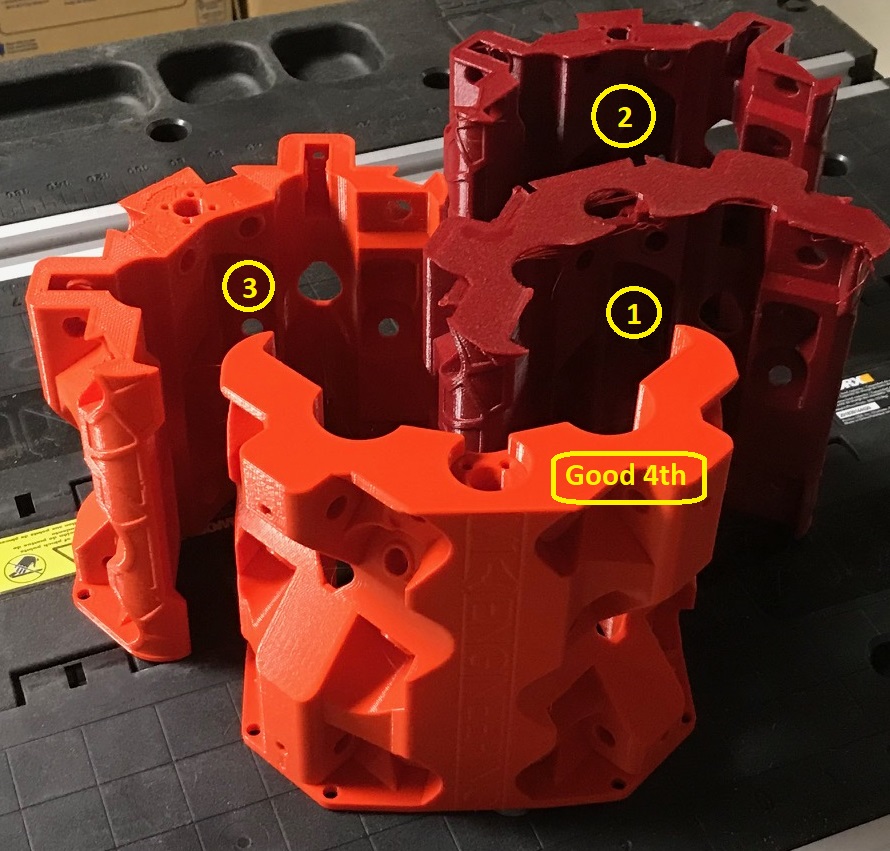
Better Picture of Y Axis shift:
3 Likes
Please 25mm prints. We cant find 25.4 mm pipes in Turkey
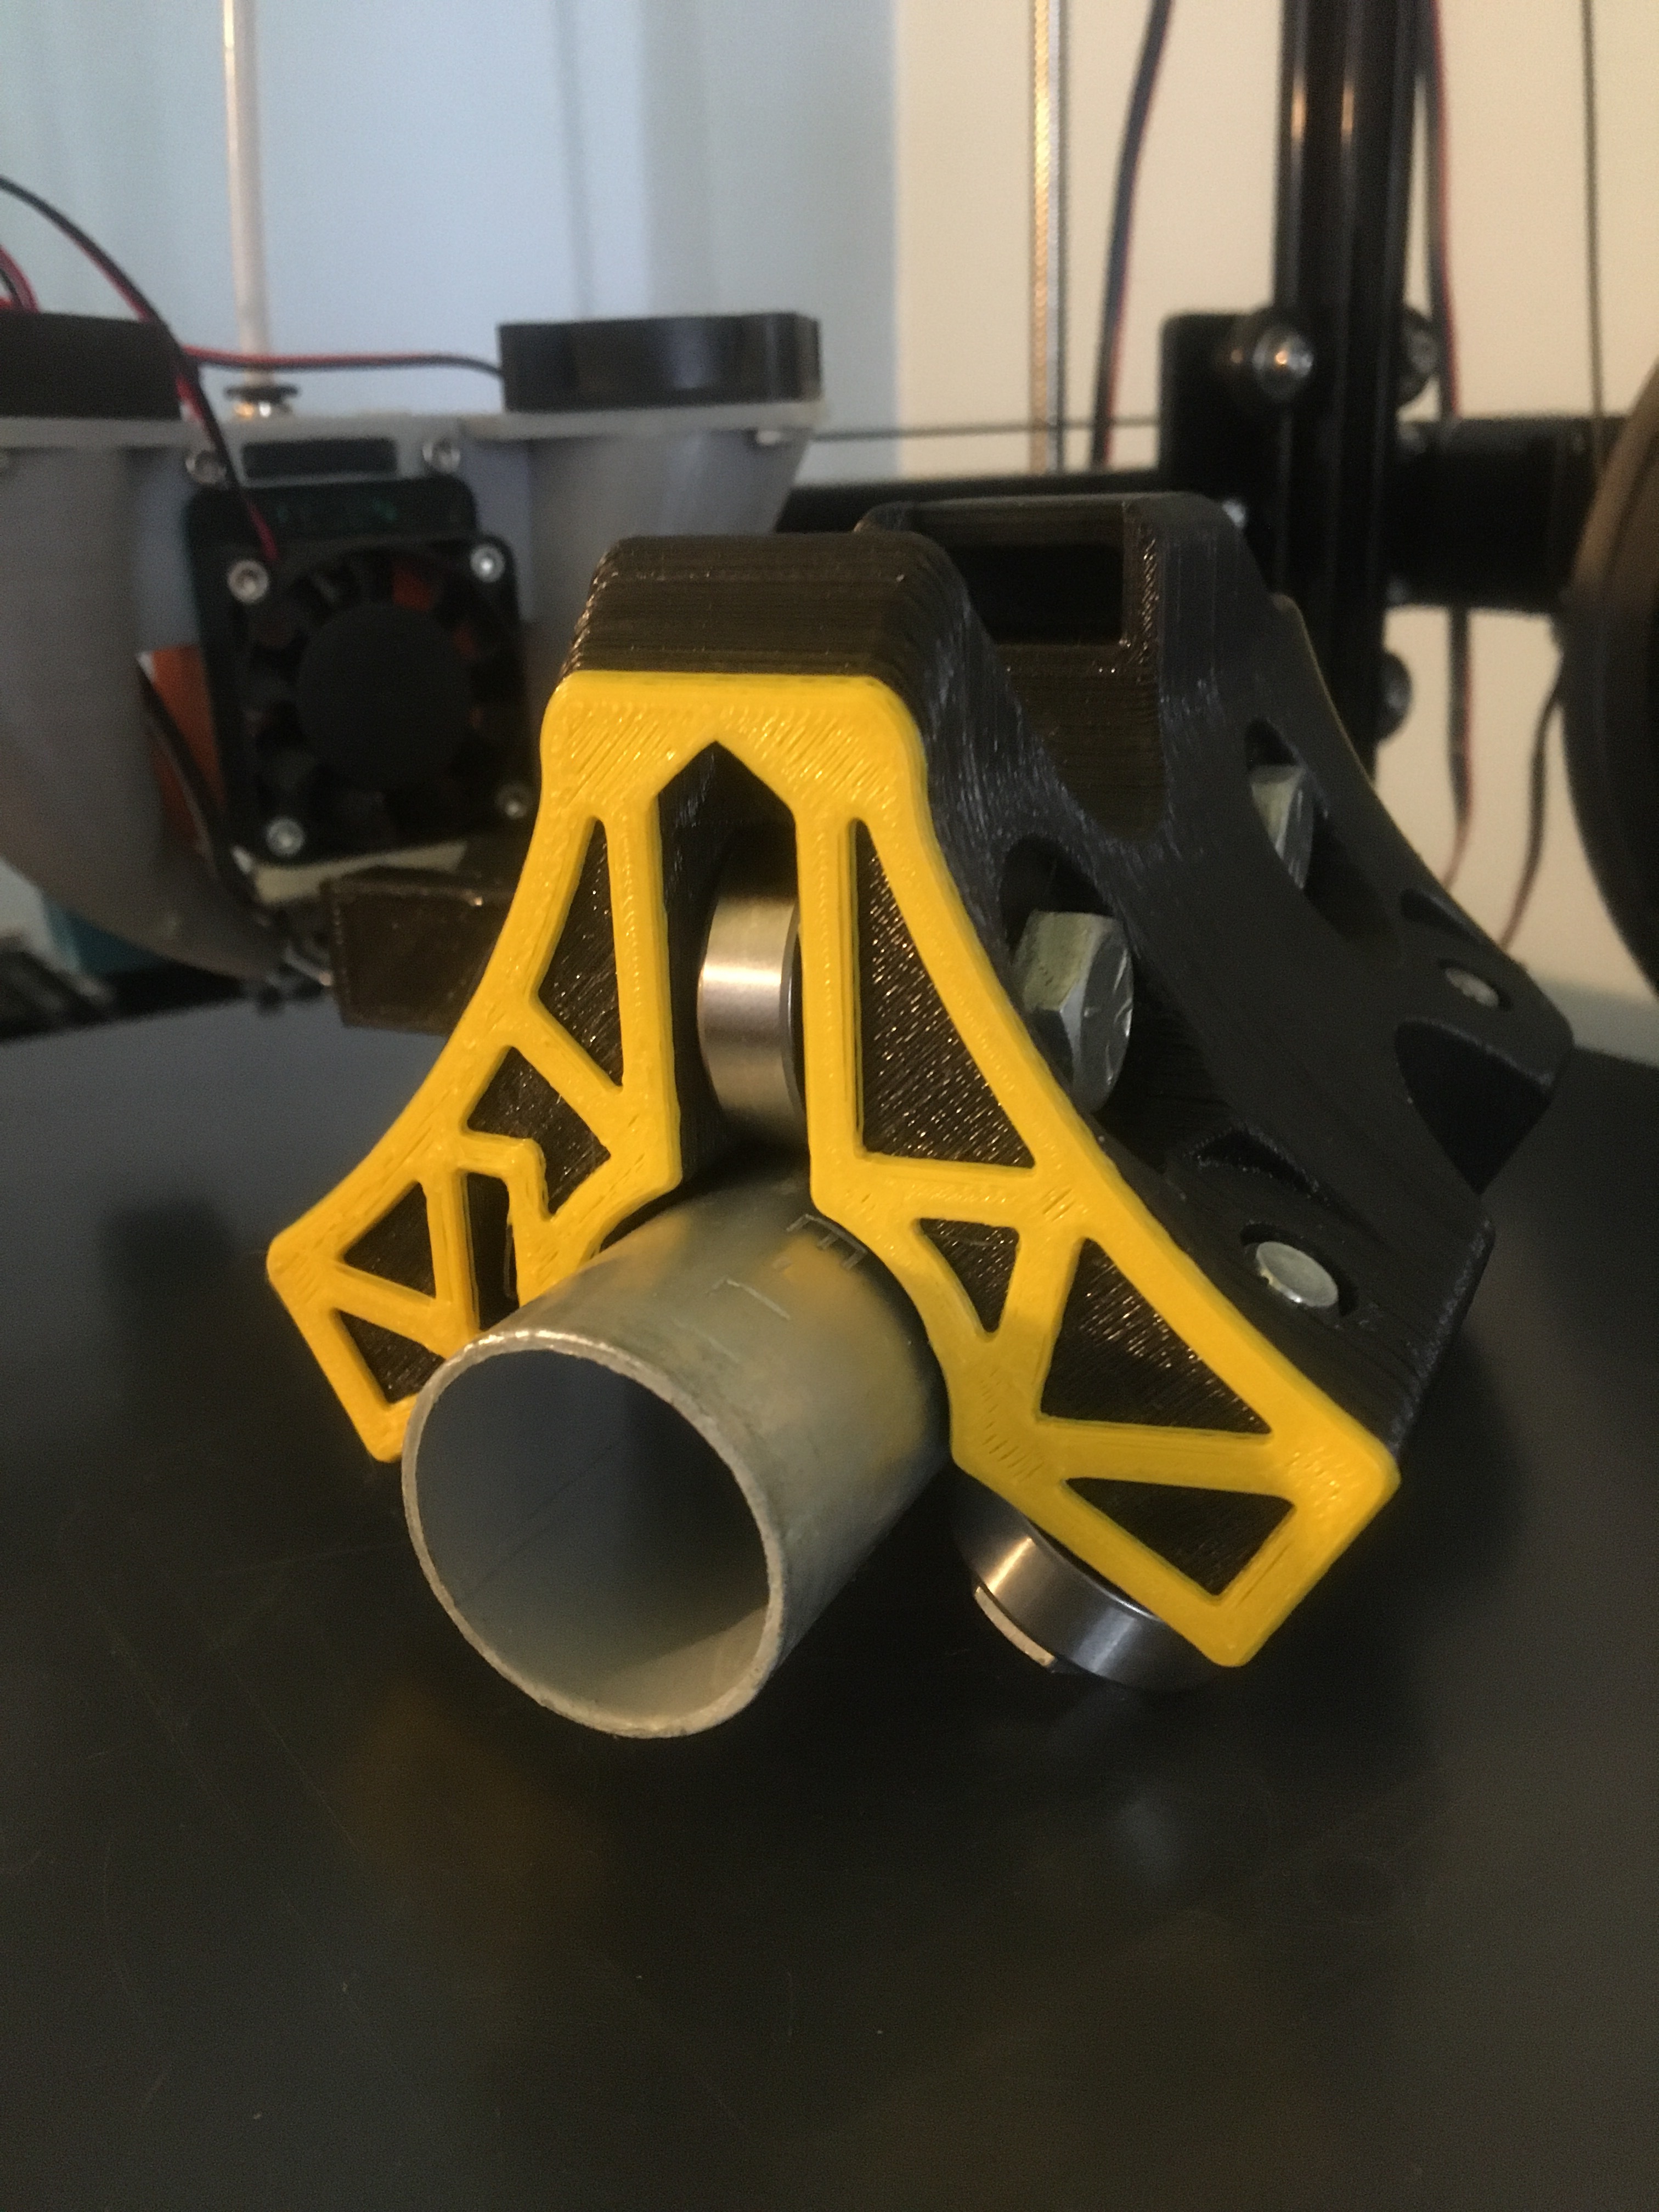
This might be controversial, but I’m going to scale down my 3d printed parts by about 99.16% to fit 25mm tubes. This way I have a snug fit around the tubes while the rest of the tolerances are good enough to fit the motors/belts etc (I would discourage you from being this impatient, though!)
Good luck getting the bolts through the holes. Even at 100% I had to screw mine through the plastic.
Also, the inner bearings on the core have to be hammered in due to the tight tolerances already. The 10 mm belts just barely fit in the holders. You’ll probably have to use smaller belts.
1% doesn’t sound like much, but there’s a LOT of parts on this build that just barely fit to begin with. I have a feeling you’ll be wasting a lot of plastic.
4 Likes
I’m going the other direction. 29.5mm(1.163”) 1”EMT. There are a few minor edits to make, and some different hardware, but it’s happening.
4 Likes
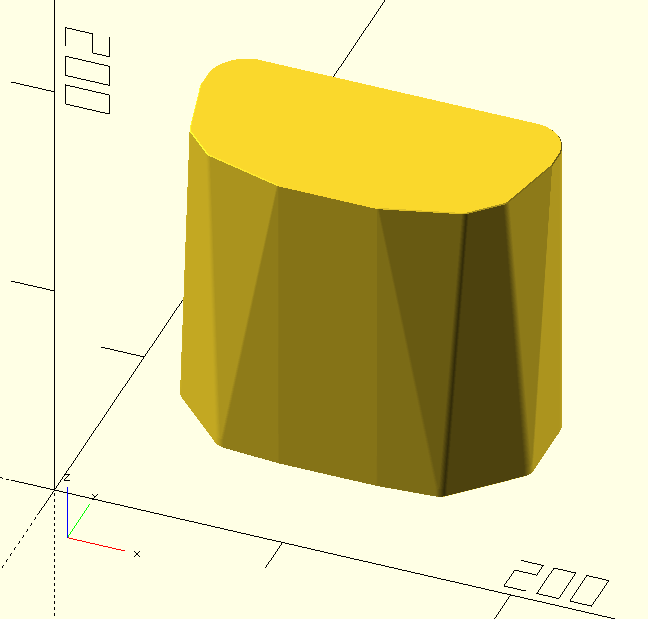
Why not just take the diagonal distance and make a cylinder in vase mode?
![]()
That is a possibility instead of 3/4" haven’t decided yet.
3 Likes
Or how about just the convex hull?
hull_of_core.zip (248.7 KB)
4 Likes