Started printing pieces when the world ended, had to rebuild my printer, finished printing a few weeks ago. Had to print the core 4 times before it completed 100% so I went through a lot of filament. Then I went to buy DOM and they were out of anything with a thinner wall so I got the thinnest wall they had (.250). The good news is there’s no perceptible deflection over 60".
I’ll probably change the Z axis tubing to something lighter when I can get it.
I’ve already stripped out a couple of belt adjusters even though I did pre-run all of my bolts. That’s a little frustrating. Possibly due to printing in PETG.
My buddy and I (he’s simultaneously building one in Victoria BC) were both wondering why the end-stop switches are on the trucks instead of the corner blocks? I’m half tempted to mount them to the corners so there’s fewer moving wires.
You have to wire the motors anyway, what is 2 more wires?
Ryan does have a mount that attaches them to the clamps (I see you have clamps, but there is a version with endstop mounts). It’s your machine though, put them where you’d like.
FWIW, I know where you can get 1" .065 wall tube in Alberta. The company I work for sells structural steel, offices in Edmonton and Calgary areas. I can also verify that it works well for a Primo machine.
I thought so too with the switch locations, but the wires moving as compared to the motor wires just isn’t that big a deal, and if you have the wiring kit, it’s run as a 6 conductor ribbon. Actually, one of my switches has failed, so I haven’t used the endstops for the last while, I just manually square it against the endstops before I start – at least until my next order of switches comes in. I do like the auto-squaring, but it’s really not that big a deal.
PETg is a little softer, and the belt tensioners are more sensitive to that. I do most of my printing in PETg as well.
Wouldn’t happen to be TeamTube (or Encore now I guess) would it? They only had .250 and .188 when I called and not enough .188. (I’m actually up near Sundre).
The end stops are on the tubes because the truck doesn’t reach the end block when the machine is assembled. The trucks take up about .5 inch (12mm) of the rail at each side stepper point.
Looking at your picture, I don’t think they need to be that far from the corner. I’ll take a picture of mine and post it later.
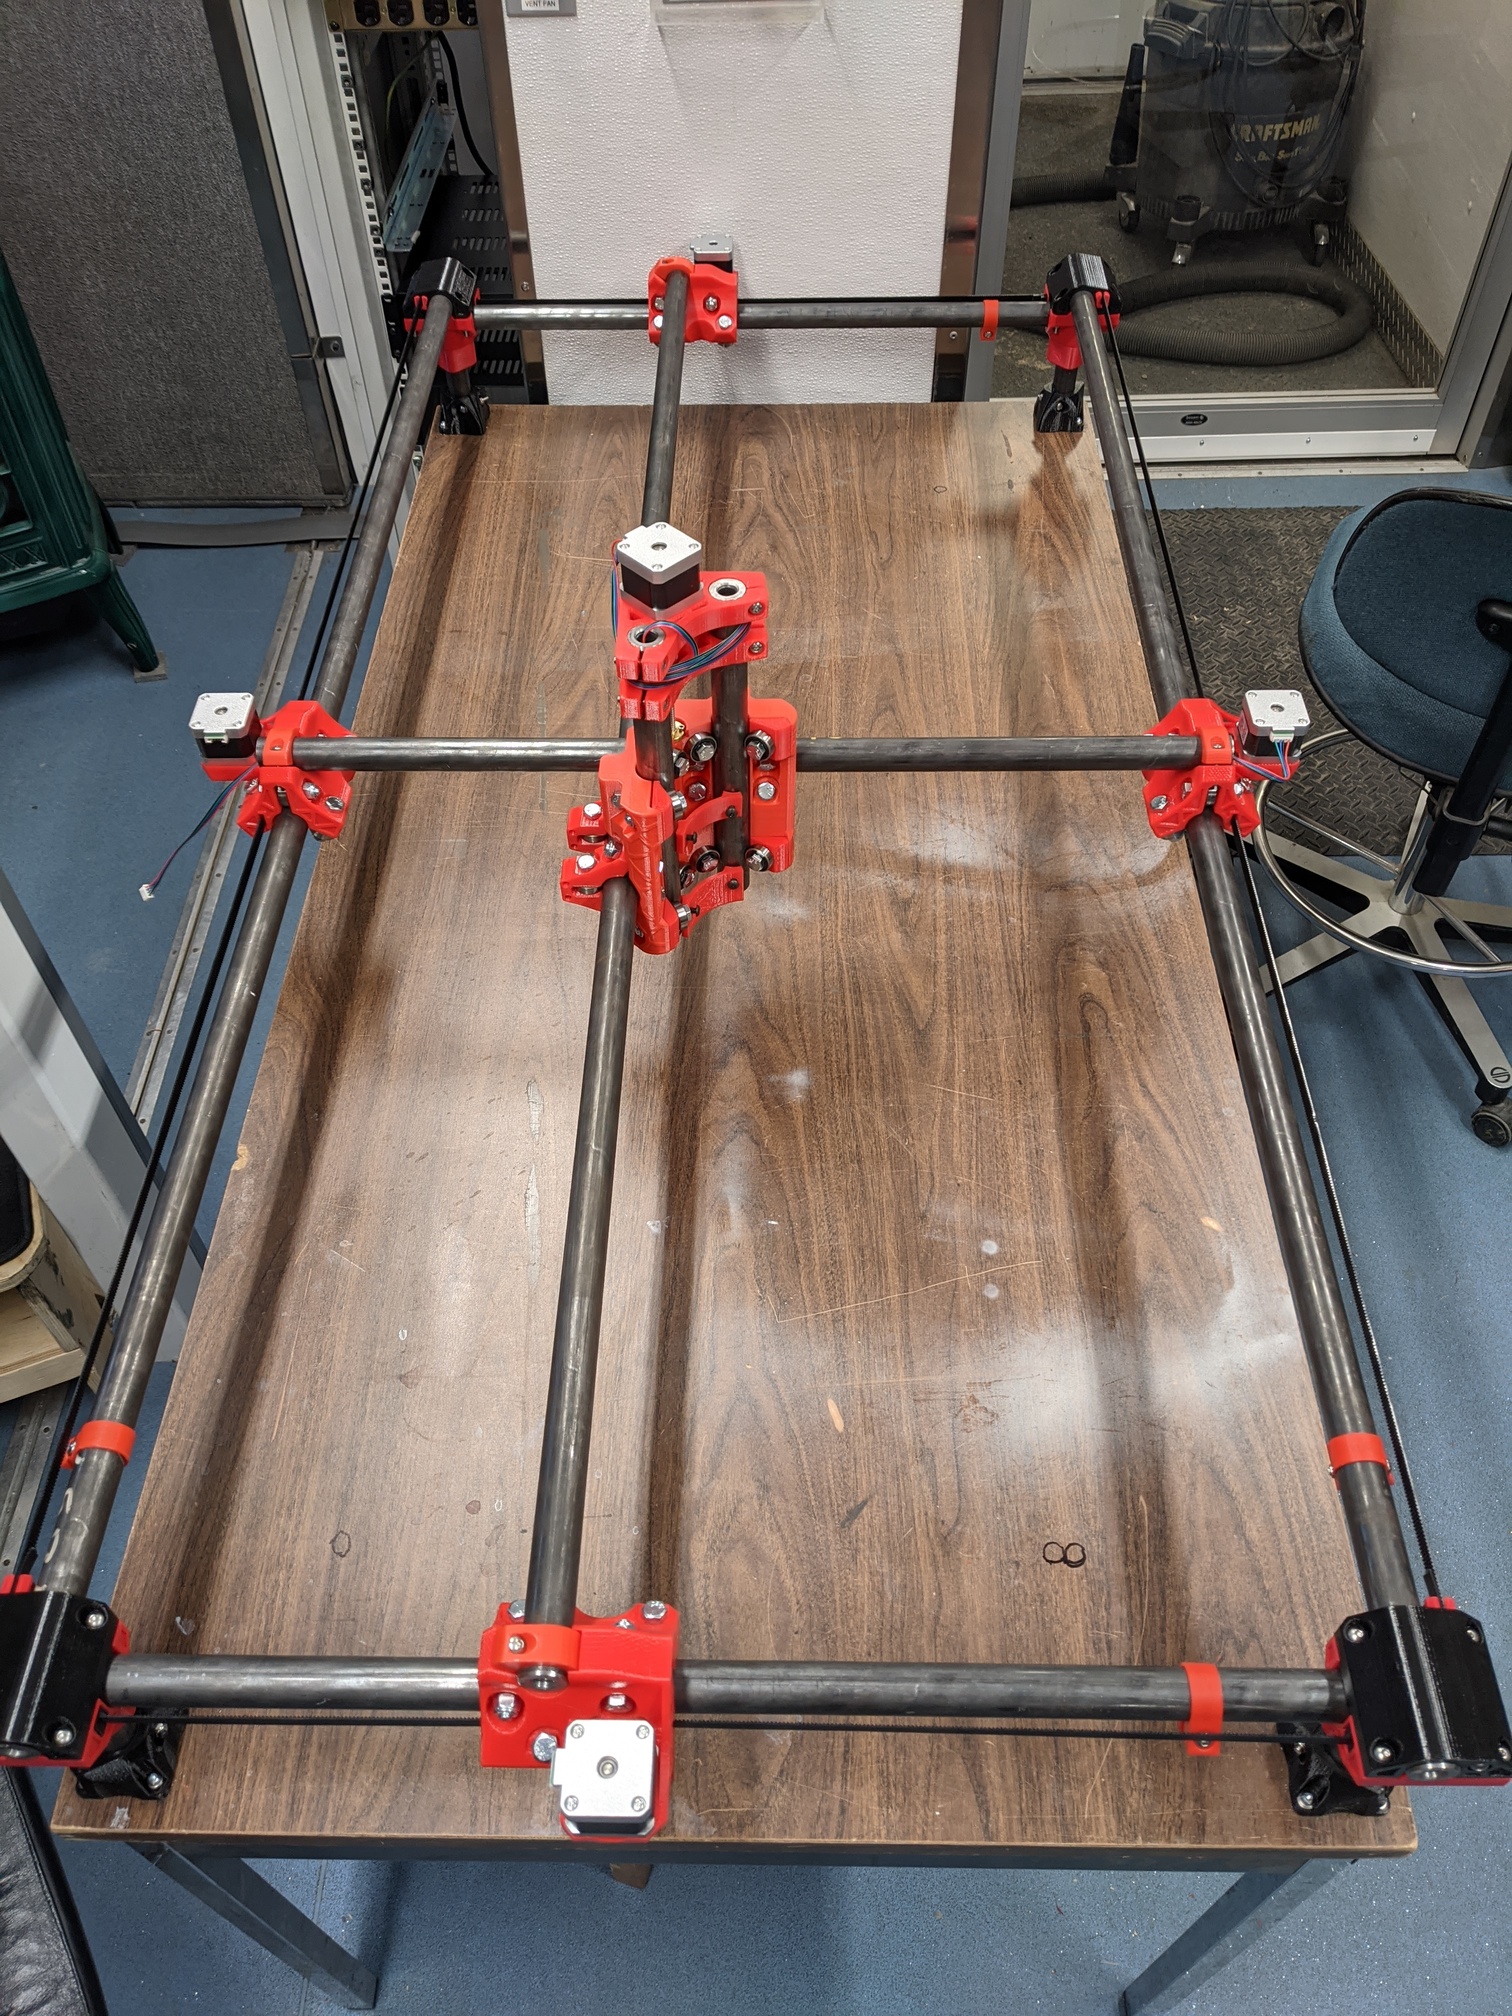
Thanks. I’m still coming to grips with this thing. In the picture, the “Y” trucks (Y is my short axis) were accidentally installed on the wrong sides. I reversed them yesterday. The Core prematurely hit the Y truck on the right of the photo because the indent wasn’t there for it to go into. That has changed the position of those clamps.
As far as the clamps, I just tossed them on there for now to get them off my shelf. I’m waiting for Mr. Amazon to deliver my limit switches and then I’ll start tuning.
But I guess I was thinking of making an endstop clamp with integrated switch mount. This is such a minor optimization that it may not bear discussion.
I was thinking that it looked like you had the trucks on the wrong axes.
All of them, the long side (with the motor) should extend in the same direction as the core, which also towards the home corner. This is clearly not the case with the trucks on the long axis in the picture, but is correct on the short axis. The motor side is also the side with the provision for the stop switches.
Once correctly oriented, the one core clamp piece that is different will make a lot more sense, too.
As far as endstop blocks with switch mounts, you may need blocks to go on the trucks then to trigger the plungers. These can probably be made to go onto the provisions for the switches, maybe with some adjustment. Personally, I like having the wiring looms for all of the motors and switches together. It makes troubleshooting easier.
@hpeyerl is this your first build? If so it’s probably best to not deviate from the base instructions. Personally, I have so much to learn that I’m trying to listen to my own advice. So seeing your post is a good reminder to me when I think maybe I should make little mods now!
That’s what I’m doing. There’s just so much to learn that IMHO it just makes sense to follow the basic instructions and what folks have done to get a good stable CNC going. Then after using it a bit upgrade as needed/wanted.
I can’t believe this thing has been sitting around for over two years but I finally freed myself up from work enough to brush the dust off my CNC. Finally making chips after also diving into OnShape and Kiri:Moto and buying a Makita rt0701c.
My build area is 1200mm x 400mm and I have lots of tuning to do still.