So if I put it next to my wheels, is it ok for the wheels to rub on it?
Lightly, it should not be needed but it can be a decent insurance if something else is goofy.
Ok, I’m Up here wiring it up now, I’ll change that before I get into any movement.
You could also end up racking the gantry, depending on how well the wheels hold to the track. I believe the $10 term is “over-constrained”.
Quite literally, just to make sure your router doesn’t take a left turn at Albuquerque. If you get out your laser sights and micrometer, it probably won’t track “True”, but it will be a lot more forgiving, and tolerate a lot more user… creativity in table and CAM design/execution. ![]()
So I got this thing wired up, and I have a green light on the Rambo 1.4. But the LCD isn’t coming on. I see the backlight, but no text on the LCD. I’m sure it’s something I’m doing wrong, so any help is appreciated.
Standard LCD troubleshooting: Swap/flip the connectors around. There’s only four combinations. You won’t fry anything as long as you’re turning off the power before you plug/unplug anything. If there are tabs that keep you from flipping the connectors, remove them. (If you’ve already tried swapping them)
On my teeny tiny build it was the fourth combination that got me going.
@turbomacncheese lmfao was my 2nd thank god!
@kvcummins Thank you! That got me going!
Success you guys! Testing the wiring, all axis move from the LCD, in the correct direction. I mean I guess lol. If I’m staring at my machine, I turn the knob left the x moves left, I turn the knob left z raises, right lowers, and Y. Well they both move the same direction when I turn the knob lol I’m going to take it all apart and put my looms on, and get everything ran into the tubes. Thanks for the help so far! Hopefully tonight I’ll draw my crown if it doesn’t get too late on me.
What’s this you say? Crown you say?
I still gotta get the pen holder a lil’ more sturdy but HEY! My machine drew a crown! It’s a start!
Yes!
So I took those rails off, and put them beside my wheels instead, I’m really not worried about it running off the rails, the issue I was having was it was creeping to the point of the z tubes rubbing the 2x4 the further it got down the table, which I ‘think’ I solved by loosening alot of things I way over tightened… But I noticed, my wires for the Y motors. they’re kinda tight when the z is extended high enough to get onto some 3/4" MDF. I’m thinking of getting some of that wire Ryan sells to extend the wires for more slack. Which ones are recommended? I see 2 different kinds. Also, how hard of a job is that to pull off?
@vicious1 Can you also recommend one of your 1/8" bits, capable of cutting a full depth finishing pass through 3/4" MDF? I see some on your shop page, but not all specify the length of the cutting area. Prefer a single flute, but if you have a better suggestion for my purpose, then I’m all ears. MDF is pretty much all I work with, and usually 3/4".
There should be room, lets see how you routed them. I had a full 4x8 and could easily raise the Z 8" or so and never even looked at the wires.
For 3/4" I like the one with the red collar it just does a 3/4" full finishing pass, but some like the other single flute better. For me the red collar (kyocera) stayed sharp longer.
I figured out what I did wrong, I had a ‘bunch’ in the tube. I have enough to raise and lower fine now. Duh. Sorry about that. False alarm, don’t mind me.
And ok, I’m going to order 10 or so of those red collar bits today or tomorrow. I looked at my arsenal from the Maslow stuff, and all I have is 1/4" 2 flute upcuts. I know those will work, but I’m trying to stick to what the recommendations are. I also read something where you had said the 1/4" bits actually need to move slower, so I’m gonna roll with your 1/8" bits. Thanks, and HOPEFULLY I’ll be getting her dirty this weekend. Still plenty to do while I wait on the bits. Gotta route my power cables under the table, and mount the power brick to the Y Plate. And I’ve still yet to get a vac hose. Plenty to do indeed.
Either of these.
You can also remove that little red donut with some pliers. It is just press fit on there. Just be careful you don’t cut yourself with the pointy parts.
@jeffeb3 What’s that for? I thought it was probably some kinda depth guide for inserting it into the router.
 I assumed it was to tell the different kinds of bits apart. I suppose it could be used as a depth gauge, but I think a touch plate would be much easier and more accurate.
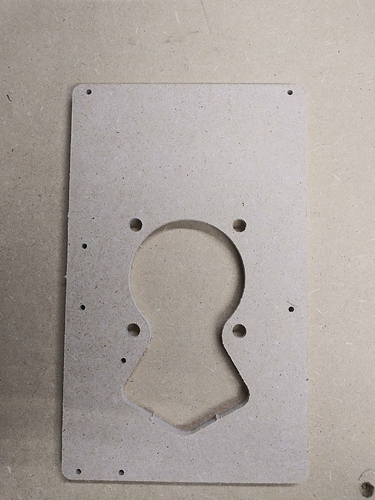
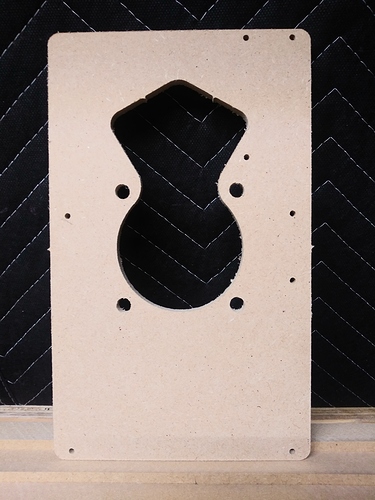
Well, she cuts. And cuts very good. And before you point out that I missed some holes… I KNOW lol I was anxious!!! haha I had some scrap 1/4" MDF I was experimenting with. I’m familiar with Estlcam. But trying to get familiar with how the machine gets setup per job, and also, those pesky milimeters…
Estlcam question. I know it has to ‘move’ in MM’s, and Marlin needs it’s info in MM’s, but can I still setup the tool paths in inches? Or does that all still need to be MM’s as well?
The 1 611 Plate took me 17 minutes to cut using the ‘basic settings’ Ryan recommends. I’ll tinker with them more as I get more familiar with the machine as a whole, and get the good bits from Ryan.
Thank you all for getting me this far!
In the tool display you can use whatever units you want, we commonly use mm/s sec around here though.
Easy to judge 8-10mm in a second vs 18.8976"-23.622" in a minute.


