I’ve started printing for LR3 after I cracked my LR2 by slamming it into the workpiece.
I have nuts and bolts being sent and the linear rails on their way.
And I have a Makita trimmer to use as well.
I also have some questions.
I am assuming that I need new cables for the steppers as the ones from the LR2 kit aren’t the correct type ? As well as cables for the endstops ?
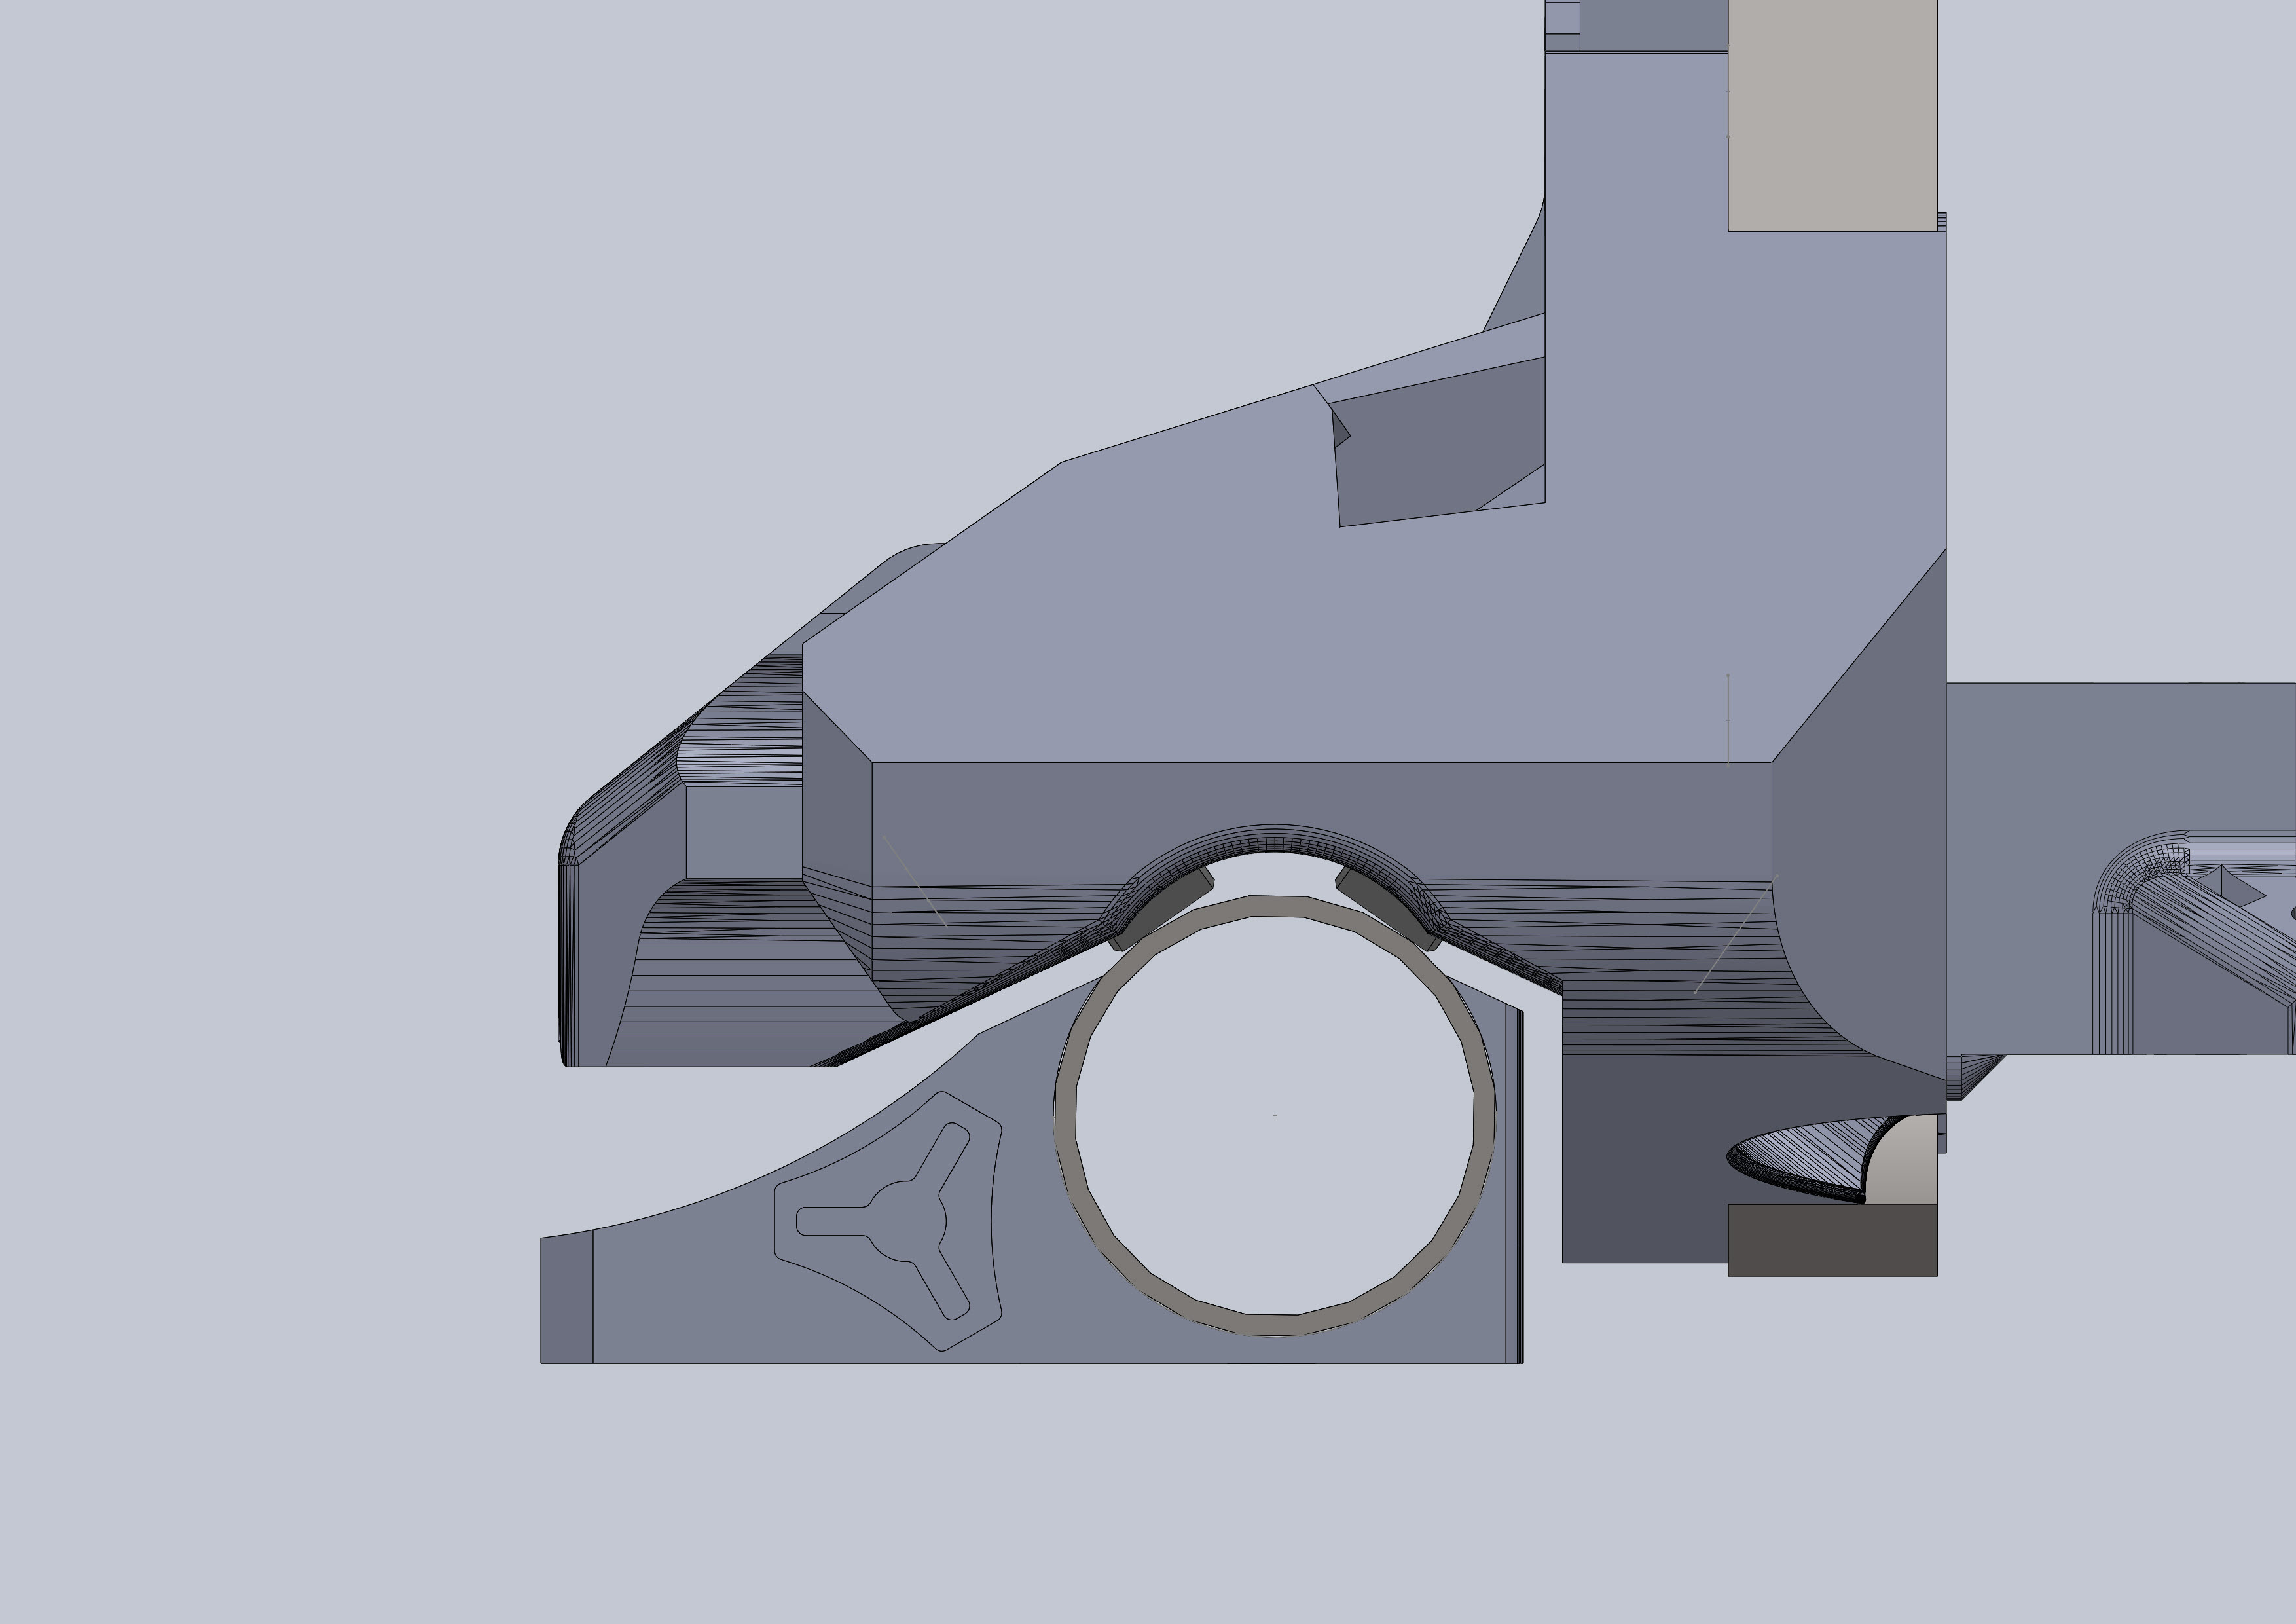
Why do the strut plates have keyholes and slots, when the printed part doesn’t allow you to slide them on that way ? The usual engineering trick is a hole and slot to allow for variation.
Can the Y rail holders be rotated 180 degrees without interfering with the side plates ?
With all the screws in the brackets, You can slide the struts in place no problem.
I’m not home to check on that. That will be a question for Ryan @vicious1 or maybe the the other beta crew members can answer…
Sorry guys, I was going to tag all of you but I can only tag 2 per post…
Thanks for your reply.
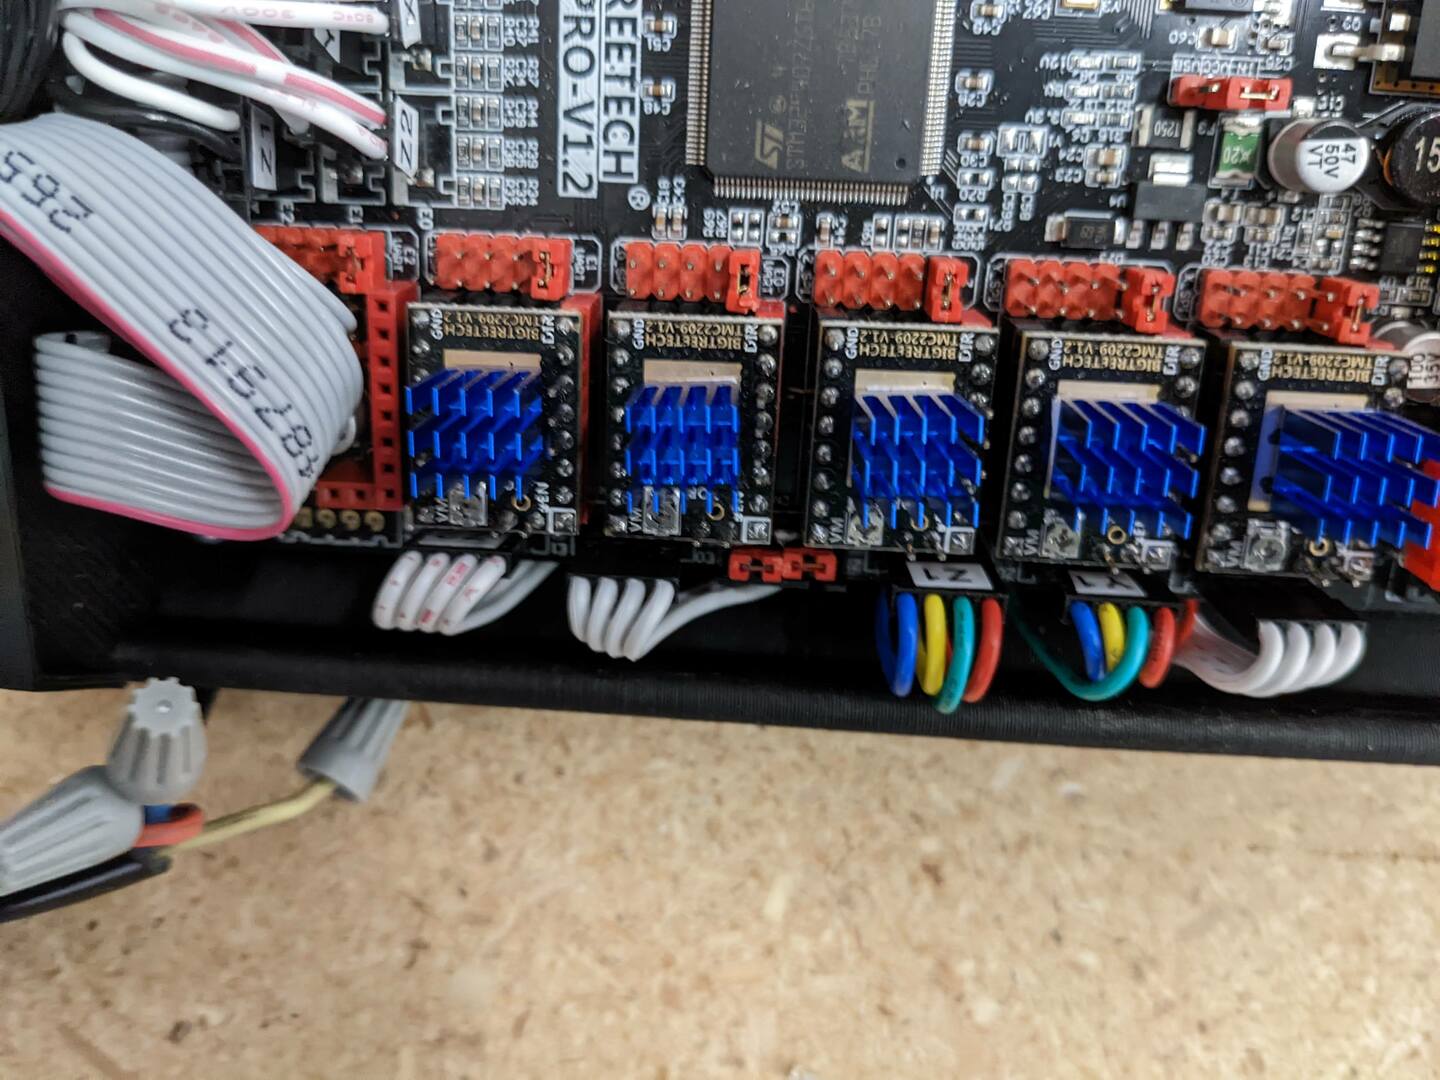
This image shows all 5 drivers being used.
The LR2 kit that I have is the series? one with two steppers per wire for y and z. I assume you bridged the middle connector and got two new cables for the other steppers /drivers ?
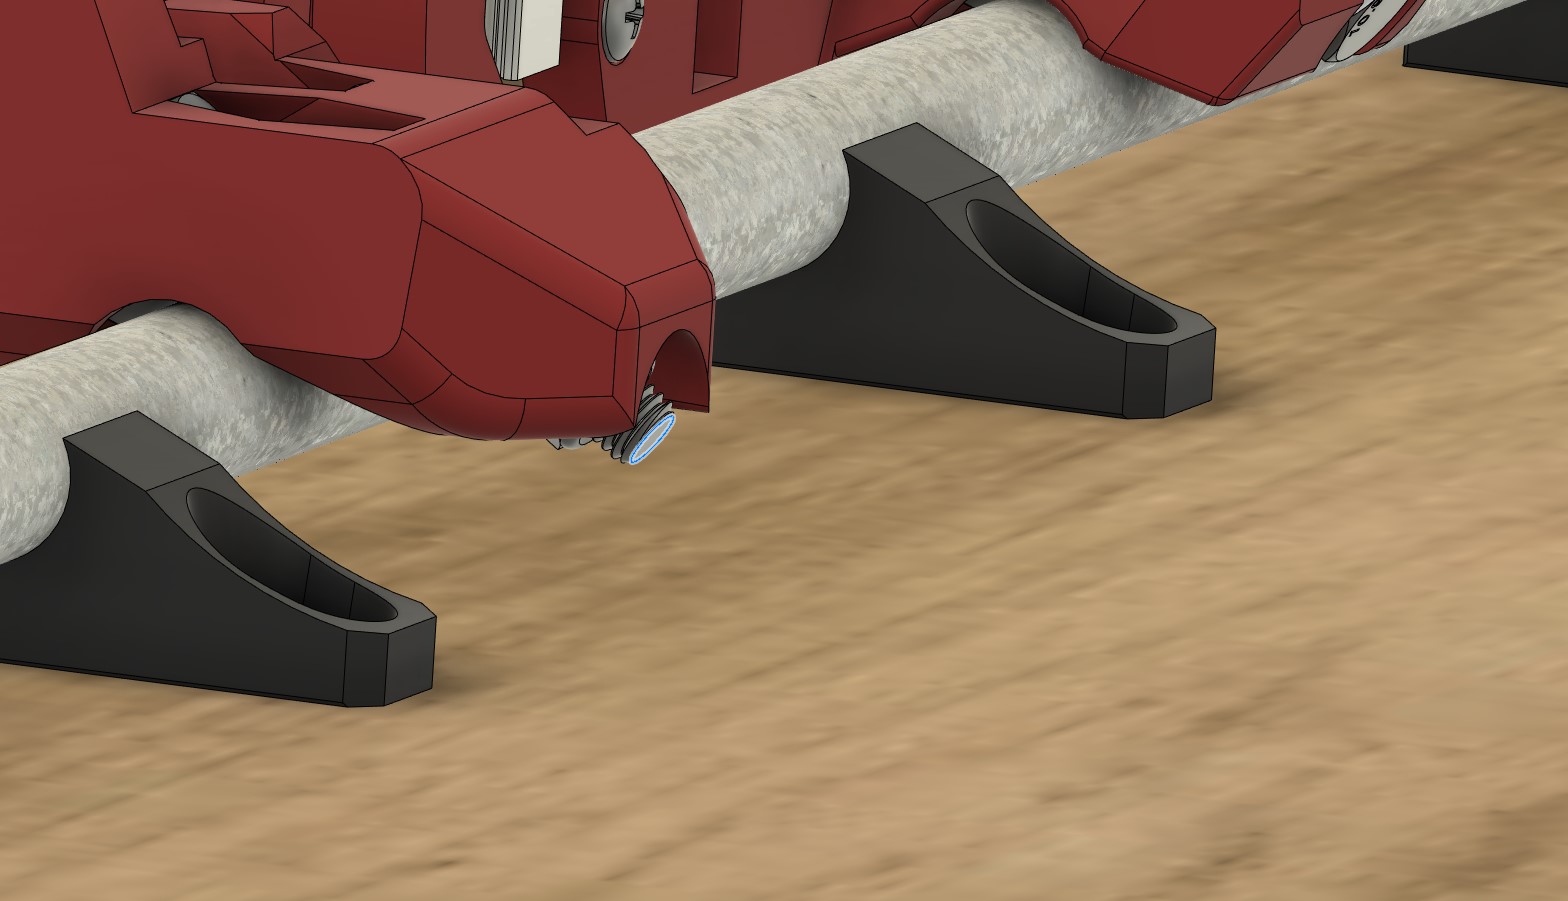
Series will work ok. But the two sides may not be the same height. One way to fix that is with dual endstops (which needs 5 drivers). The other way is to have a wedge to start one side on, so it compensates for the difference (a hard stop).
I may be misremembering, but the bearing wheel side may be at the right height.
A wedge is probably the wrong name. A spacer is better. Something to put under the low side to lift it up so the Z is the same across the whole X axis. You put it on the spacer. You make sure both ends are down as low as they can go. And then you enable the motors and you can jog up, remove the spacer, and setup your job.
Dual endstops may be easier for the LR3. With dual, you can adjust the offset with homing switches.


