ALERT: This is only for very shallow cuts in circumstances described below. It is not recommended for regular or normal use. For shallow cuts, you should first position the router bit as high into the collet as is proper and doable, and then if you still have too much height for your dust collection, temporarily using one of these extensions may help. Needlessly placing your bit too far down and your router too high up reduces rigidity, increases risk of breaking the bit, and is detrimental to the LowRider’s well designed performance.
NOTE: this is the extension set for the 2.5" vac hose remix. (If you have a ~48mm vac hose, goherefor that main original design, andherefor that extension set remix.)
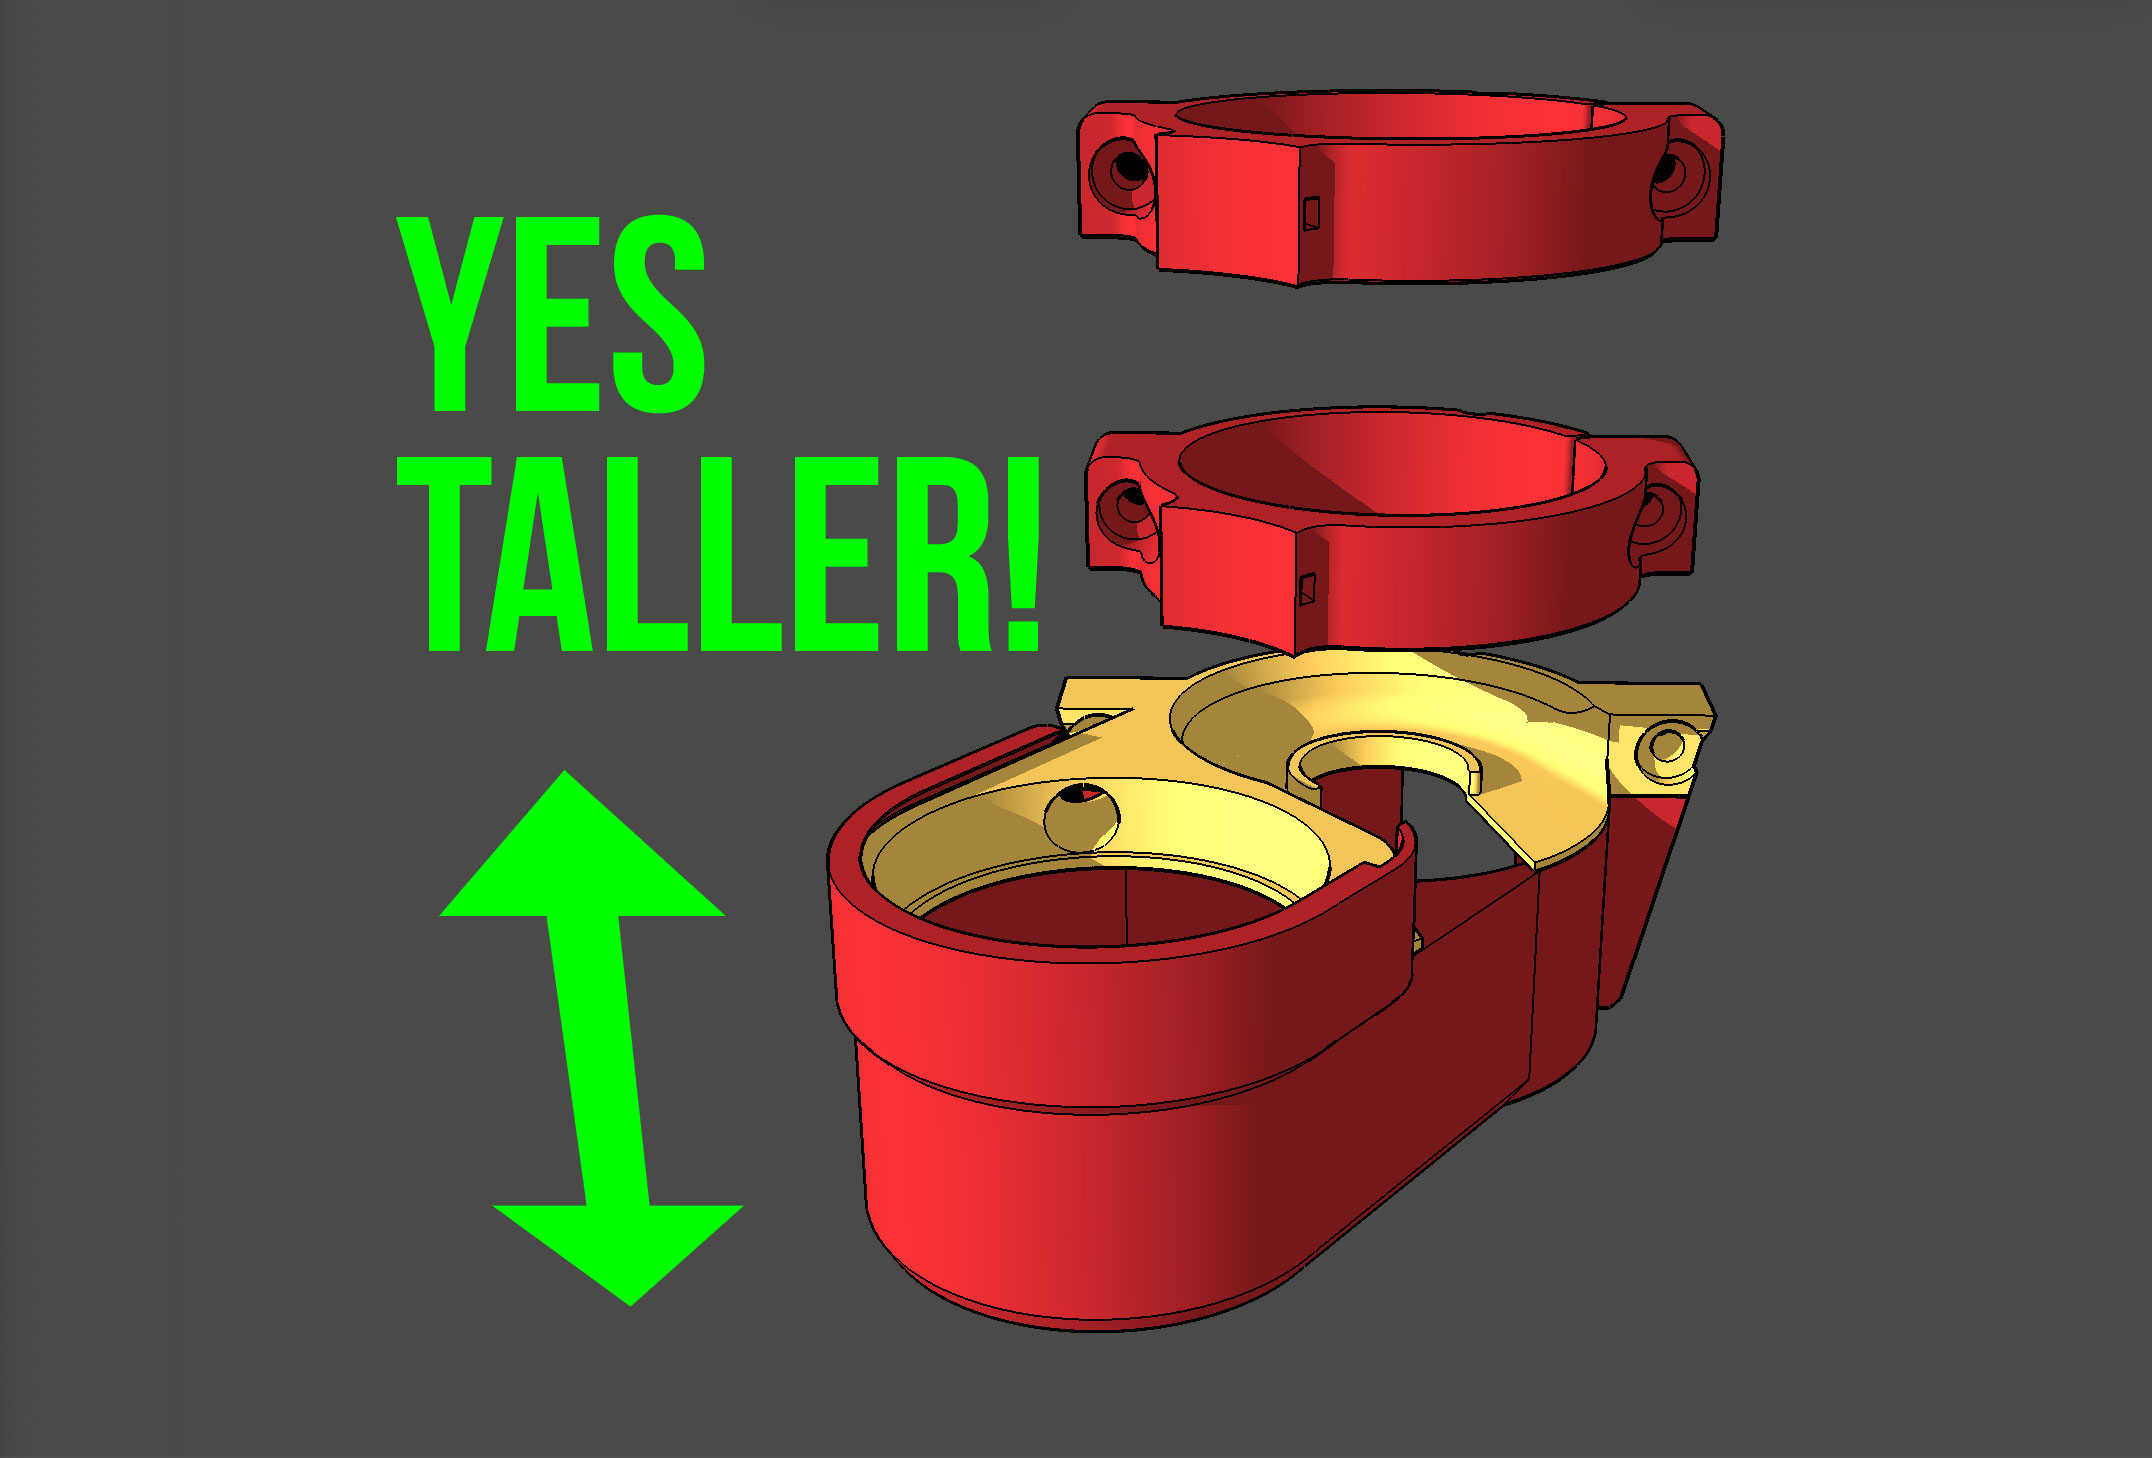
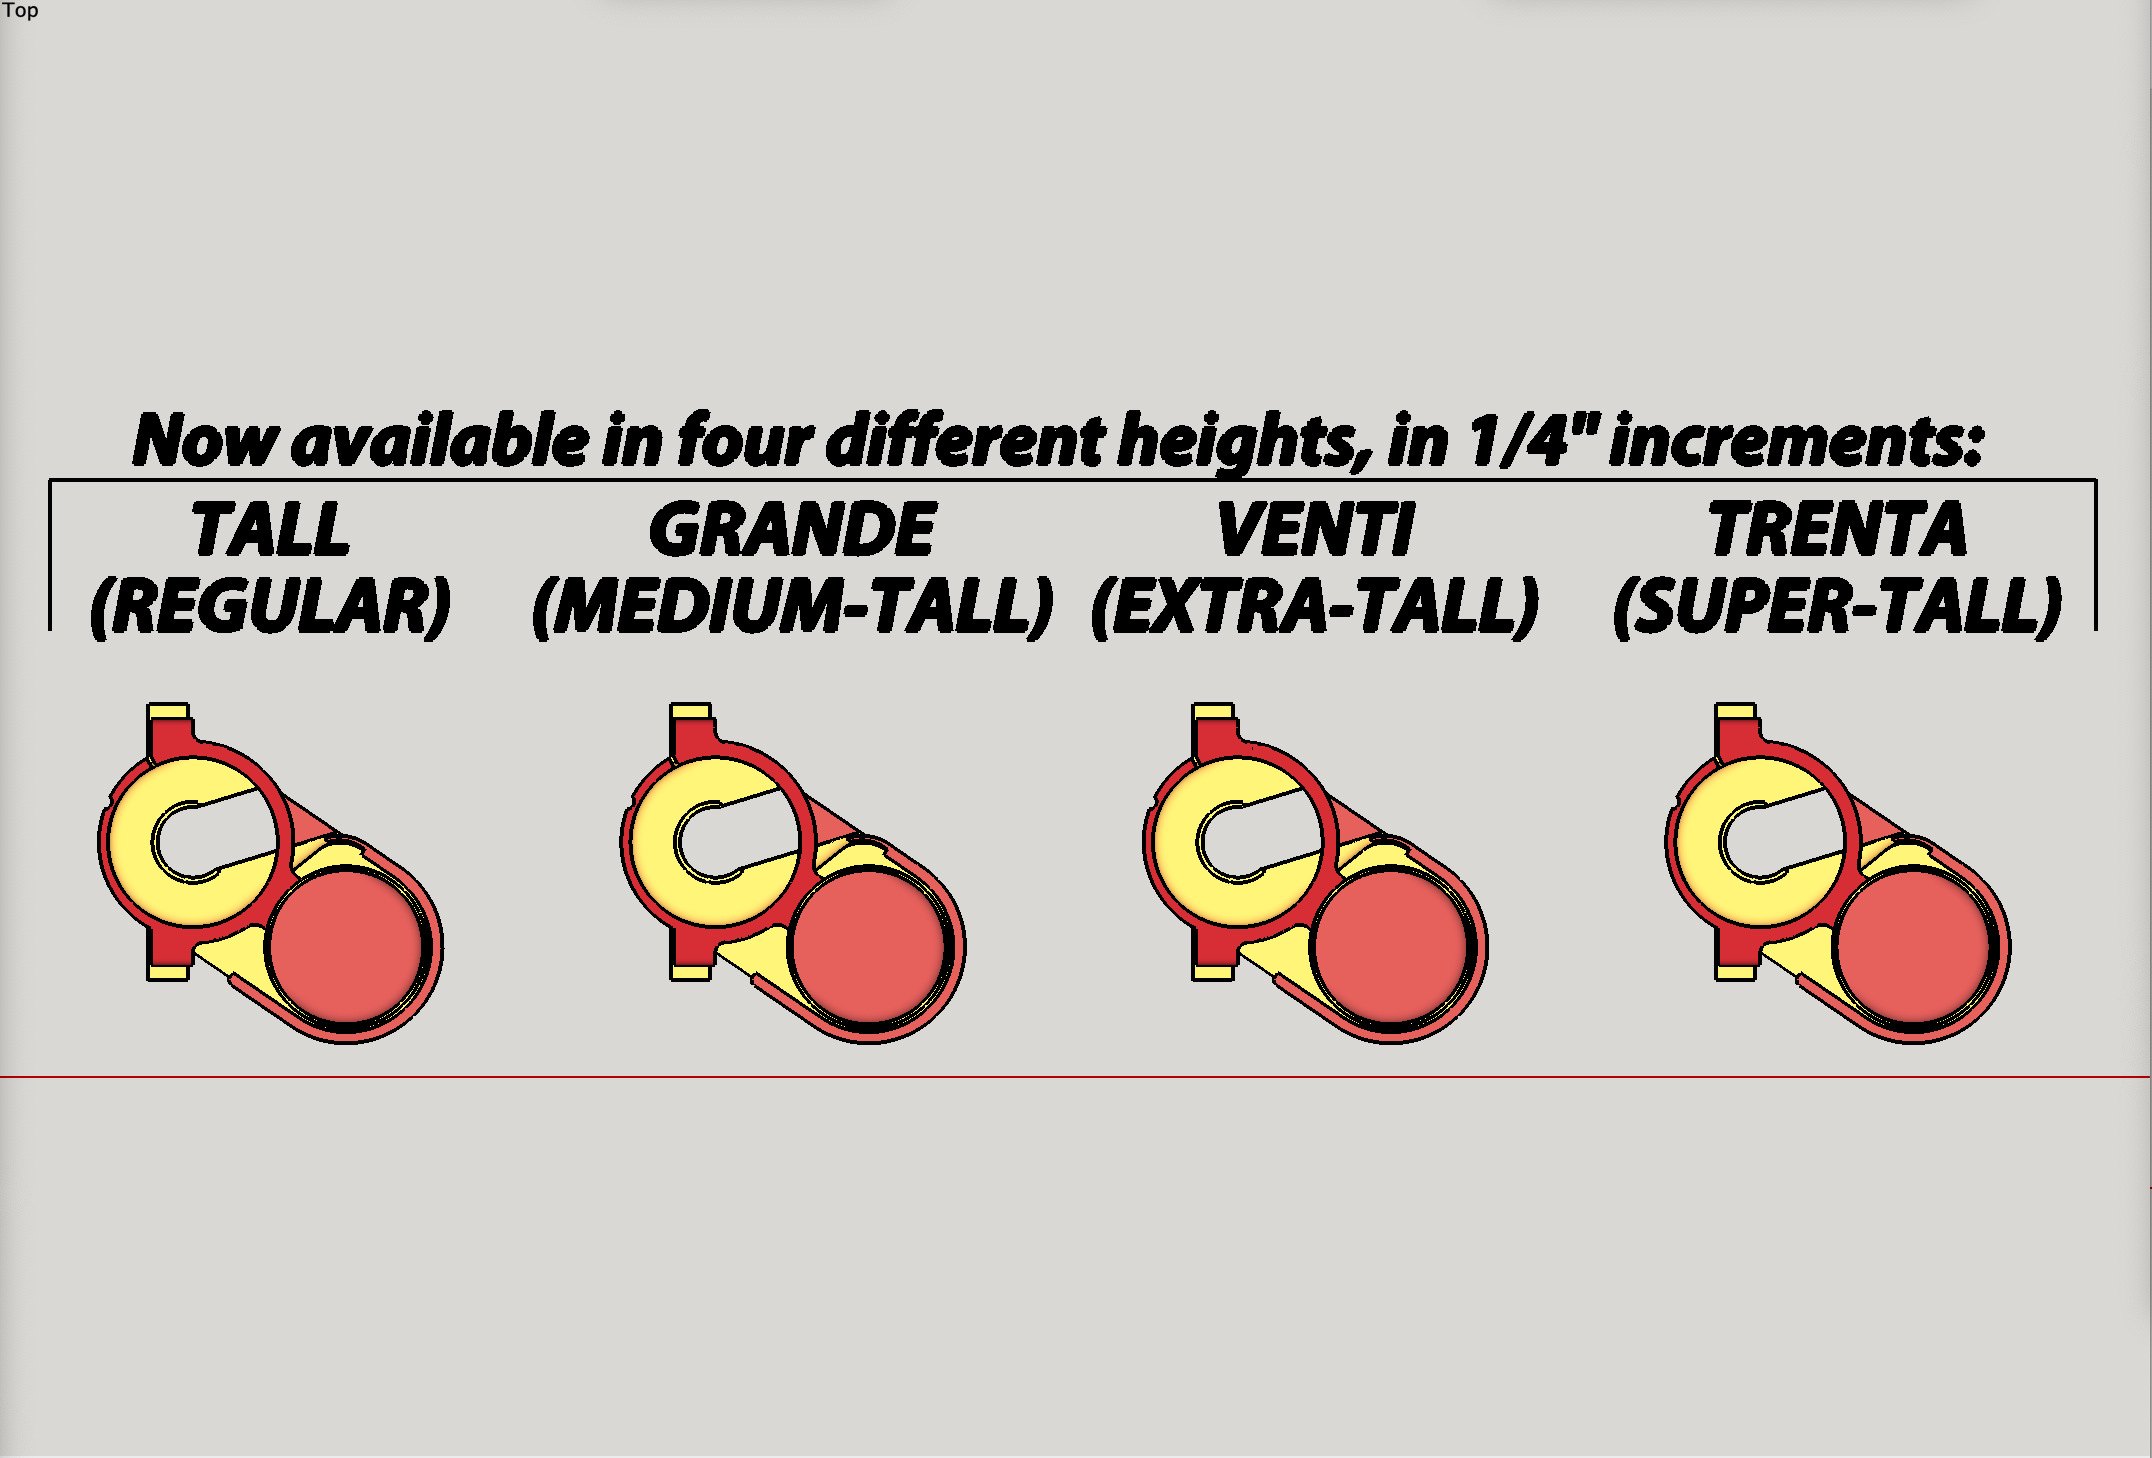
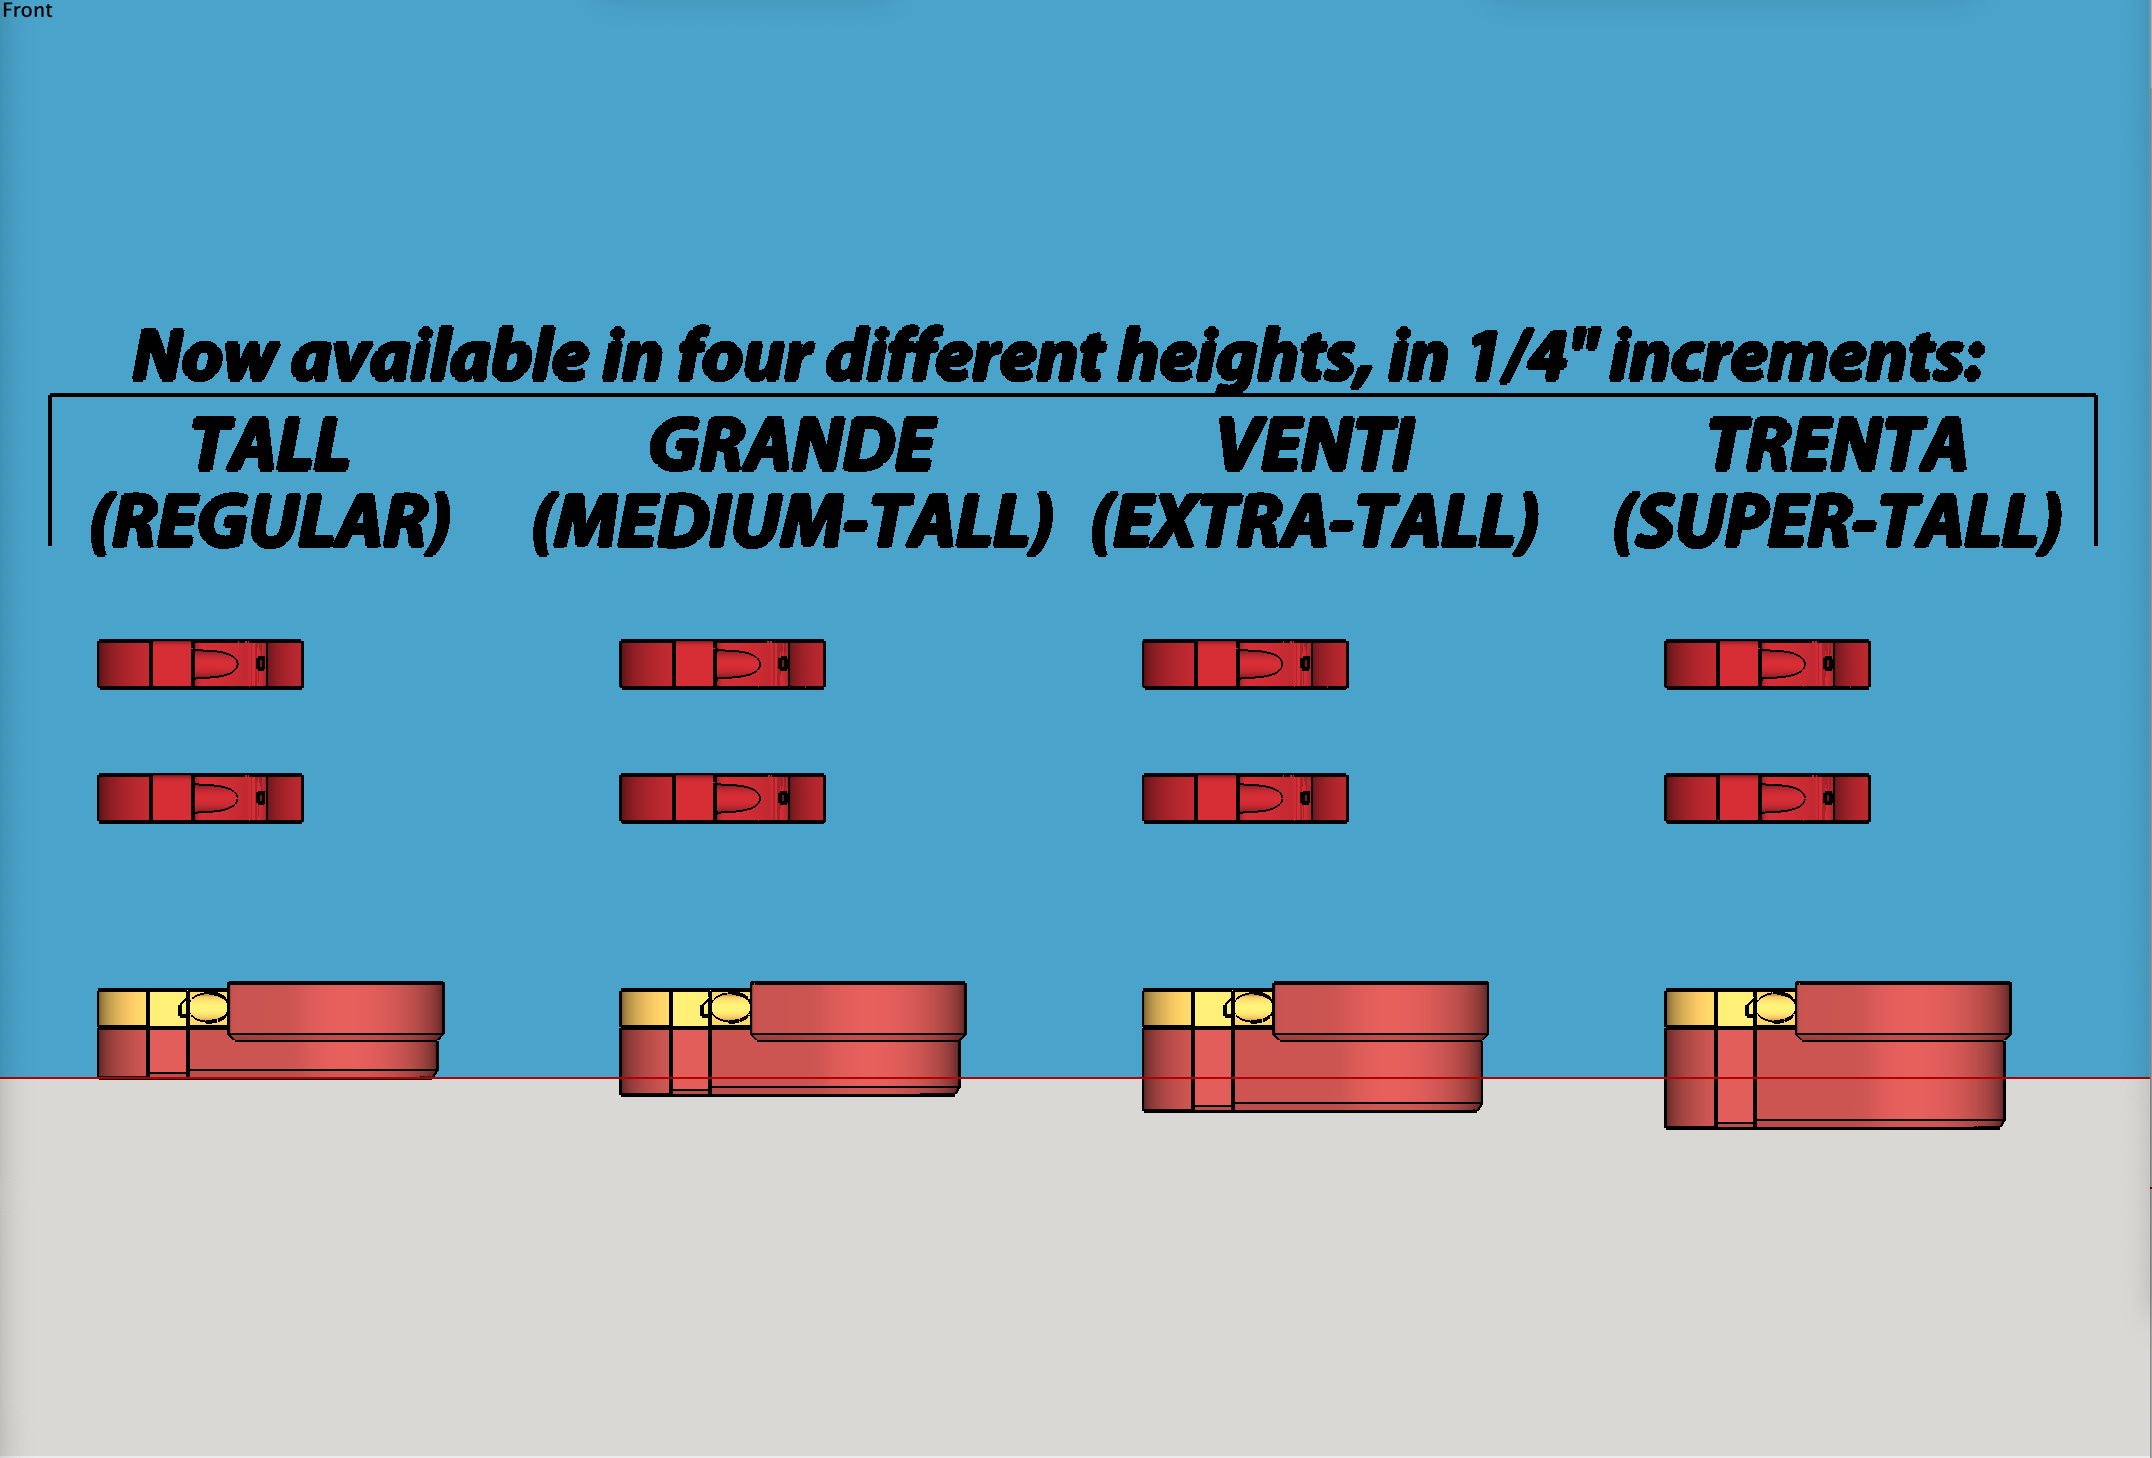
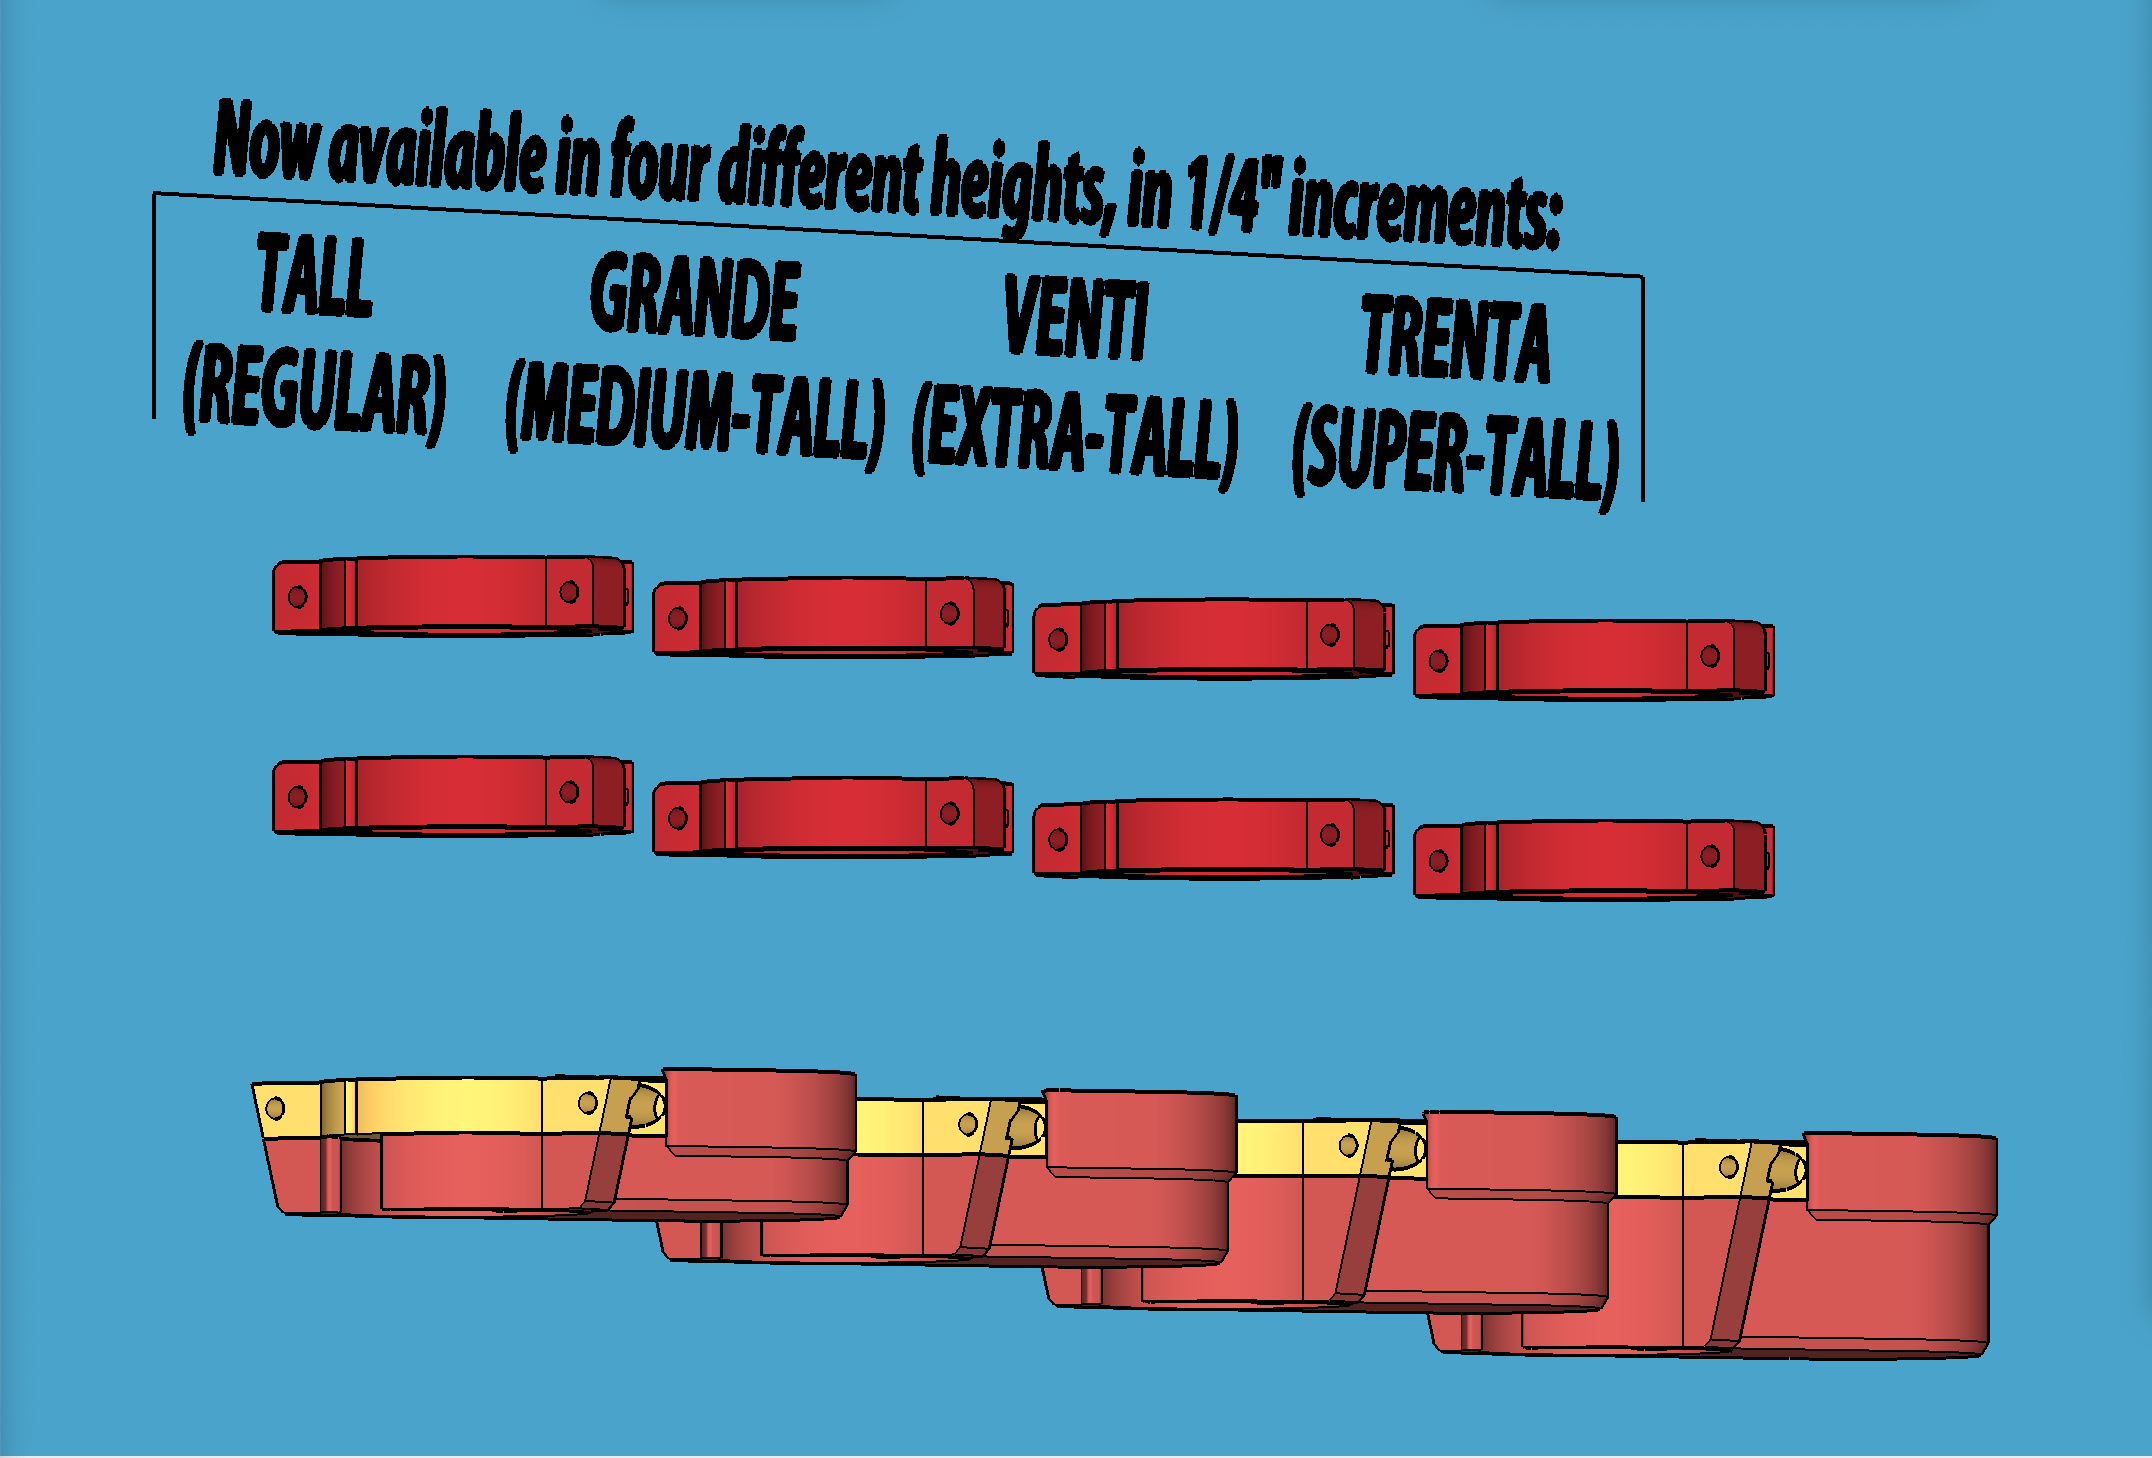
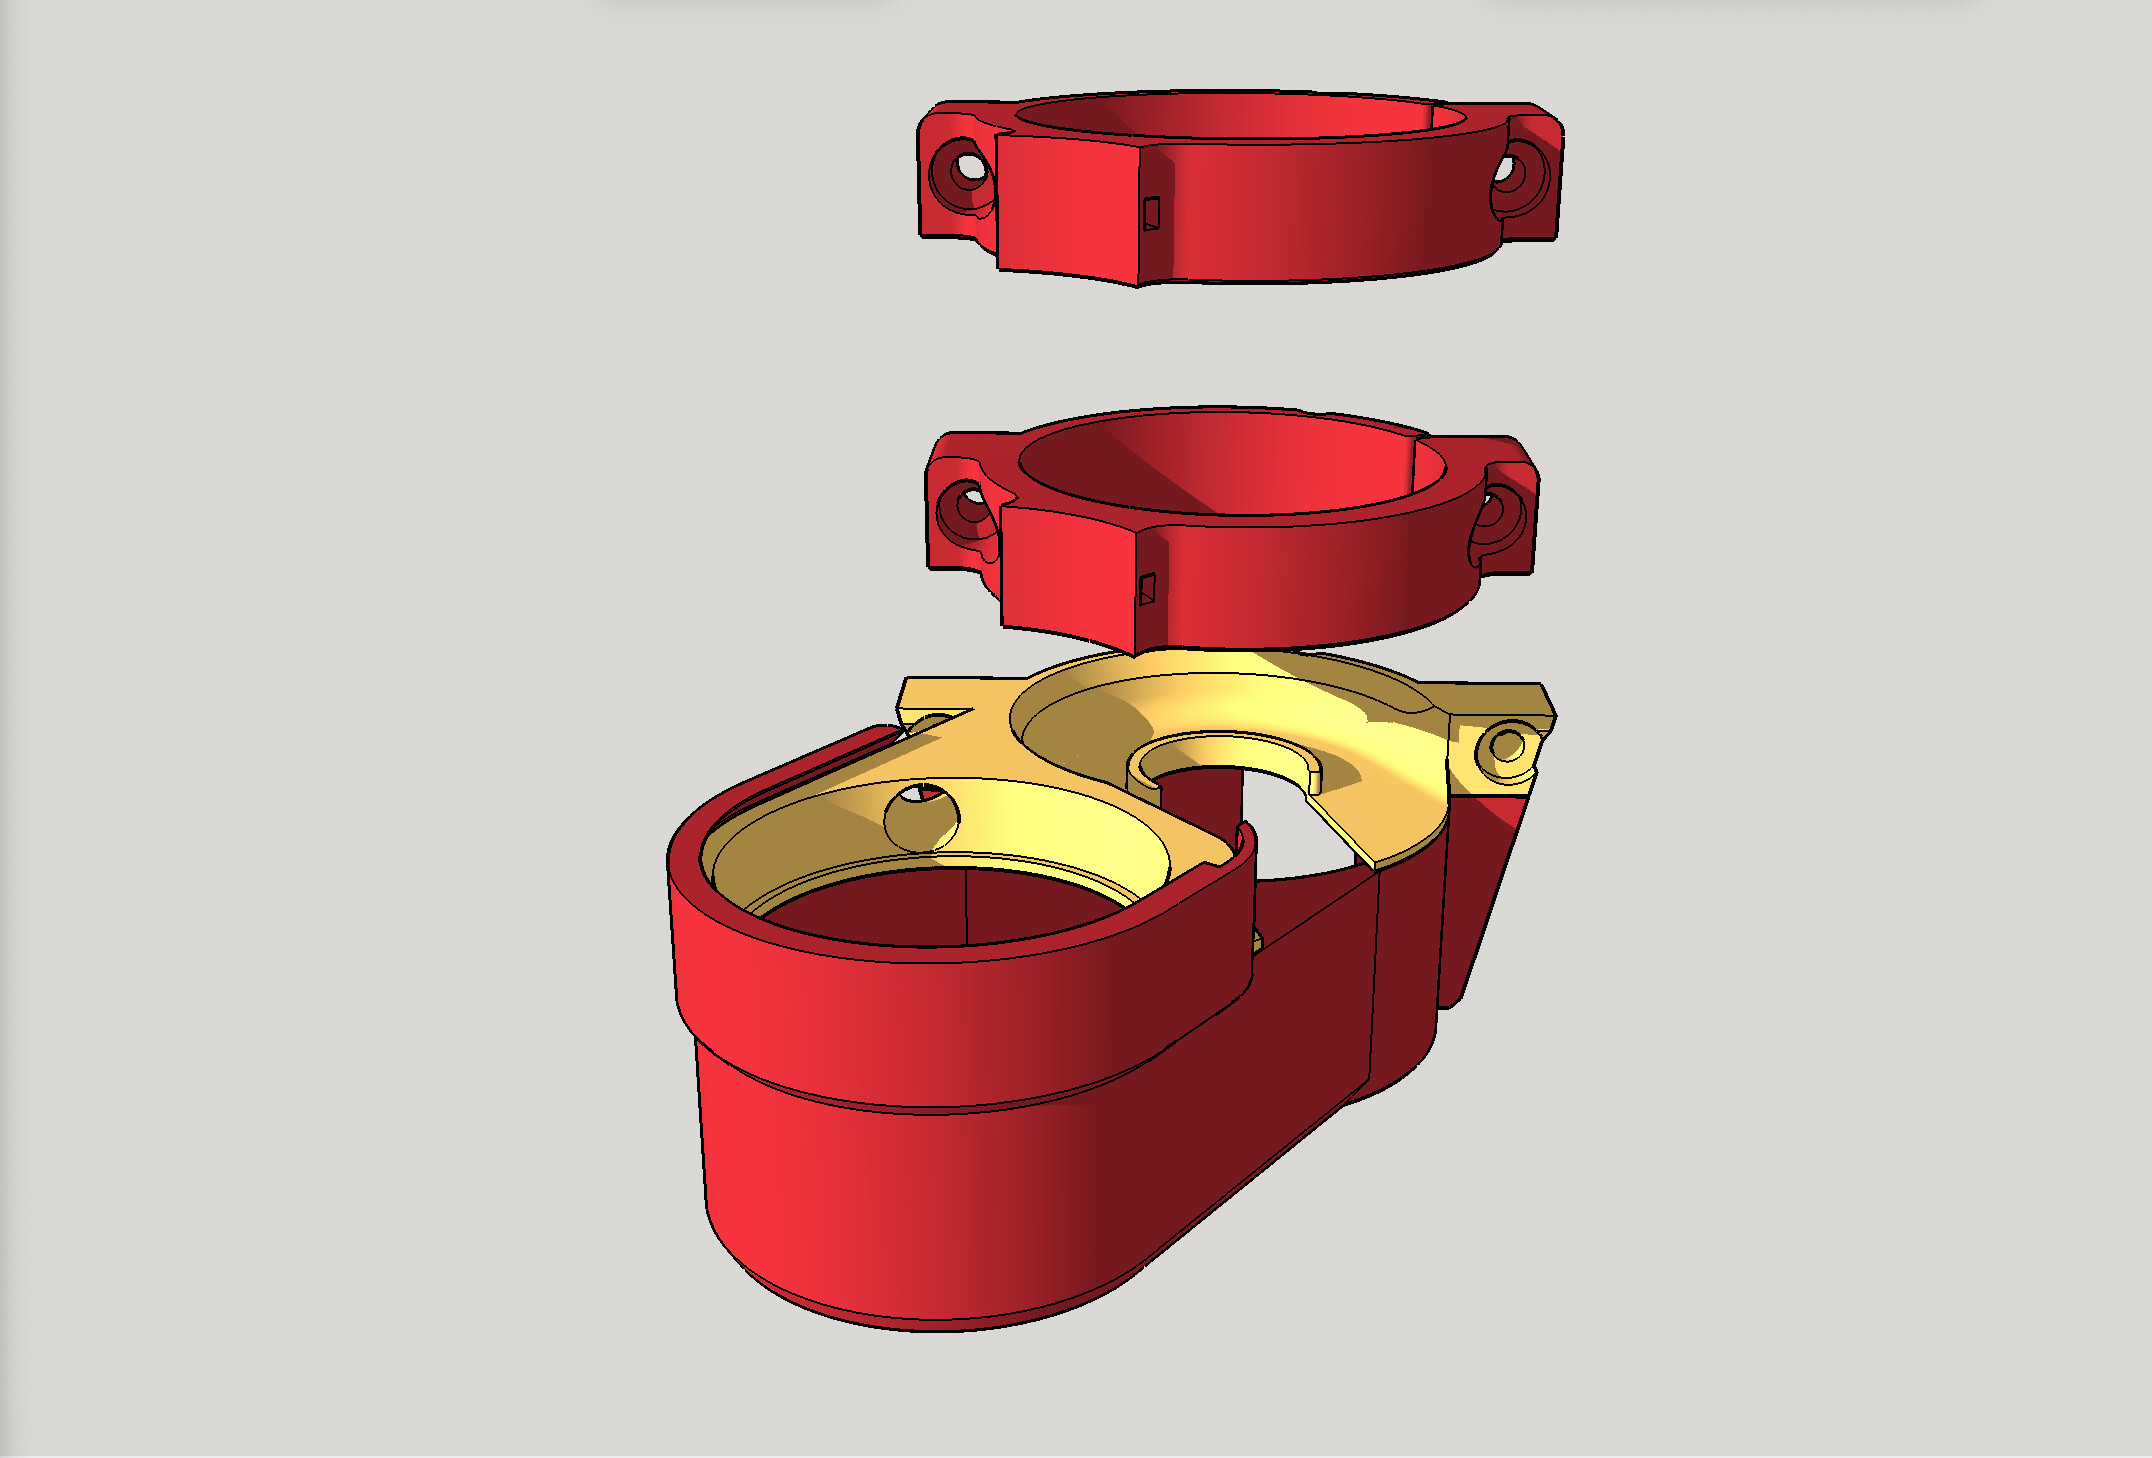
When you are not cutting deep and you want to get your dust shoe closer to the work, you can always insert your bit further into the collet, but there are limits to how far that can go. Whenever you need “more” — and especially if your collet situation is a challenging case like @Jonathjon’s … here’s a link to a newly posted remix, in which I offer 4 different heights (3 new ones beyond the original) of the vac shoe “lower” part.
Thoughts on printing a Venti or Trenta in TPU and using for jobs where you expect dust shoe to get compressed against stock? For a very soft TPU, potentially harden/reinforce the top rim after printing. e.g. Bead of epoxy/polyurethane/super glue, or something else? Around outside of the top lip (not too thick on side contacting XZ plate)?
So, I printed two new “vac lowers” — one from the “regular” original file, and another from the tallest one. However, I made some changes in slicer settings:
The regular was sliced at 30% infill, with 3 perimeter walls, and it was sliced for one of my BIQU B1’s.
The tallest one was sliced at 20% infill, with 2 perimeter walls, and it was sliced for my Ender Extender 400 XL.
I don’t know if those slicer differences are the reason, but the regular one fits tight, and the tallest one fits loose and has a lot of play. Remember, the upper “mounting track” portion is the exact same geometry in all the versions.
Just to see, I will reprint the tallest one with the exact same slicer settings as the regular one, and if it still fits loose, I will know it is not because of slicer settings but because of something else, perhaps added weight. I suspect it’s the slicer settings.
It may be the opposite: under extrusion on one of the profiles. I think the key was not the number of walls, but the fact that two different printer profiles were in view.
Also note: although they were originally sliced using two different printer profiles, both were printed on the same printer (the Ender Extender).