If you have two of those, why are you looking into the MPCNC? Like you mentioned, use those as your horizontal rails, then all you need is a gantry. Since you only need one Hiwin rail on each horizontal, remove the extra rails and mount one to a much smaller extrusion. It will be vertical, so no sag issue even if it’s 8’ long and keep it as light as possible for optimal speed.
Those machines must have had a giant motor to pull the print head back and forth so fast. If you want speeds like that, you’re going to need some big steppers.
I felt the MPCNC would keep the engineering to a minimum. I’m concerned about getting lost in the bits and pieces. If it were my skill set, I’d be fine. It’s not.
From this post, I’m better understanding how mass and acceleration/deceleration and keeping things beefy that don’t move and light that do move, etc. is priority.
If I go with the existing materials, it looks like the working area will be 138"W x 86" H.
I just built a 96" x 84" clam shell vacuum press (modding a 4’x8’), so I really want to preserve 84" as the minimum. My main rotesserie easel is 14’x9’. If can get the large plotter going, it will be nice art making kit. And I still have my 4’x8’ Zenbot.
I agree losing a rail on the Y axis would be good idea, resulting in less friction.
The uv inkjet’s original motor was a big servo, maybe 5"x8". The print head probably weighed 40+lb.
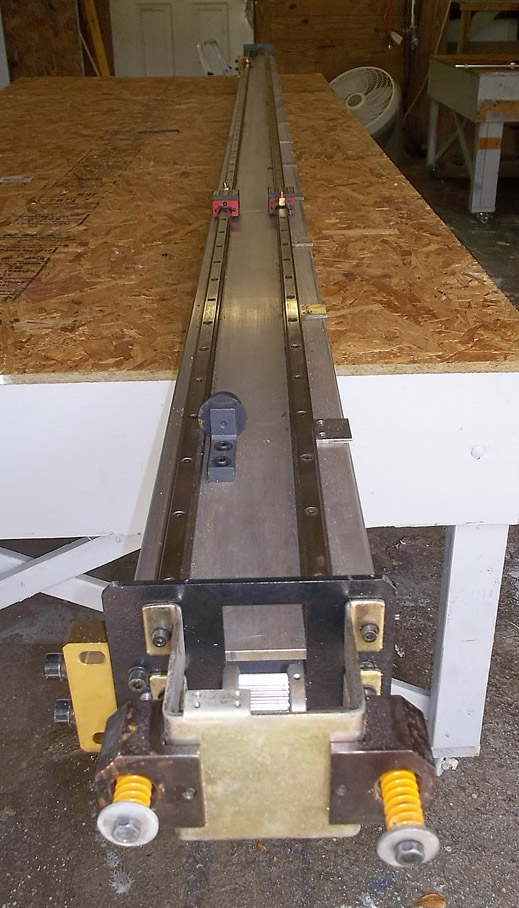
I noticed one of my gantries is missing its belt and the drive pulley assembly.
(How does one post photos to this board? I’m getting “denied” when attempting.)
CONCERNS
1 after some thought, I might not be able to go that fast just due to the rheology of my materials.
2 Angular deviation amplification might be tricky across such a large span. Usually we mill the flaw board on a CNC router so whatever problems the machine has becomes an artifact of the table. I might have to mill the plenums top just once with slowest, lightest passes. Maybe turn the machine off and manually do it (like a router sled).
If you’re limiting the output to drawing, could you substitute a hobby-style servo for the Z axis stepper to keep weight down? Use a spring to keep the drawing implement against the wall, and use the servo to lift it away.
I think you’re right. There’s different surface effects that a silicone brush or paint brush produce depending on the pressure. But that adjustment could be manual, even loosened or tightened on the fly.
Are there prefab hobby pens with actuators?
More on speed… orob addressed some of this in his post above, but worth repeating here …
Now that you have a basic idea on the design, you need to contemplate to go with a corexy or a simple cartesian setup. You will achieve greater speed with the corexy because it allows you to eliminate a motor on the gantry. No motor means less weight which means less momentum which allows for greater speed. The drawback is that the design increases in complexity as there are a lot more belts and pulleys involved (more parts to design and build/print). My wall plotter is a simple cartesian that uses 2 motors to move the gantry in the horizontal direction and a third motor that sits on the top part of the gantry that moves the tool head in the vertical. It is much simpler than a corexy but that third motor has to move with the gantry. In my case, the weight of the motor is rather insignificant compared to the weight of the gantry itself, so its no big deal, but its a small motor because all I am moving around is a pen. Your motor will likely be significantly larger, so it might be a factor. Just something to consider before you get too far down one path.
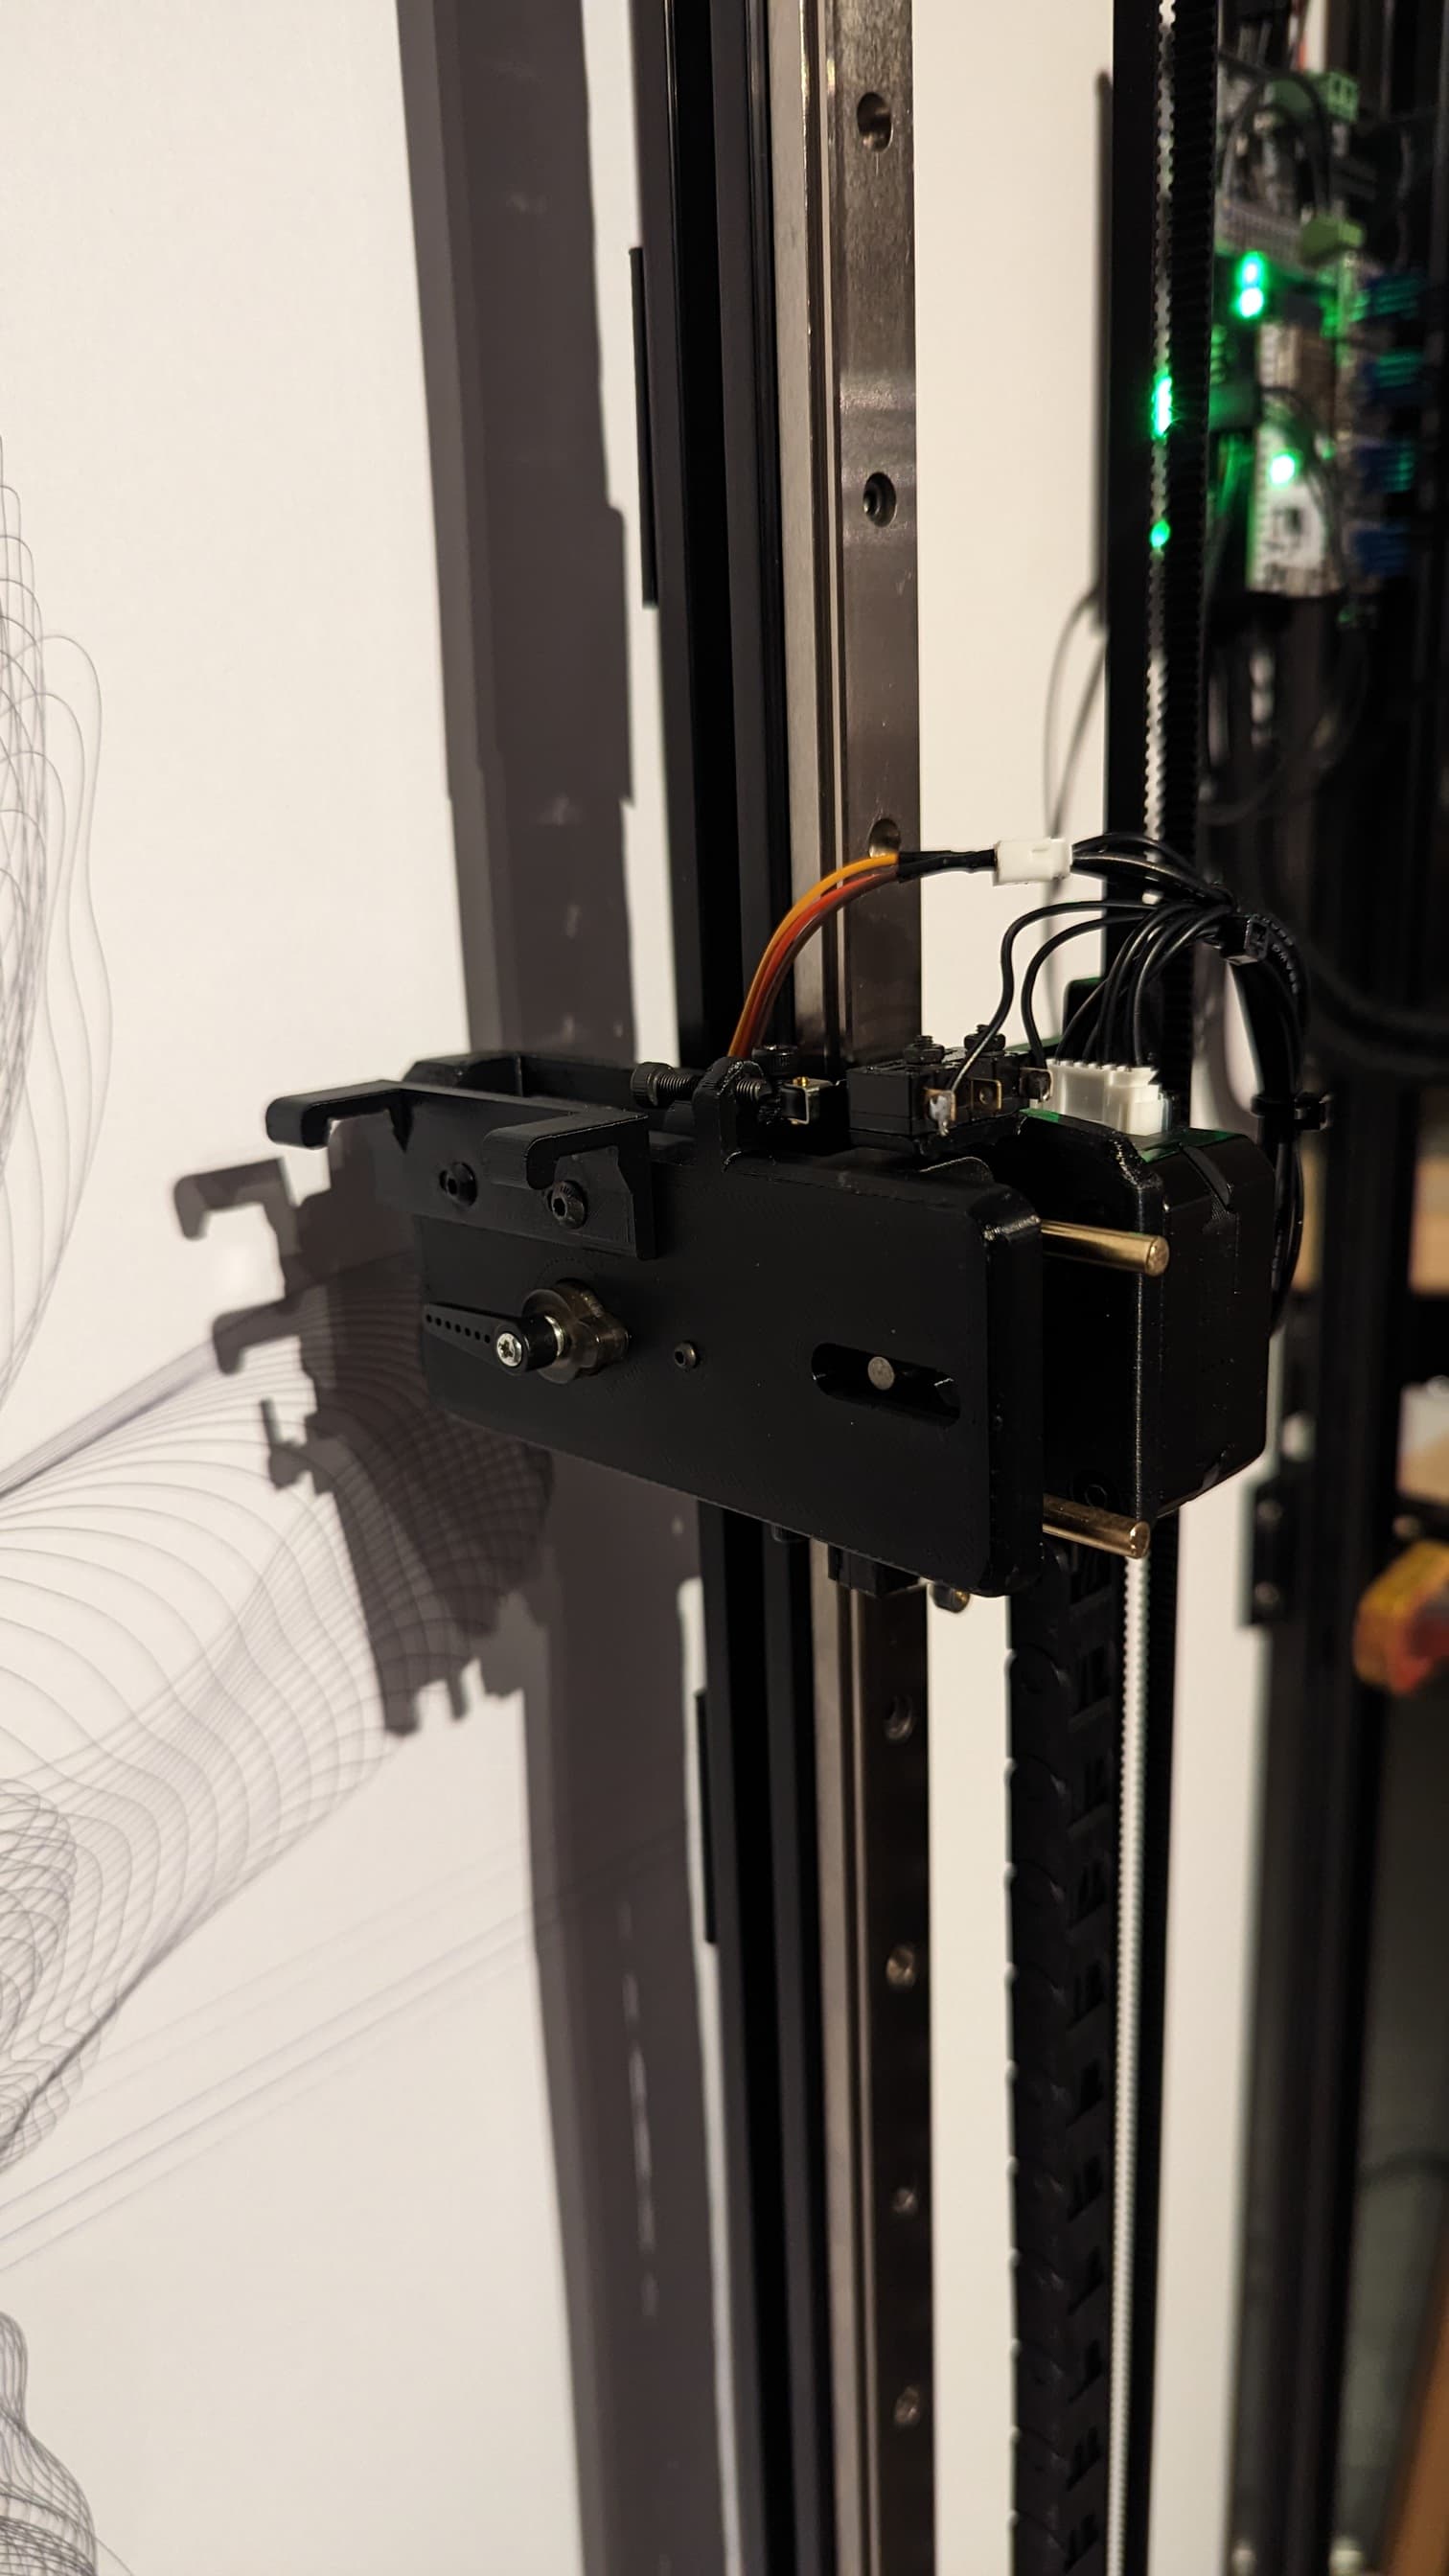
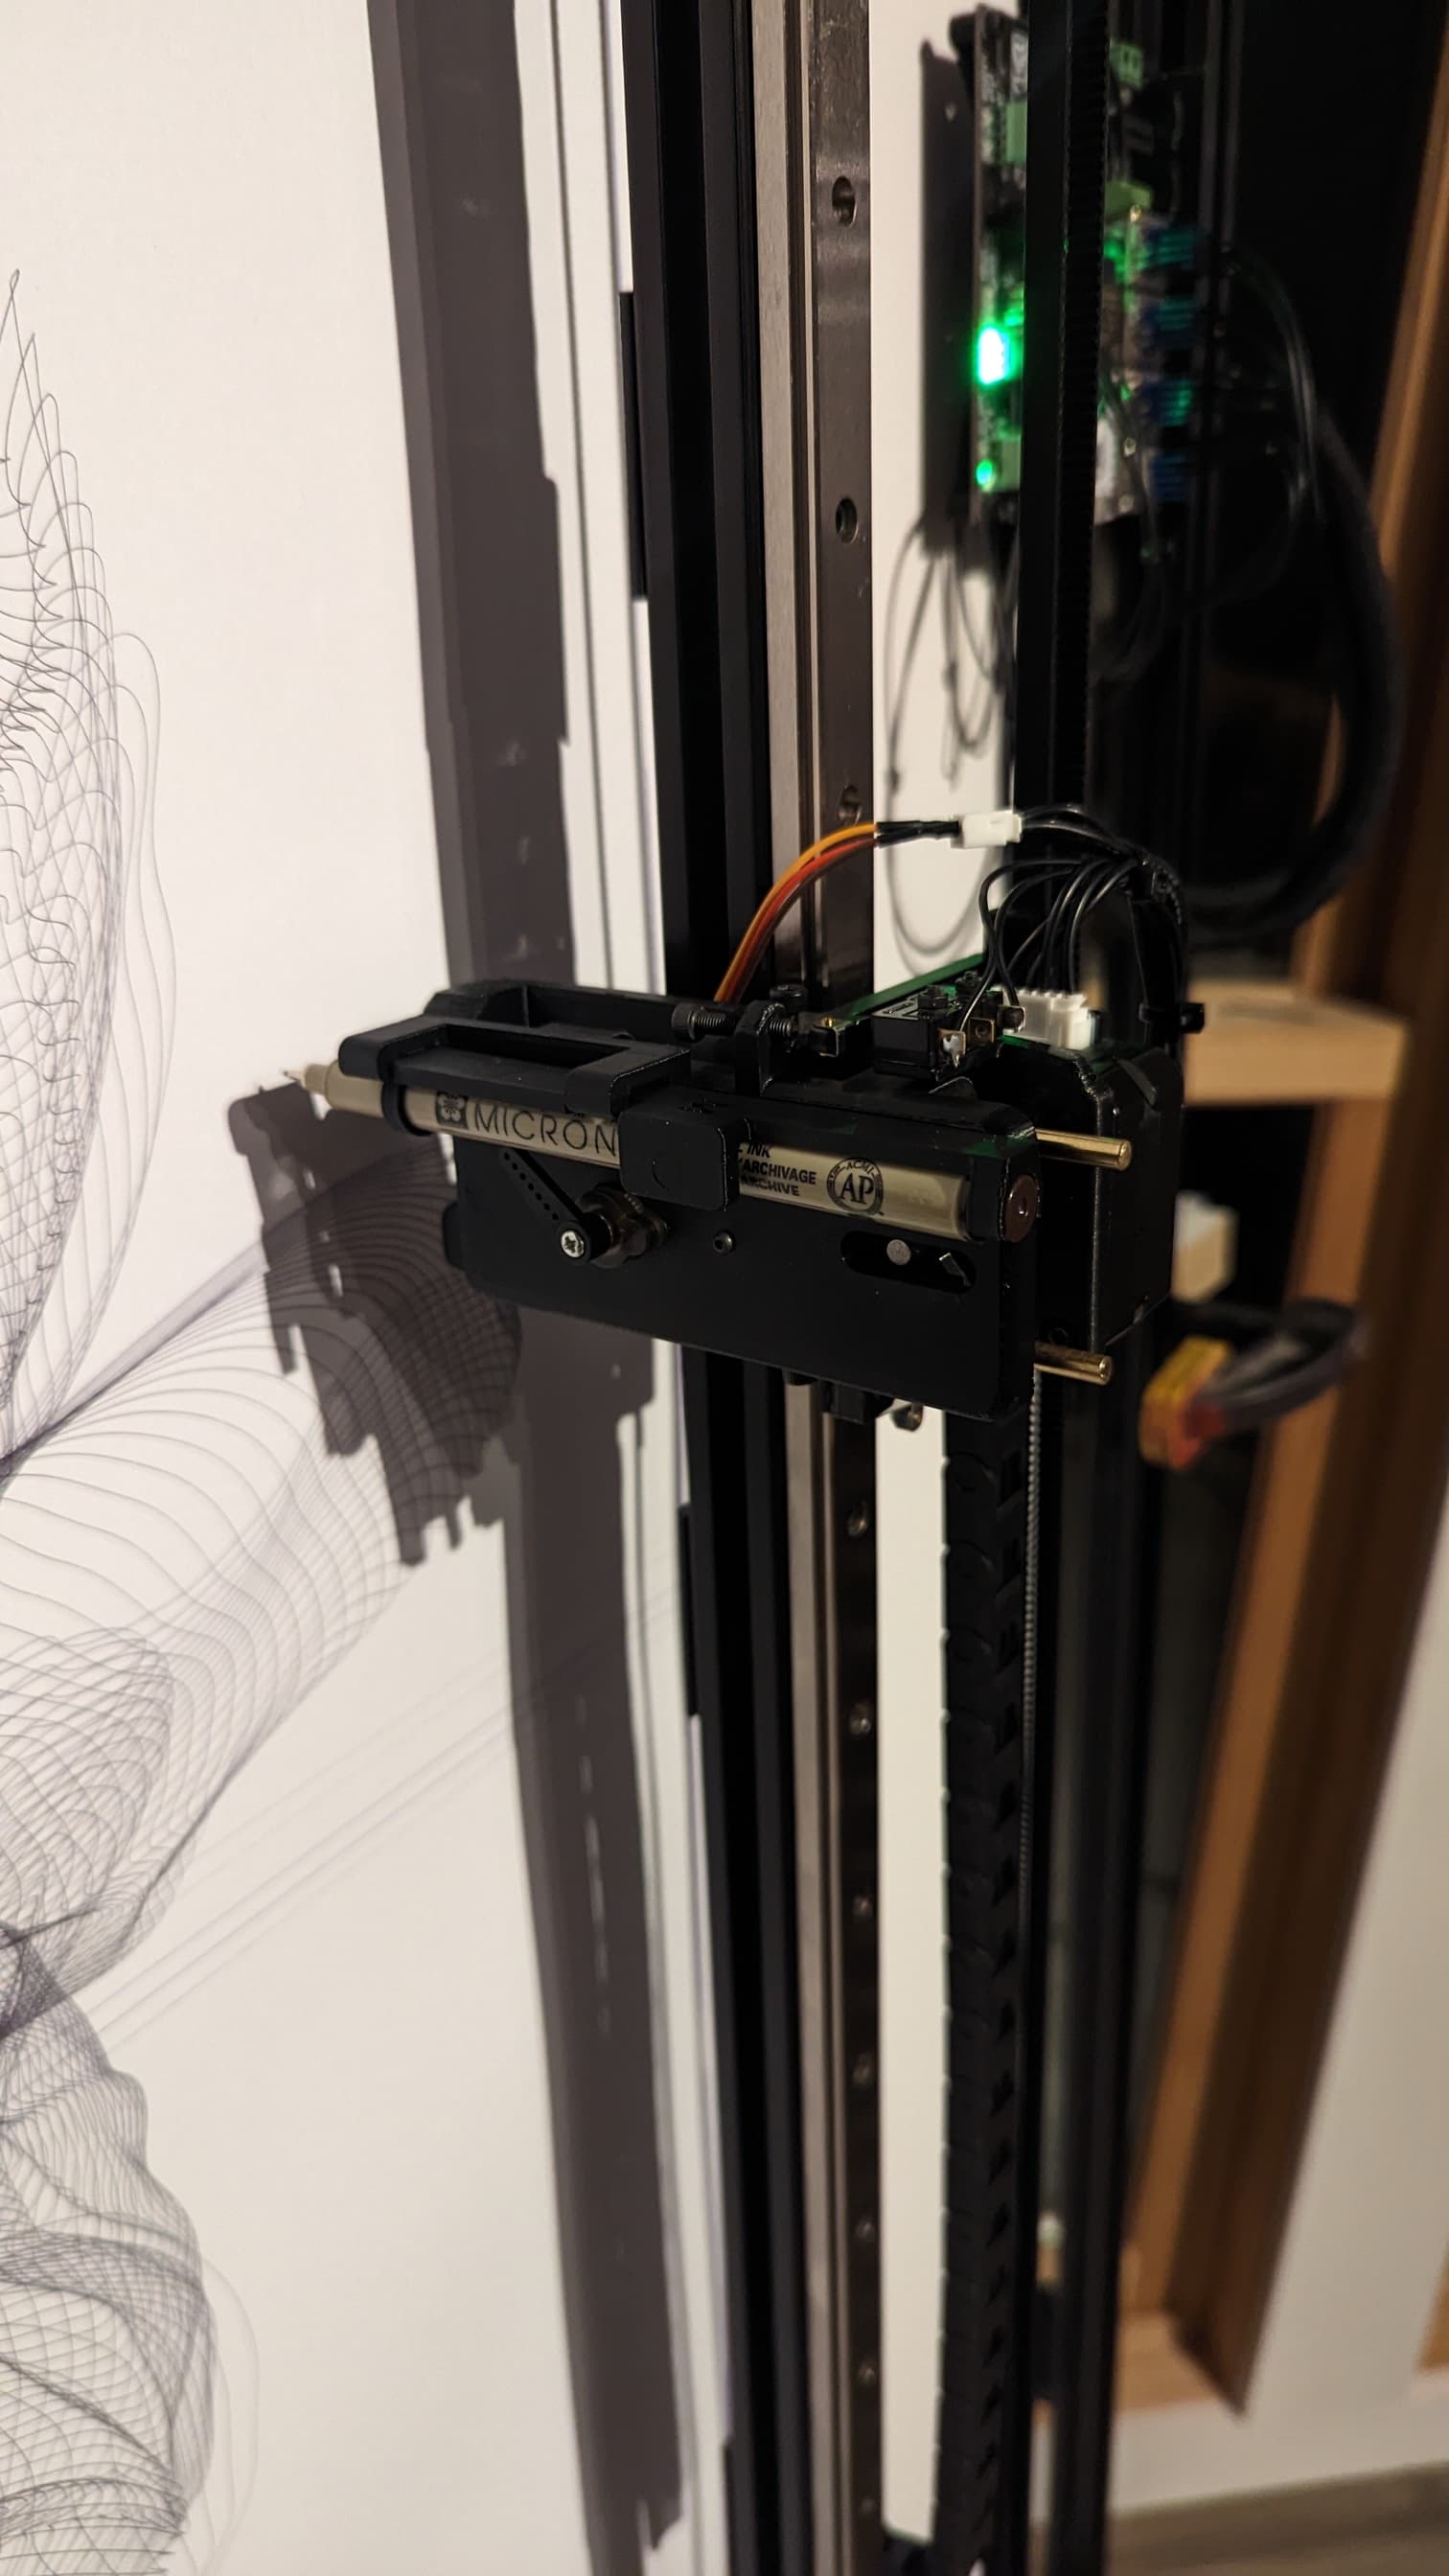
I went with a small stepper to control the pen height. I do use a spring to keep the pen on the drawing surface, but I was thinking I might eventually get into brushes (brush pens actually), in which case the spring alone wouldn’t work so well. My design can accommodate different pens and brushes if I get that far. When I find a new pen I want to use, I design a caddy for it, so all the different style pens can sit in the same tool bin. I’ll take a few pics to better explain…
I don’t think these pics do much to explain the mechanism, but here they are. One with a pen and one without. The pen holder rides up and down on two brass rods (on four bearings). The pen is lowered to the paper by the Z stepper but not forced to a specific height. Like an old turntable lowering a stylus to a record. Except, it can’t use gravity, so there is a spring involved.
Edit: In the case of a brush, it can be lowered to a specific height. So, best of both worlds.
I’m hoping to start a thread on the build where I can go into more detail. Hopefully in a week or two, but food for thought for now.
The CoreXY look really cool and fast. But at the distances these belts would have to be laced up, it seems like I’m asking for a lot of bouncing. Also, the studio can be come quite dirty with work. The less surfaces the better for the machines.
Attached is one of these gantries. Like I mentioned, one is missing the belt drive assembly. I suppose there’s some alternative. I can buy two or a whole set. I noticed some similar offers on the internet.
I like that pen holder. I saw where a servo might serve better as a pen Z-axis as they re-zero? What’s your opinion on that? Plus I can imagine this machine is going to be very noisy. Are servos a no go, complexity wise?
I agree. One can program in gentle pressure changes which would produce some very nice effects.
I’m kind of sold on getting a C-axis in the mix on the Z.
But really, if I even had the base machine on the wall and rubber band a silicone brush to the Z, I’d be going great. At least the Z is a quick change item. I can start simple and work my way up.
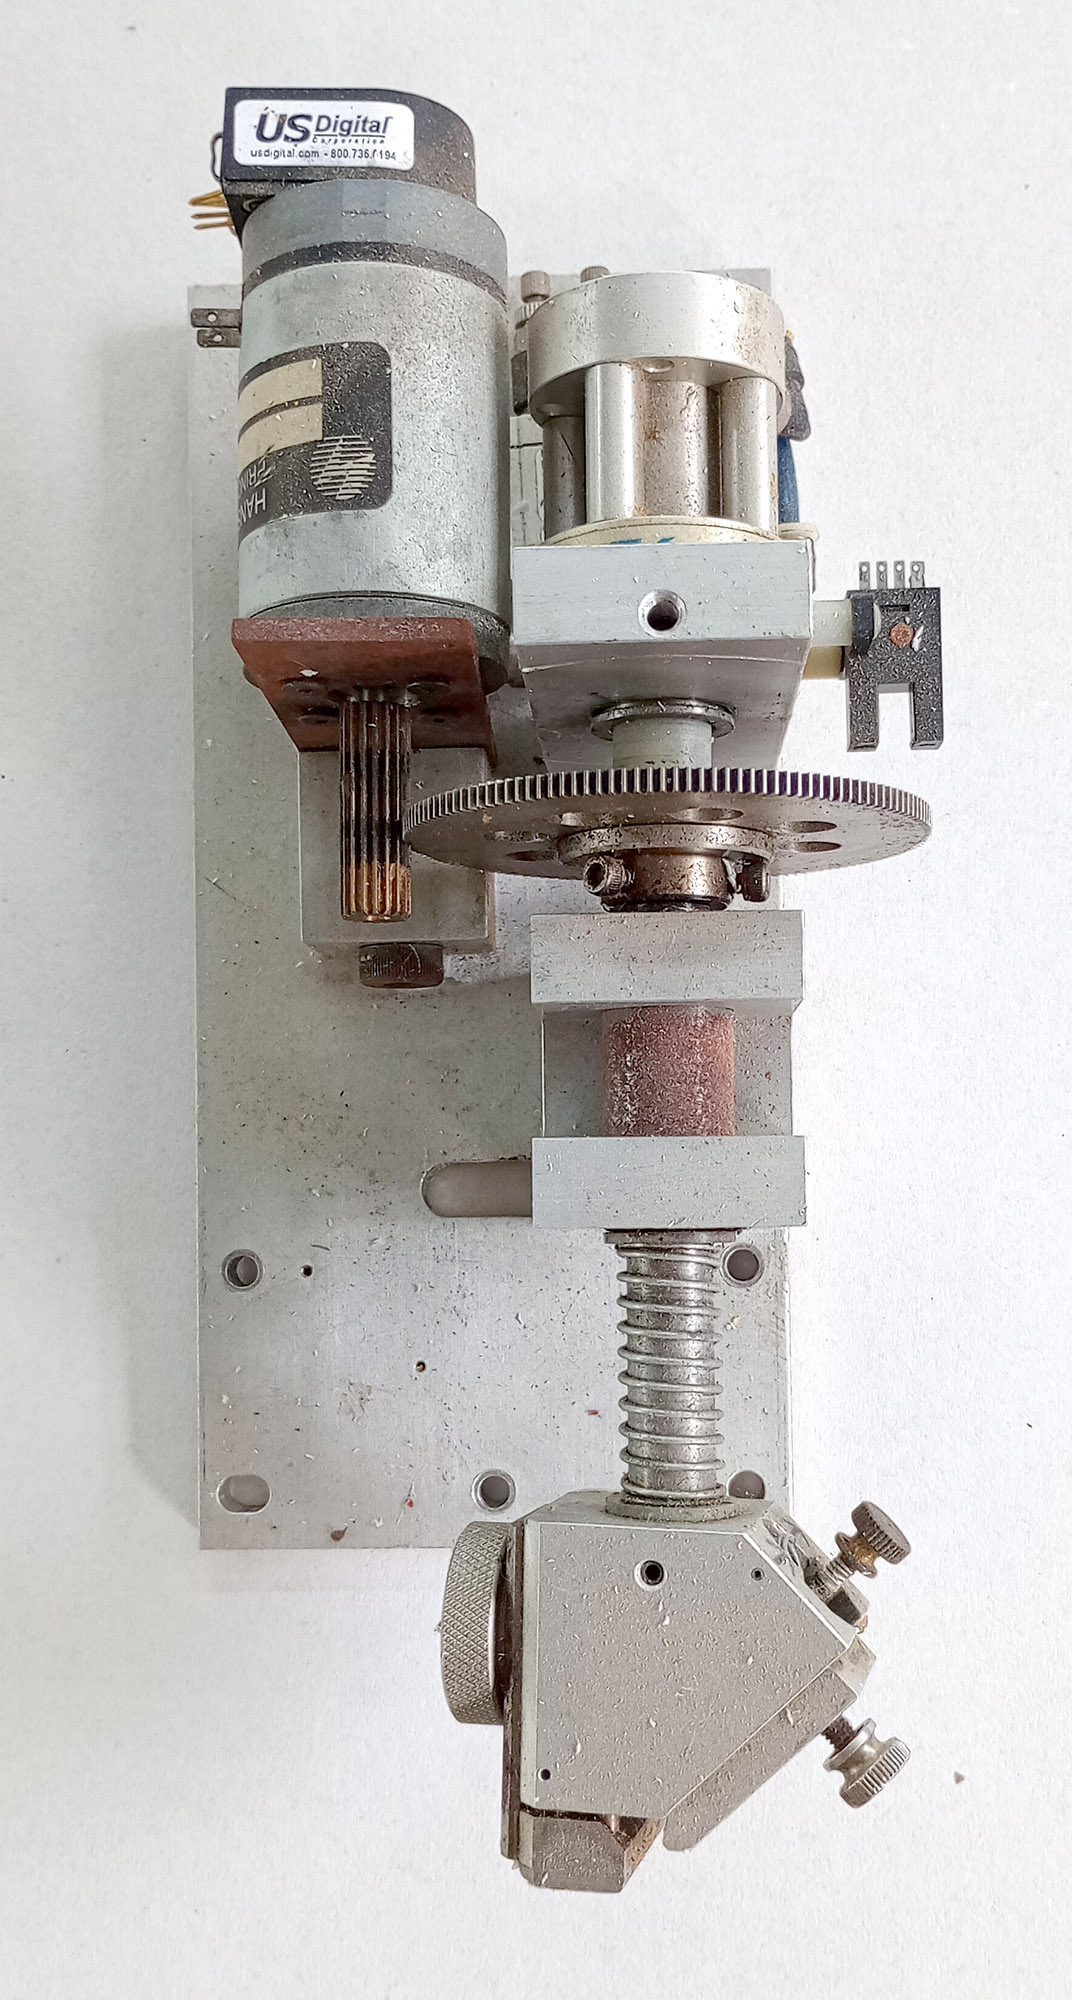
I’ve got this mat cutter head. Maybe I can put it on a diet?
I need to find this graveyard of large format printers. I could use a few of those gantries.
Yes, technically you could accomplish the same functionality in my pen holder with a servo instead of a stepper. And once calibrated, a servo remembers where home is, whereas a stepper needs to re-home whenever power is lost. Servos are significantly louder. There isn’t really a right or wrong. Personally, I like the grace of a stepper if you can accommodate the size and weight. To me, a stepper is like Matthew McConaughey and a servo is Bobcat Goldthwait. You can tell them where to be and when, and they’ll both get there, but Matthew is going to make a smoother entrance, every time. OK, maybe a bad analogy, but it’s 8pm and I’ve had a few.
We are focusing on keeping the weight down and now you throw that C-axis back into the mix. As long as it doesn’t have to move very fast, I think you can find a place for it. This is why GRBL has a speed setting.
You need to put that mat cutter back on the shelf and save it for another project. Not only is it way too big and heavy and would be comparable to using a sledge hammer to hang a picture on the wall, it looks like it has a rotary encoder on it. Way too complicated if all you want to do is spin a brush. Making a brush holder that can be controlled by a C-axis servo wouldn’t be that difficult and would weigh very little. If you needed more than 180 degrees of rotation, a servo probably wouldn’t do it. In that case maybe use a stepper like they use as extruder motors on direct drive 3d printers. Very lightweight and easy to interface with the rest of the machine controls.