How About One More Primo MPCNC Build 20 x 28 working area Jan 2022

Nice table.

3 Likes

Did a bit more work on the mobile cart today.
Haven’t decided if I need a bottom on the tabletop or not.


4 Likes

A torsion box’s strength comes from having a skin on both sides. Even a 3mm skin on the bottom of that box will make it far stiffer and stronger.

2 Likes

LOL… came in for another cup of coffee, I had just cut the bottom skin earlier this morning. I woke up realizing that the strength of the box, or TJI or sheer wall is derived from having the perpendicular ‘rib’ in between the two planes as you pointed out. :slight_smile:

3 Likes


Next, I’ll work on trimming out the top and enclosing the cabinet. Once complete, I’ll start the actual building of the Primo Kit

3 Likes

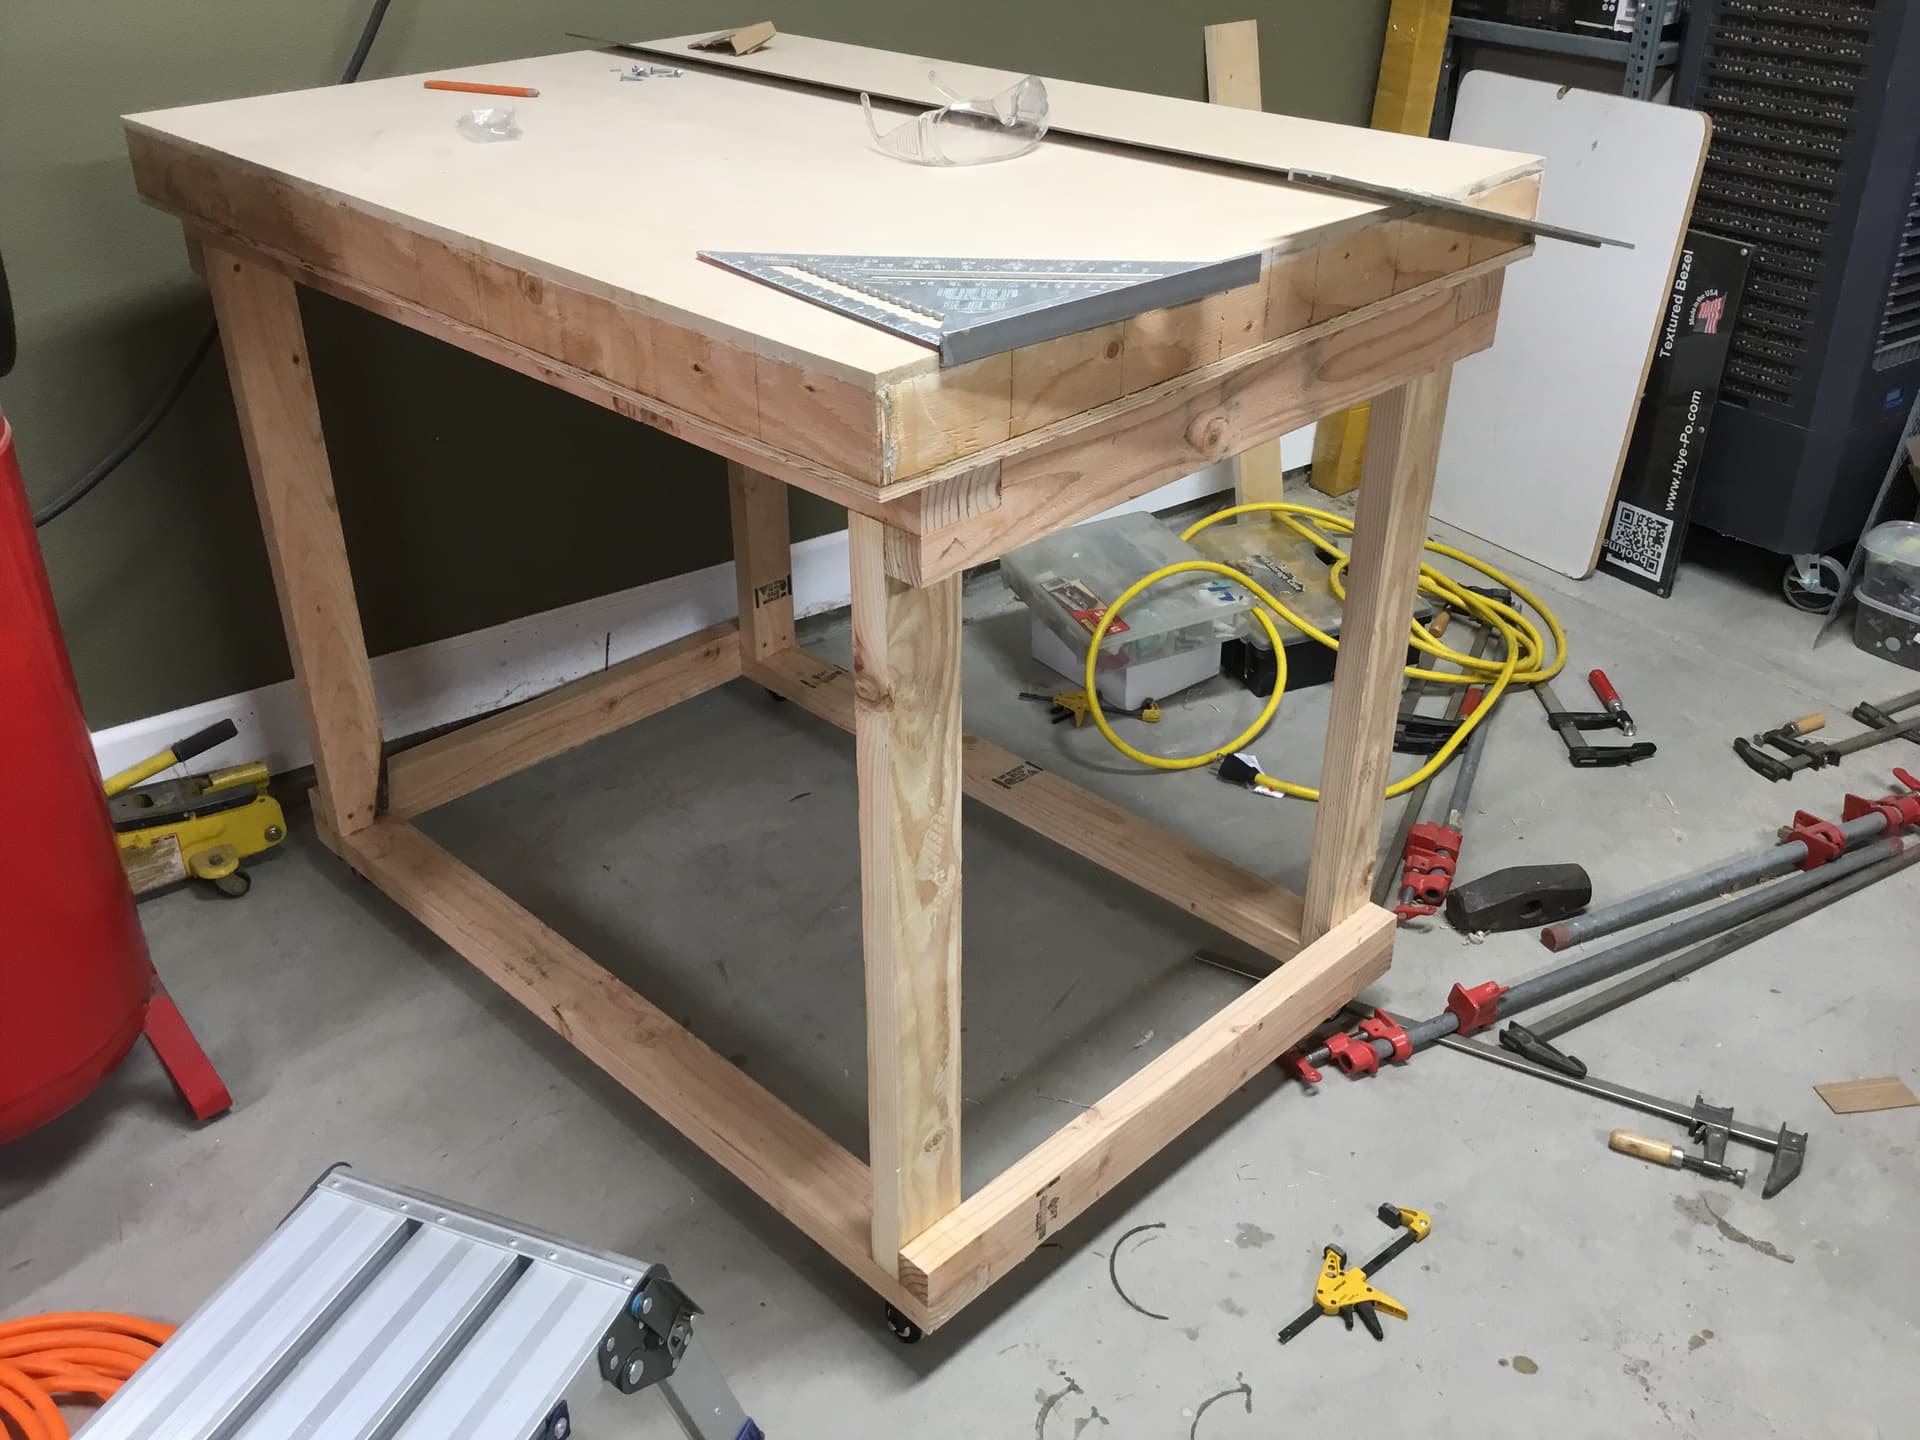
Table top is finished as is the cart. Will probably enclose the bottom for drawers and doors at a later time.

7 Likes

Cart more dunner… :slight_smile: I think I’ll stop with the cart now and move onto the actual build of the Primo. What y’all doing for waste board? lay an extra layer of the 3/4" MDF then mount the feet. I’m thinking of cutting center out so it is easily replaced? how about 1/4" MDF or masonite/white board as it is relatively cheap and easy to size?

5 Likes

Cart looks great!

I went with 5/8" MDF for spoilboard, in replaceable pieces. I wanted something that could take T nuts and still stay out if harm’s way. The T nuts are 3/8" tall, which leaves them 1/4" from the surface.

2 Likes

I have so many iron in the fire… lol I’m hoping to have this build done by end of summer LMAO.

so I downloaded some end caps and drag chain mounts from thgvrs (saw them in another article). but since I went with 1" DOM 1/8" wall, the would likely not fit. So I redesigned them on freecad (my 2nd time learning CAD) and sent them to a guy I know to print. I’ll see how well the new resized endcaps fit and will report and share files upon success for others with 1/8" wall pipe. Admittedly it was fun drawing the endcaps from scratch learning as I went. Also it would be nice to have my own 3D printer that requires NO real technical knowhow (much like the FoxAlien laser cutter I bought, worked right out of the box flawlessly).

1 Like

I had some extra 1” DOM sitting here and well, decided why not have a tad bit more Z so I cut and polished two 12.25” pieces so that should give me about 4.75” workable Z space. I am also going to have the 3030 extruded adapters printed and assemble the 3030 frame on 3030 legs. The timing couldn’t have been more perfect happening upon that post since i had been thinking of being able to use the rolling torsion box workbench cabinet for other tools as well, like the laser cutter. Once i get the printed parts back from my printer, i will begin assembly. I’m getting anxious now. LOL

1 Like

My first Lowrider table was 10’ x 6’ frame using 2x4s from the local box store. It started warping after several months of Arizona heat. I just replaced it with a torsion box table using plywood because the alternating plys are supposed to warp less than solid wood. Time will tell…

1 Like

That is a large frame indeed. how tall were your inner grid parts? Mine were around 3.5" plus the top and bottom 1/2" MDF sheets all glued together. Even in the AZ heat, if its all glued together and snug, it ain’t gonna move much LOL

1 Like

So here is a question that I need some guidance on. end stops. I ordered the complete kit with the SKR PRO1.2, 5X 2209 DRIVERS, TFT35 E3 V3 -FLASHED- unit and this did not come with end stops. Are they necessary and if not, why would they be better to have. I’d like to build the machine once LOL (good luck, I know). I have no problem ordering all the parts if I knew what I needed that will work with the PRO1.2, and any step by step instructions posted that show me the assembly so I can insert that task into the full build.

Any help is appreciated for sure

2 Likes

My grid uses 3.5" wide 1/2 birch plywood strips. I have 1/2 MDF on the bottom and 3/4 MDF on top.

1 Like

Endstops are not needed. You need to tell the machine where to start. But in CNC, it is based on the workpiece, not the endstops. So you will set up a job by moving the bit to the starting location and reset the coordinates to zero.

Where endstops are handy are two cases:

  1. These machine use two motors that move in lock step. You need to start them out square and then they will stay square. If you want a shortcut, putting an endstop to each motor to reach (dual endstops), will let the machine square itself. It is a bit more complicated than that. But that is the idea.
  2. If you are making 16 coasters or something, you will probably make a jig to hold the stock, and then just pop in new blanks. You can make sure your blanks start at the same starting place that way. In that case, the machine needs to start in the exact same spot every time (it forgets it’s position whenever the motors are disabled). You can do pretty good by just starting the machine in the same place (by holding against some hard stops) or you can just home it when you turn it on. The endstops help it reset to the same place after you turn it on.

The documentation for dual endstops is in the docs:

docs.v1engineering.com

2 Likes

Project update: I have decided to utilize GermanSteel124’s printed 3030 extruded aluminum adapters for the legs which will give me a good sturdy frame around the ‘table size’ of the machine.

This will allow me to easily remove the CNC machine so I can use this mobile cabinet for other purposes. It will resemble something like this.

image

I will be cutting in t-slots on the table top, the leg frame will then be able to clamp to the mobile cabinet with a 30mm thick spoil-board that will sit just above the height of the 3030 extrusion frame. The spoil-board will also have T-slots in it for holding down the boards that will be routed.

1 Like

I do not have a 3D printer, but I do have a laser cutter/engraver. So I drew the printed controller box and using 1/8th inch plywood constructed a copy of that printed box.


Now ready for sanding and a clear coat to match the mobile cabinet.

8 Likes

Nice ! Is it for skr 1.2 board ?
Would you mind to share the svg/dxf cutting file ?

1 Like

It is based off the printable SKR PRO1.2, 5X 2209 DRIVERS, TFT35 E3 V3 that i ordered with the kit. I shared the files are on the FB v1Engineering group page under files. I actually just shared the lightburn library file that has all the drawings on it. The link is here if you have a FB account and member of the V1 Eng group.

2 Likes

Thank you but arf… i’m away from facebook since 15 years :frowning:

2 Likes