Hi all, so by far I have completed the build with 6mm belts and somehow managed it. I am now stuck with the wiring, the x was easy but I am unable to figure out the series for y and z axis. The z axis only moves in the -ve direction no matter which side you turn the knob. Also my stepper connection has a jst 6pin connector with 4 wires. Can anyone provide a schematic for the same?
The steppers usually come with a wire to connect those 6 pins to the 4 we use. It is usually the two outside and the two middle ones, but I don’t know what order.
We need the stepper wires in AABB where A and B are the two coils. If you attach some wires to the pins I mentioned in the 6pin, you can tell if two of them are part of the same coil by connecting them. If they are part of a coil, the motor will (almost magically) be much harder to turn.
Once you have those 4 wires figured out, you can follow the instructions here for series wiring:
https://docs.v1engineering.com/electronics/steppers/#series-do-it-this-way-
If any one motor is going the wrong way, you can reverse the 4 pin connector. So instead of AABB, it will be BBAA. 1234 will be 4321.
Do you have an endstop plugged into the Z axis? What does m119 say? If you have that backwards NC instead of NO it will only move one way.
Thank you… I figured it out. Actually my steppers were wired as alternate coils as in AC is a coil and bd is another coil. So had to try a lot of combinations to work… but it figured it. Now I am stuck at the gcode. I tried to try a simple square of 100x100mm in sketchup and exported it via sketchucam. When I run the gcode on the lowrider, it just moves to a certain point and stops, nothing happens. What am I missing here? Is there a post processor to put in sketchup. And btw, I am on a mac so can’t use estlcam and fusion lags too much on a mac for no reason. Any simpler alternative?
1 Like
Does the test crown premade gcode work?
The units in the gcode always need to be mm and the speeds need to be mm/min. You also need to make sure you have set the origin (G92 X0 Y0 Z0). Many can programs assume G0 is an unthrottled travel moves, but Marlin treats it just like a G1. So new cam programs may need to be babied.
I feel you on the mac issue. I use Linux, so fusion isn’t even an option. I have estlcam working in wine. Kiri:moto works on stls, but it is browser based, so it is compatible. I think most mac users are fusion or they spin up a vm to run estlcam.
1 Like
Thank you again buddy. I tested the crown and it succeeded, what an amazing feeling. Also, I checked the gcode I made and it has origin issues as you mentioned. Thank you for all the help. I finally have my machine moving.
1 Like
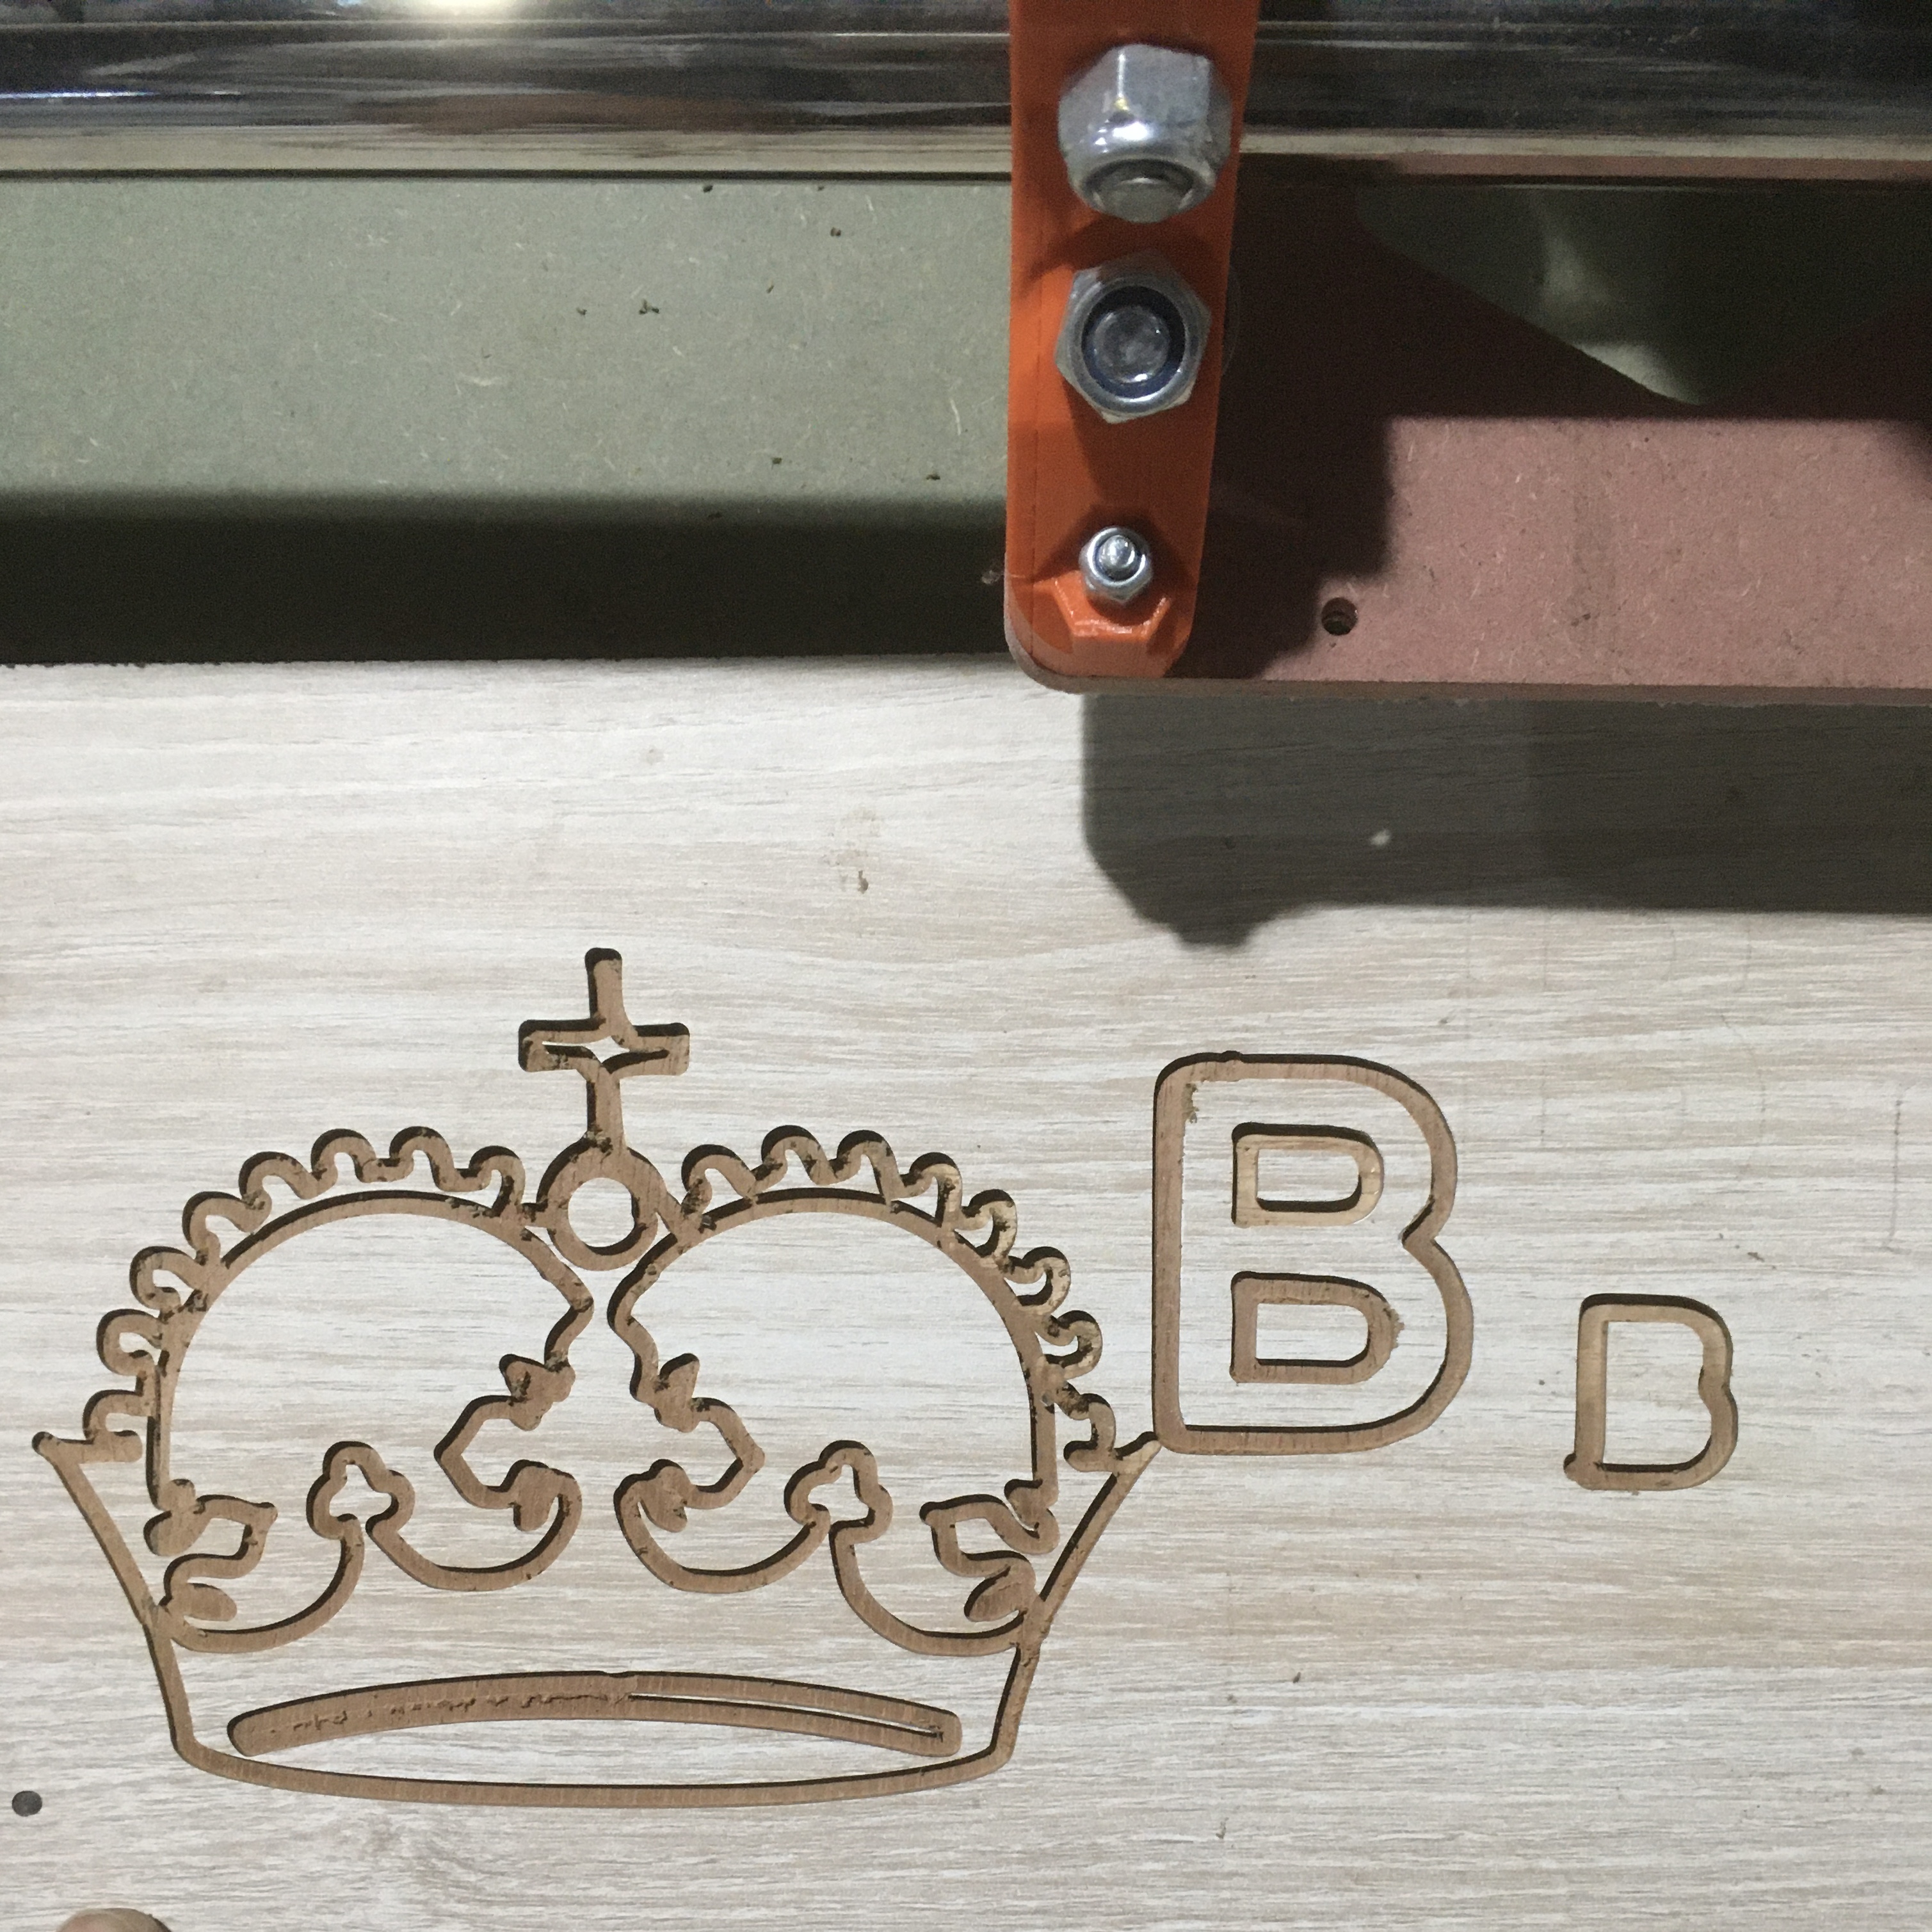
Hey, so I got the machine to work but there are certain quality issues. As you can see I have attached the test file, the crown is the same premade file that Ryan has uploaded, I ran it with a router, it has quality issues. Also, I tried to mill a letter but at times the curves mill as lines and even the lines are not straight. Is this a build issue or software issue? I used martin’s post processor in fusion 360 for the gcode and Guffy’s post processor shows invalid in fusion 360. Maybe an update issue.
Congrsts on getting it going, now on to the next learning and tweaking phase. Don’t worry though it’s all part of the process for most of us.
This is a build issue. Could be squareness, might be slipping grub screws too but start with checks of the build and bolts and things.
1 Like
A picture of your complete build is super helpful so we can look for common build issues.
The crown looks pretty good but there is definitely something off a bit. Your left right axis seems to be the problem area. So loose or tight belt, most likely loose pulley grub screw.
Guffy’s PP still works fine for me. Did you put DIYCNC_Common.js in the directory when you installed Guffy’s PP?
I am on a mac and there is no directory for installing tha pp. I installed it from inside of fusion workspace in manufacture tab and settings - local post processor. It showed invalid and then martin’s pp worked. Both of them are .cps files
Hello so I got it working for a sign. And it works good thought a bit level issues. I had a doubt if we can include negative values for x and y axis as there is with the z axis. Because after booting up I would want to control the machine in negative directions as well specially the y axis is always twisted with manual movements. I am running series without end stops.

The pieces of software that restricts negative movements is the soft stops. It is only enabled on it configurations for X and Y on dual endstop firmware. If you are running the serial furmware, then it shouldn’t be on.
I think you can turn it off with an m code. M121
1 Like
Or you can disable it in the menu on the screen.
1 Like
Perfect. I dint know that’s what it does
Hello again, so I have a doubt again regarding zeroing the axes. Usually I would adjust the router bit till the top of the workboard and then turn off the machine and turn it on again and run the gcode. Since I lubed the leadscrew, after turning of the machine, it falls on one side. Apart from adding the g92 x0 y0 z0 to every gcode, is there any other way to do this? Estlcam has no option for a post processor to do so. Also, how do I fix the machine to not fall after turning it off because that way my router bit will someday collapse.
The falling is normal. You can use a 1 start lead screw in each Z, but it will be 4x slower.
You can add the G92 to Estlcam’s starting gcode. Then Estlcam will add it to every file.
You could also just make another gcode file with that and run that before starting your jobs.
There is a menu item to do the same thing. On the LCD, I believe it is something like “set home offsets”.
Where is the option to add that start code in Esltcam? Also tried saving a separate gcode with g92 x0 y0 z0 and then running my file but it dint work
Found it it’s under - Setup - CNC Programs- Texts tab. Thank you once again
1 Like
Make sure you use ALL CAPS. It is case sensitive.
1 Like