I guess I can just try it. I bet we do not even need all 8. Just a couple jumpers into the same spot.
Hmm…I need to prioritize some time here. Might need to make a schedule for a few days.
I guess I can just try it. I bet we do not even need all 8. Just a couple jumpers into the same spot.
Hmm…I need to prioritize some time here. Might need to make a schedule for a few days.
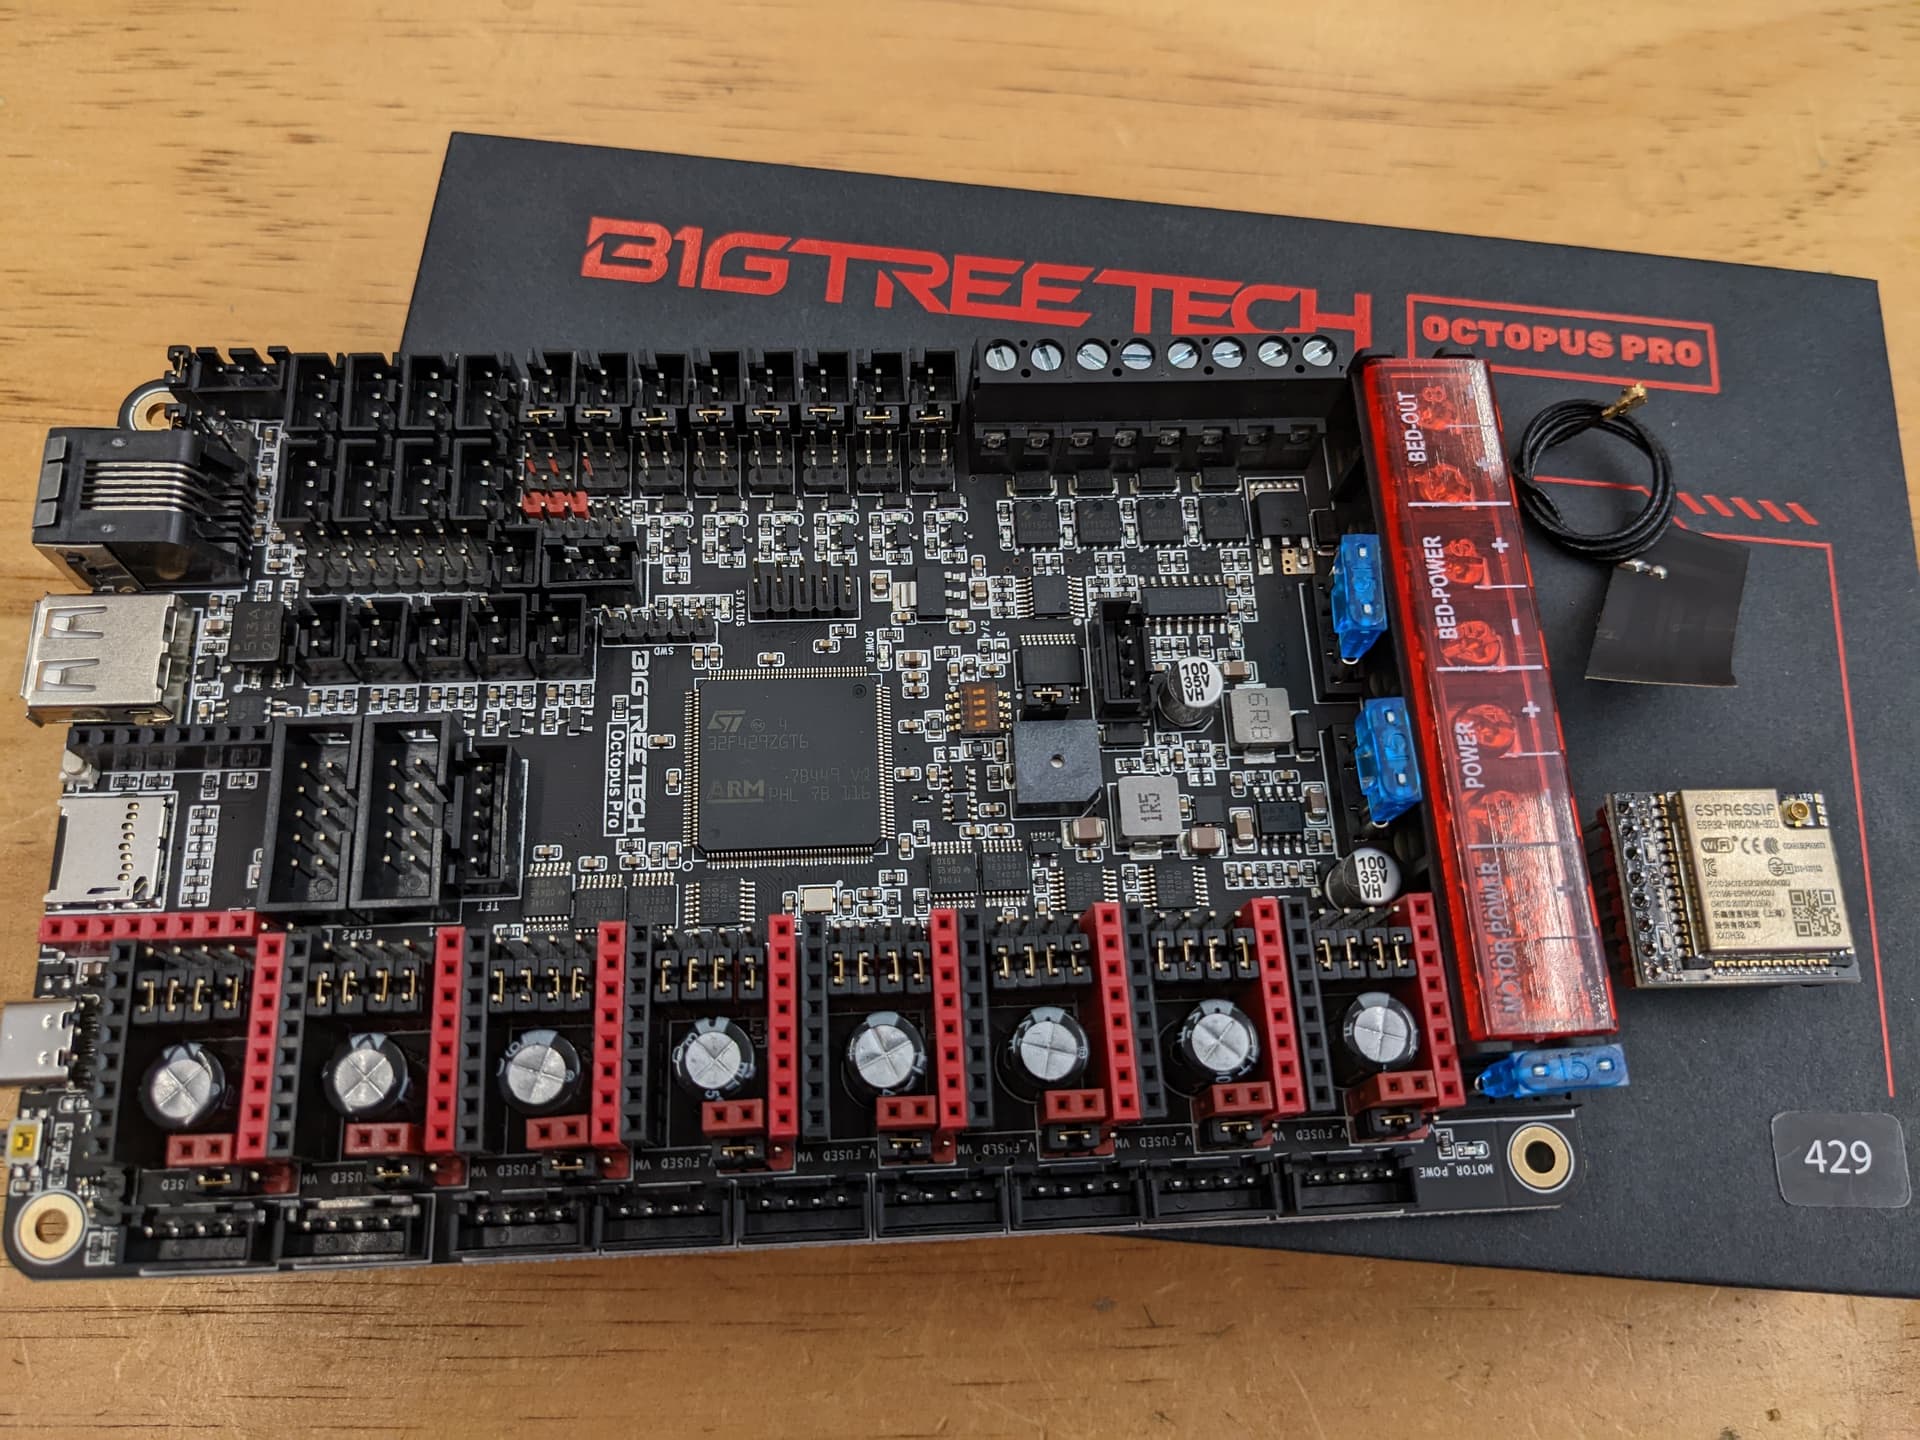
Well this showed up today.
Seems like it is the answer…
It is a lot longer than the SKR Pro. I think the integrated antenna is the better option for the esp32. Wonder if it works with esp3d v3.
There is very little info on that ESP32-u from BTT.
I finally figured out how to flash it, and YES!!! esp3d v3 works just fine.
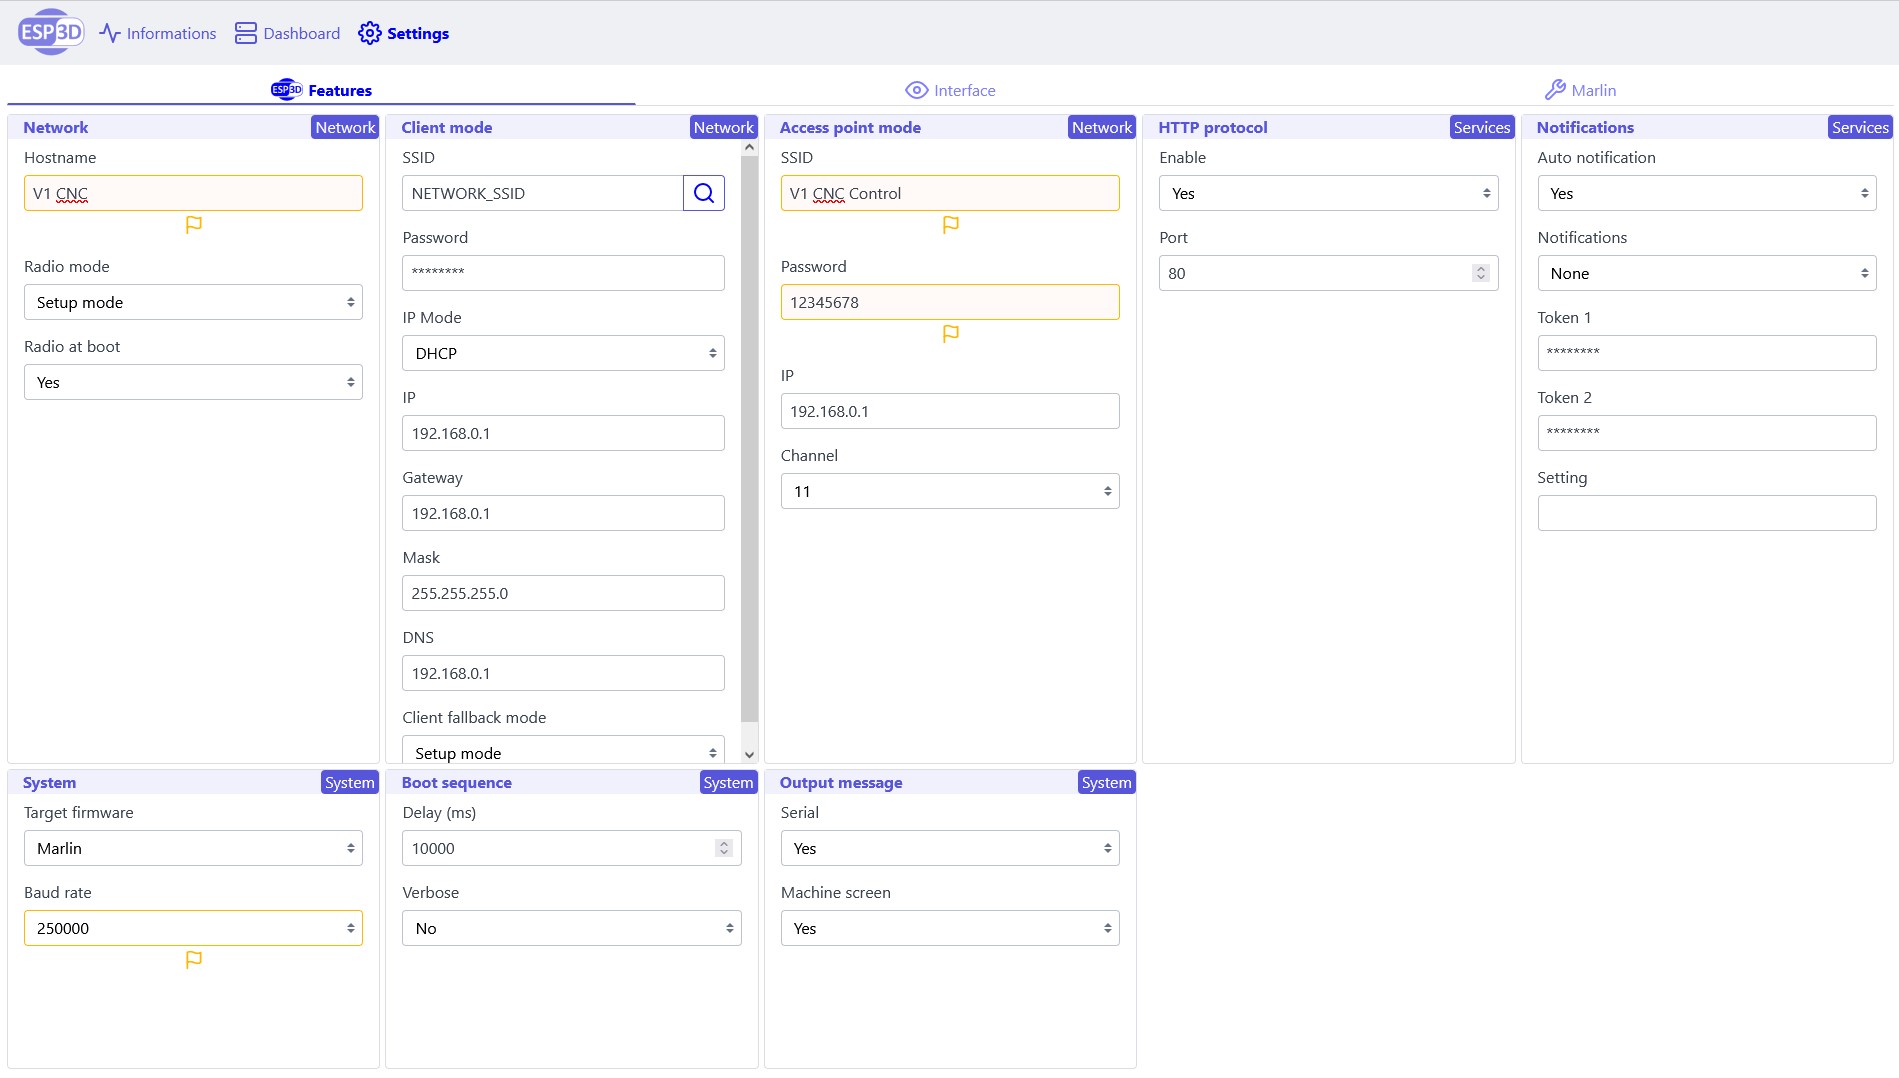
Learned something else…I sent my programmed 8266 to a lucky order today and turns out I needed one more file off it. Shoot. I will redo it. So you need a preferences file for the interface, and the Export file for the internet/file settings. No big deal but I need to add it above.
Lets see how much BTT wants for these things in bulk (they are usually a bit more than the rest but will replace DOA’s for me).
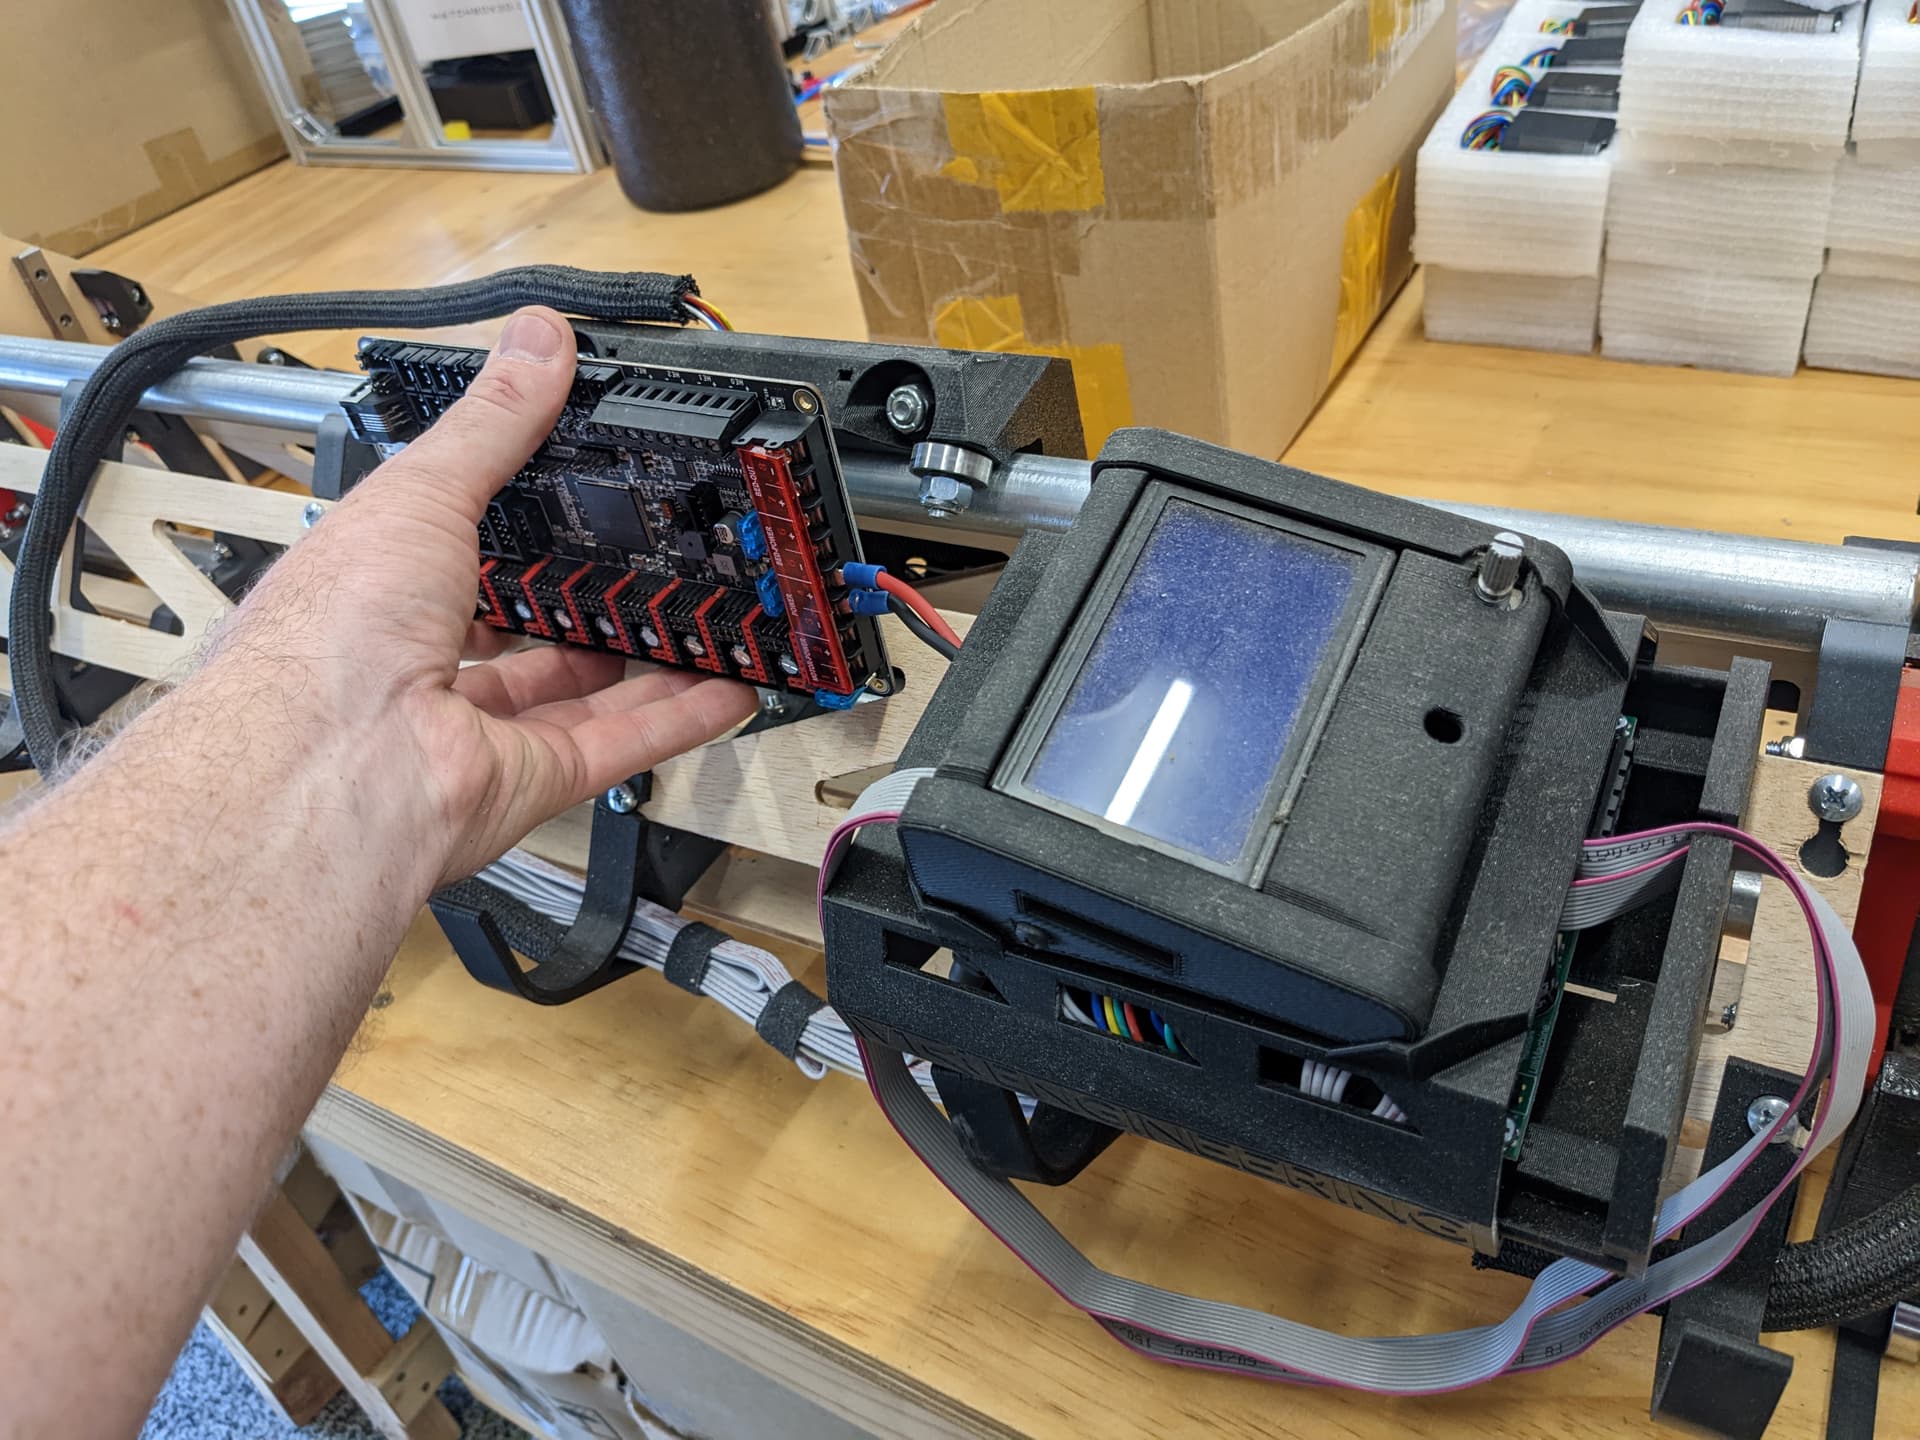
Any ideas how to make the LR3 board case smaller for the Octopus?
Maybe this way?
Is that an entirely new control
Board with integrated wifi?
[quote=“vicious1, post:17, topic:34707, full:true”]
Wierd, I thought I had, it went through the whole progress bar, wait 40 seconds thing and restarted itself. But the version still says 2, so I guess I have to wait for the mail to get a firmware dongle.
Cheers!
Brain storming…
What’s the best location, and orientation to minimize Wifi interference, maximize clean Fan assisted airflow over controller, minimize kindling sawdust accumulating on all those drivers ![]() , especially if the board is encased in a snug warm PLA case (also diminishing PCB/parts longevity/performance/stability
, especially if the board is encased in a snug warm PLA case (also diminishing PCB/parts longevity/performance/stability ![]() )?
)?
Should controller and case be mounted to outside (or inside) of YZ plate, or off the gantry altogether? Or perched up and/or vertically mounted at least? Maybe mounted to a mostly printed+EMT+ply swinging boom with umbilical (carrying Power/Signaling/Vac-Hose), with aviation connectors?
Maybe controller and case on the boom’s vertical arm? Maybe boom is made from printed+EMT+ply by a partially built LR3, similar to the struts?
The octopus has a fancy esp32 port. The reason the esp32 is better than the esp01 is you are able to update it, on the fly by dropping on a new file. The esp01 needs to be unplugged and flashed with a programmer.
The reason this is even relevant is BTT keeps telling me there is no more SKR Pro’s and I need to get the Octo, but then they give me a deal on some SKR Pros and move the final date back a month or two. At some point I need to pick a new board, the ESP32 bonus is making the Octo look good.
And then… well the octo looks to just be a slightly better version of the SKR Pro.
Make sure to get the BTT one I showed the little one is not good for anything else. I just used the BTT one for the esp32, actually several flavors of it. Worth the extra dollar or two.
I started doing some sketching with a pen and paper before CAD. I think that vertical is going to be good. CAD is the truth serum though. Looks like it fits, vs actually fits are two different things.
The LR3 seems to need a bit of extra weight so it does seem like a good place to have it actually on the machine. At least in terms of down force, Z pressure. Doesn’t help the Y moves though. Outside the YZ plate and it technically increases the footprint, but it adds weight there just the same. Boom arm for the boar adds unnecessary (possible electrical noise) extensions to all the wires.
I think I will try to get a handful of the ESP-01s in the shop in the next few days to get some feedback. I like it, kinda weird on a daily phone but an old phone, tablet, shop laptop, or computer would be awesome!
I think it really gets a lot of the things that have been requested for a long time for less than a Pi, and a bit easier, and a lot smaller as well. Super easy wireless jogging, I like having a terminal (don’t tell Heffe I actually use it all the time), and the Macros are just the cherry on top. Any of you that do repetitive stuff can add a macro and have a one button click super easy.
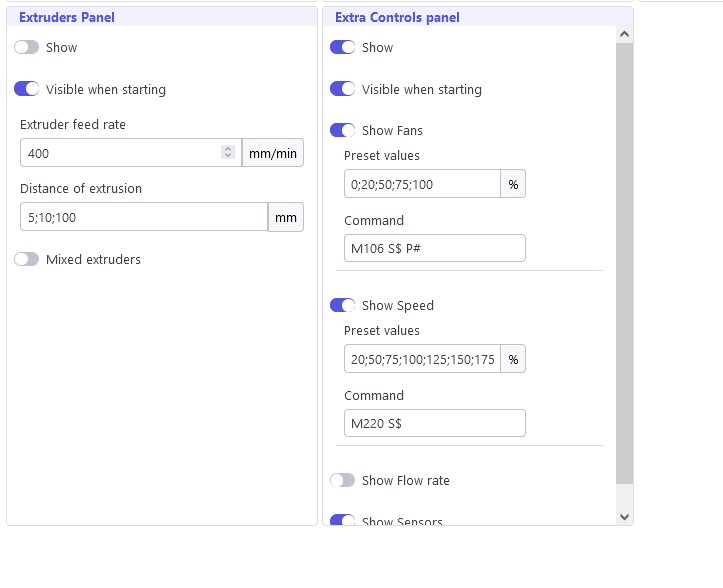
Just going to add an example of a macro. I do 4 YZ plates at a time. Each set, homes, then moves back 413mm, over 10mm and down 30mm before I start to probe. That use to be at least 6 clicks for the smallest move. Now I can have tree macros one for each starting place. One click, get out the probe and get to it.
Or I added some for leveling the Z axis on the LR3. I used to just type all the commands into the terminal, now, click click clicky.
Im loving the direction this is moving in
thank you for continuing to add capabilities, Ryan. truly feels like we are part of something special
I feel like I get stuck in obsessive tendencies with deep rabbit holes of little information! 
I think I might have to put up my to-do lists for you all to see to keep me on track. Luckily, with this rabbit hole we got something useful out of it.
In the end I am still trying to make sure we have the best bang for the buck, and what we learn is shared publicly so it could help other CNC’s as well. I feel this really does add huge functionality for less money. Esp3d has been around for a long time but it is fairly obscure so it is taking a while to piece it all together. The ESP vs a TFT cuts the control package cost by probably more than 30%. We have been kinda inching up in price over the years and I hate that.
The other thing I have been doing in the background is changing all my printers to the new MP3DP v4, more reliable and faster print times with less waste. That should allow me to drop the prices of the printed parts kits a bit…that and possibly optimize the parts themselves a bit.
Seeing this development gives me hope that esp3d will become more popular in the cnc world. I’ve had esp3d on my rig for some time. If it weren’t for bCNC z leveling, I wouldn’t need a pi. I suspect if this idea takes off, it won’t be long before esp3d also has a mature cnc probing suite so to speak. It’s just a matter of putting in time building macros and a ui for it… now that you guys got all the hard work done.
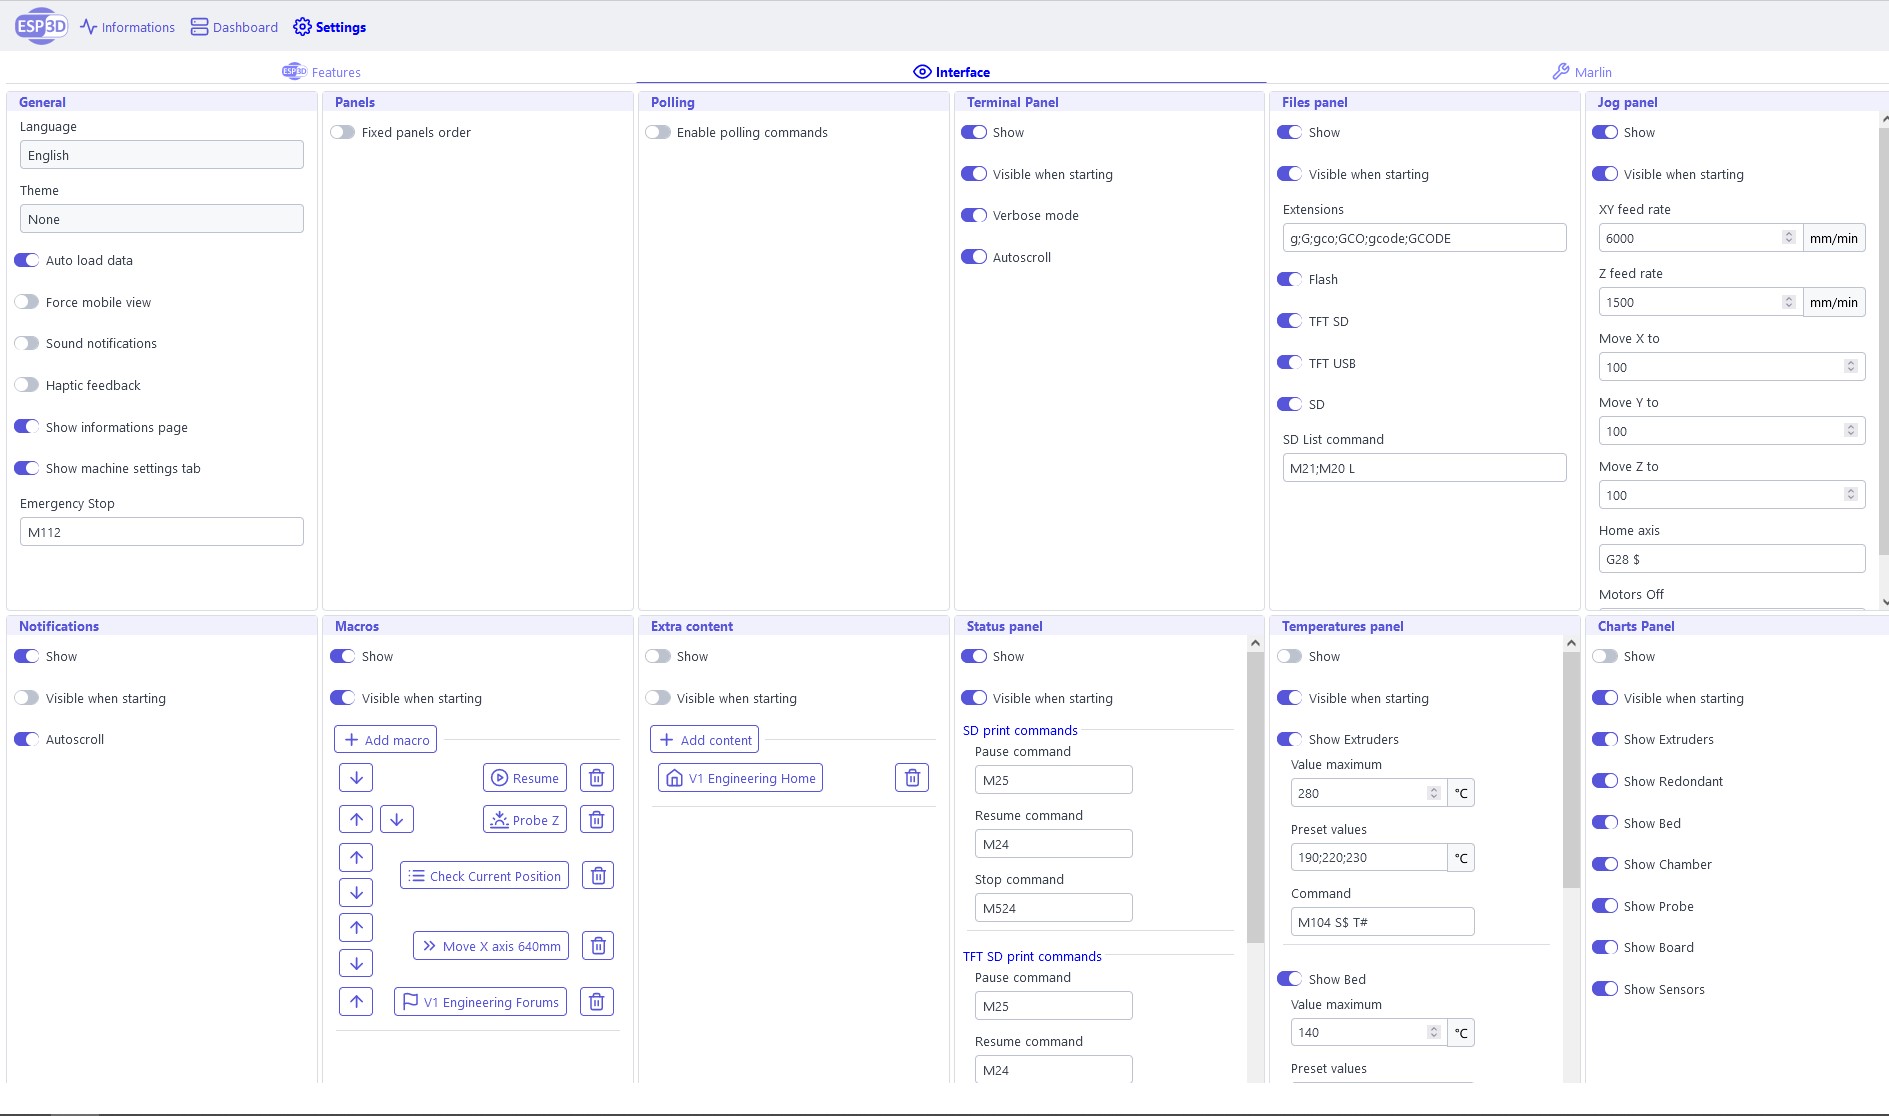
See any settings I can or should turn off? I want to pop a few of these in the shop but I want to get this pretty close first. The UI can be changed without flashing, so these are not critical.
Started on the Octopus Case…vertical is no good. Refining the current case a bit.
One more question. I am flashing these 8266’s with platform eye oh, Can I have it load the setup files at the same time? Like add a line to the p io setup file?
Do you need the printer/temperature stuff on?
Laser macros? Or do those change too much?
We could add a section in the docs for useful macros. We could make a link to that from here too. Then we can update it over time.
You can probably put the data in the right place somewhere. But this is probably a better question for espui devs. They may be doing something when you change a setting. More than just changing the bits in flash.
There is also probably a way to just pull the program and settings off of a working esp8266 and just use that image to flash new ones. I would have to try it though. I don’t know enough to guess my way through it.
Temp panel is set to not show, which is as close to off as it gets I think. The status panel is on because it can show fan port speeds but maybe I will set it to not visible at start since I doubt many care what the fan port is doing (IOT relay, maybe laser).
Notifications? No idea what that is.
Oh…
It isn’t horrible. It takes 1 minute to flash each one so I can do a bunch in a row. Then plug them in individually, power it up, connect to it over wifi and dump all the files on at once and that is fast., check the UI real quick. That second step also serve as a check. So I think $10 is pretty fair for all that. If I can figure out a way to do it a bit faster I could drop it a dollar or so.
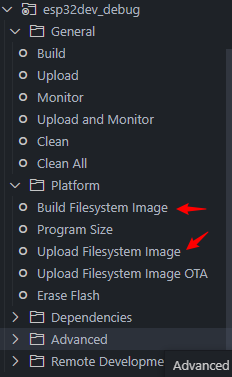
I haven’t looked at ESP3D since 2.x, but if the config files are stored in the SPIFFS partition of the flash, you can upload it with PIO. Store the files in a folder called “data” in the project root. Then you can build the FS image then upload it to the ESP.
If it is as simple as flashing an image, you could probably setup something like this to just do a dump of the hex: Overview | Standalone AVR Chip Programmer | Adafruit Learning System
![]() Thank you!!!
Thank you!!!
Oh, I like that. That could be cool, Thank you!