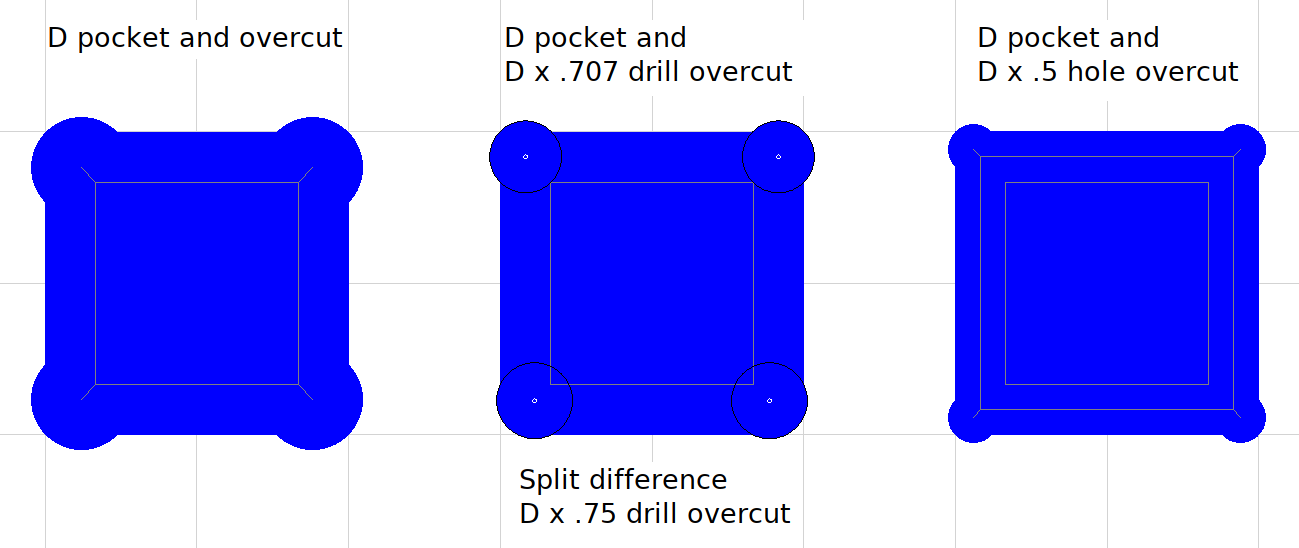
I updated the drawing to hopefully clarify that Estlcam over-cuts are to the RED line. Yes, using Automatic functions : add overcuts makes single tool over-cuts really easy and drill hole (blue) over-cuts require two tools and some CAD work.
Oh, sure. But you need a smaller drill bit to do the blue. The estlcam overcut is the smallest cut to clear all of the material with the same bit.
The only point of my original post/drawing was that the drill bit has to be big enough to remove whatever material the pocketing tool cannot. Delving into it further I discovered that the minimum drill size is pocketing bit diameter (D) x .707. With Phillips suggested split difference the minimum drill size is D x .75. When using a second (hole only) path for the over-cut the minimum tool size is much smaller (…D x .208), example is D x .5.
2 Likes
The second toolpath is maybe the way to go, but then I’d have to check how deep the thinner endmill could go without breaking. I would not want to do everything twice completely and double the time. Thanks for the pics Dave.
I’m playing with the pocket options and it seems to be doing very small increments. Is this right?
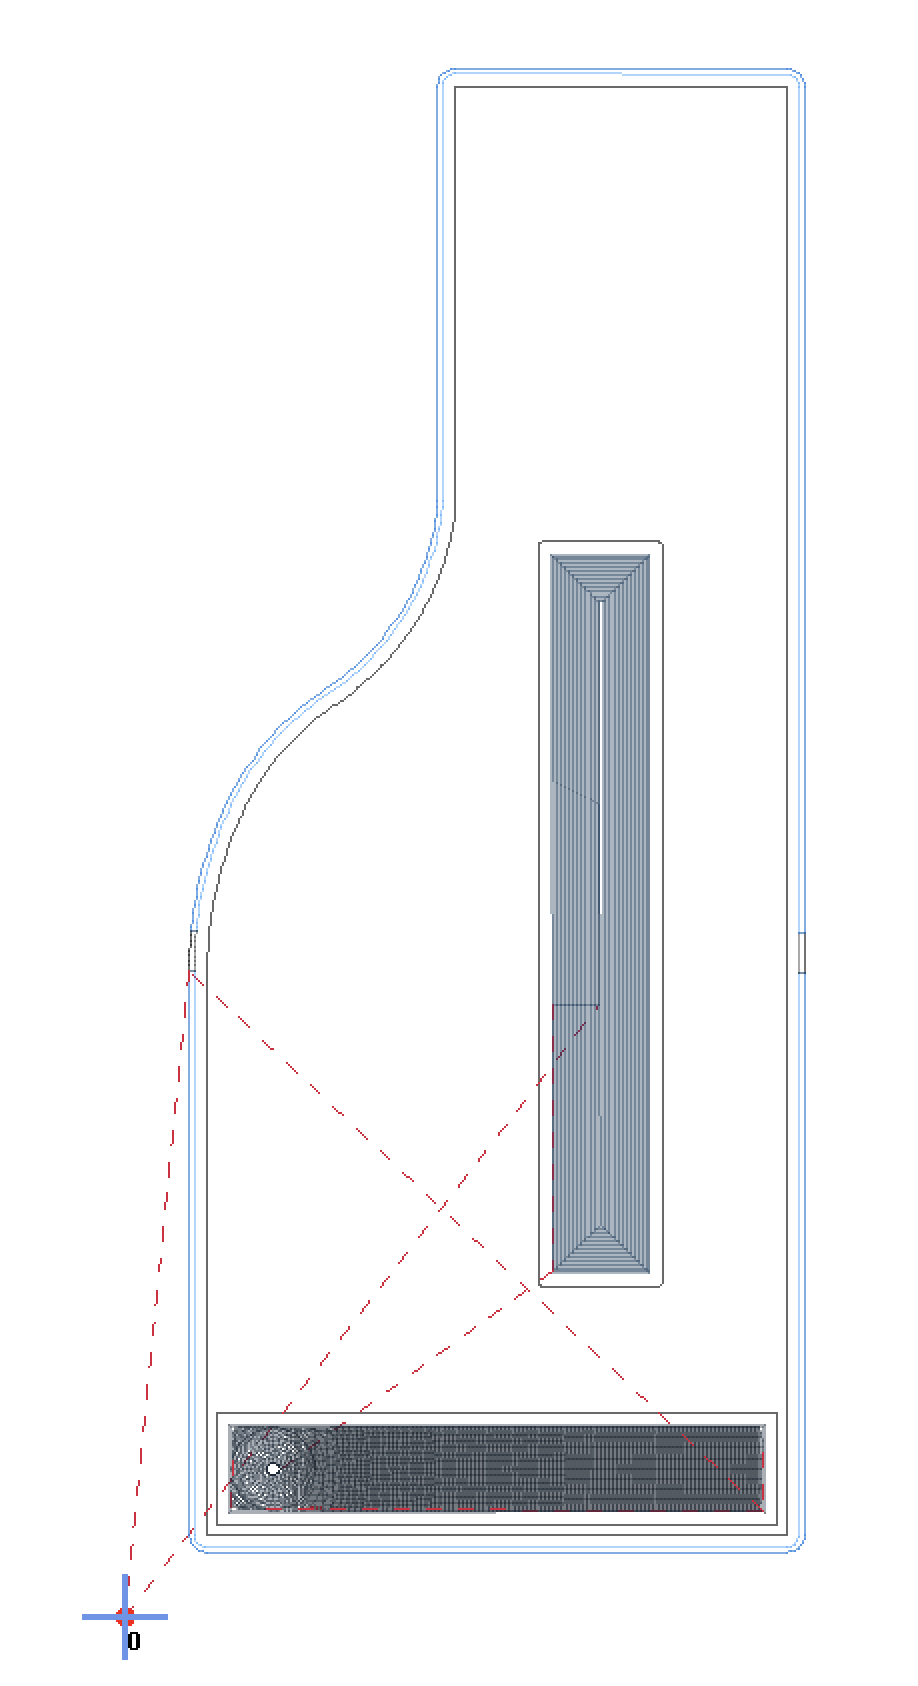
This wood piece is only about 80mm by 180mm. So the pockets are about 15mm across yet there are so many lines. Can I configure how much to cut each time?
Note I’m just playing with a small piece to get used to Estlcam. Eventually I can to cut a piece like this that is much bigger.
Click the tool list wrench icon and have a look at Stepover. It looks like your tool diameter and/or stepover is really small. Do just a pocket path and use Preview to see how long it will take to machine using different methods. Linear is the fastest (only one that can use a > 45% stepover - I use 75%) and can be rotated, e.g. Pocketing angle 90 for that vertical one.
1 Like
Cheers. Mine was 5%. And thanks for the angle. I was thinking that was the tool angle