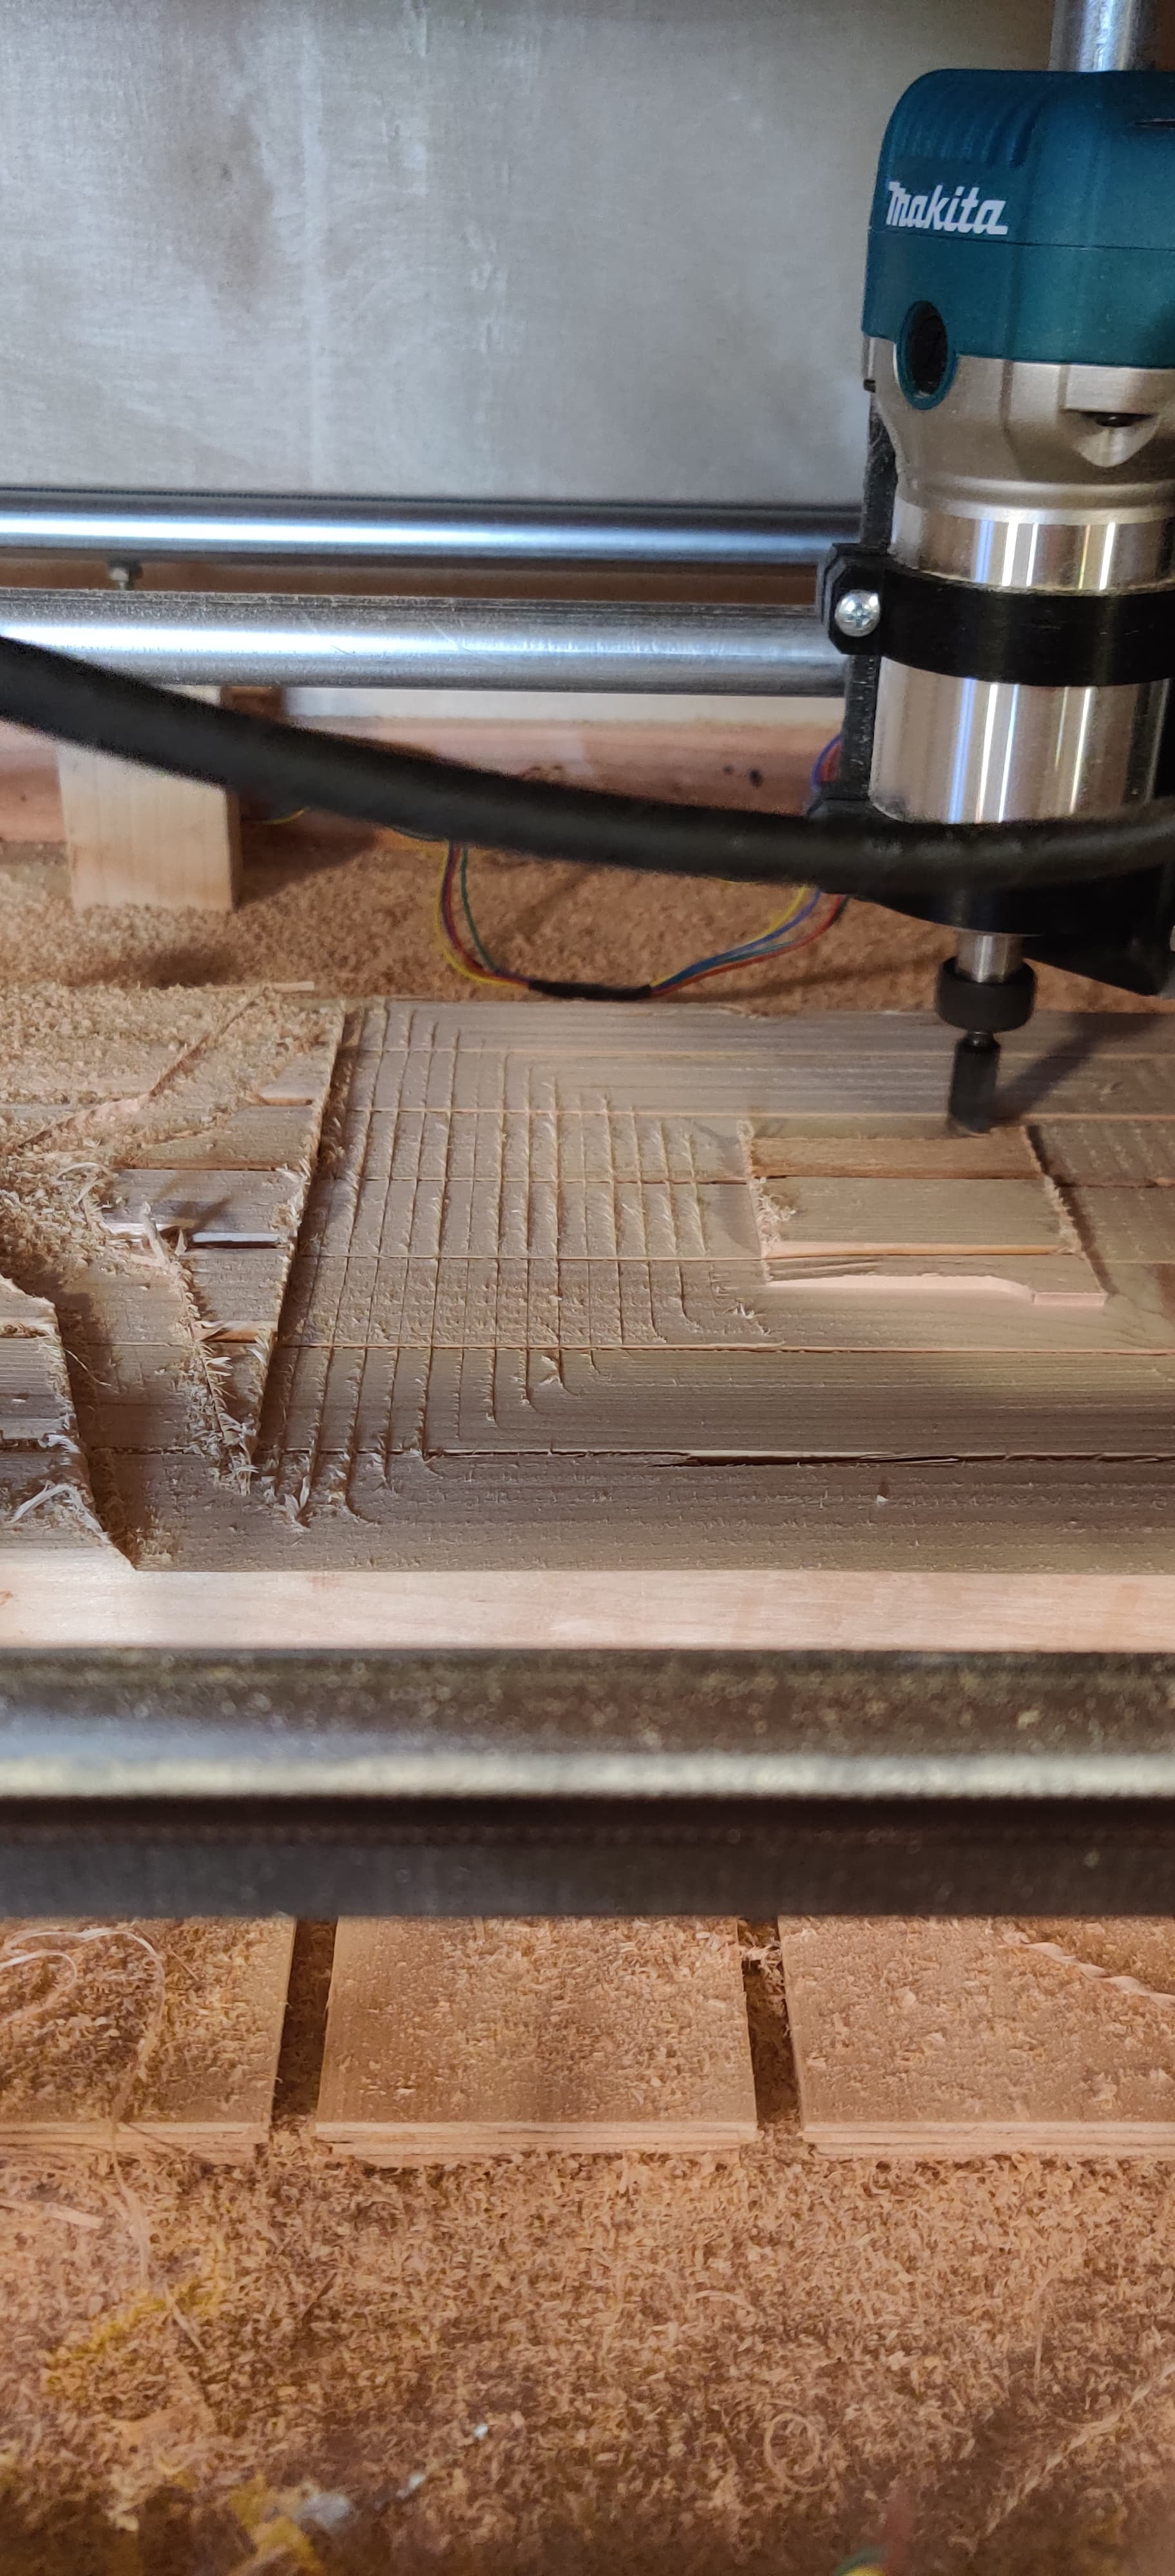
I’m having a hard time getting the MPCNC to be as accurate as when I first set it up. As you can see in the picture, it’s leaving behind lines. It’ll also shake as it moves past certain regions. Not chatter at the bit, but big rumbles that shake the rails.
I’ve tried cleaning everything as best I can, including getting gunk of the bearings, and tightening the bolts on the core. What am I missing?
Are these lines predictably on one side of your toolpath (it looks like they are always on the left)?
Have you checked the grub screws on your pulleys? Maybe the tool is pushing itself “away” from the toolpath and there is a little play in the pulleys on the axis that should be positioning it to align with the toolpath from the last pass? So if your x-axis is from left to right in the picture, one of the x-pulleys might not be completely fixed and when there is load on the tool it shifts this small amount to leave this small residual…
To me, this looks like a possible tramming problem. Tramming is setting your router perpendicular to your work surface. I don’t know how your machine has changed over time, but in general you would want to:
Verify that the leg lengths are all the same.
Lightly surface your spoil board
Use a tramming arm and thin shims to set your router perpendicular to the spoil board
If you did any shimming of the router, re-surface the spoil board.
You don’t need/want a “fancy” tramming arm with gauges, just something simple like this one. My first one was made out of wood and took about 10 minutes to make.
If it was working before and is not working now, look for what changed. Vibration can cause grub screws to loosen, as mentioned above. Any chance a structural piece cracked while the machine was out out service? I’d wiggle each truck and each corner to see if anything has gotten loose.
So it looks like it was several things coming together.
-The grub screws were ok, but the belt on one wide was riding against the toothed pulley. Adjusting it over solved the rough areas.
-I was getting focused on the core and didn’t notice that the X was out of square by almost half an inch. Setting the trucks right also made for smoother operation.
-I don’t have a 3D printer so I can’t print a tramming jig, but shimming between the Z rail and tool mount with a couple strips of cut-up beer can made those lines a lot less severe. Also using a newer bit that wasn’t so heated up helped as well.
-Two belts seemed looser than the others, so I tightened those a little.
You can use a coat hanger bent into a Z shape for tramming. Just chuck one end into the collet, and bend it around to the other end is just touching the spoil board. Then you can swing it around to see how much it changes in height, and adjust from there.
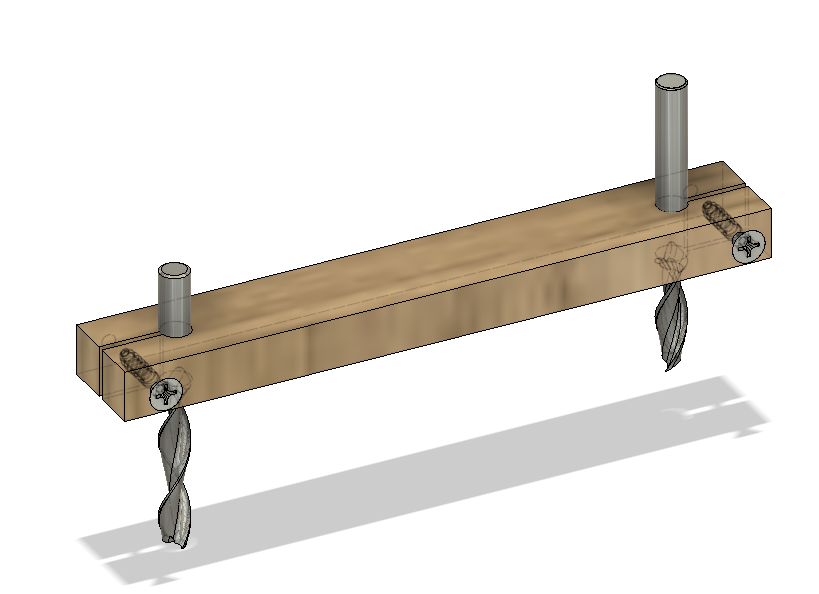
At this point, you may not want to tram your router, but if you do, you can easily make a tramming arm out of wood with a hand drill and a hand saw. A tramming arm does not need to be precise, or perfectly aligned, or 3D printed…just tight so it does not wabble. Take a piece of scrap wood with a couple of holes with slots. Tighten the holes with wood screws from the side on both a bit in the router, and a spare bit, and you are done.