First off all thanks for still following this threat.
What we changed:
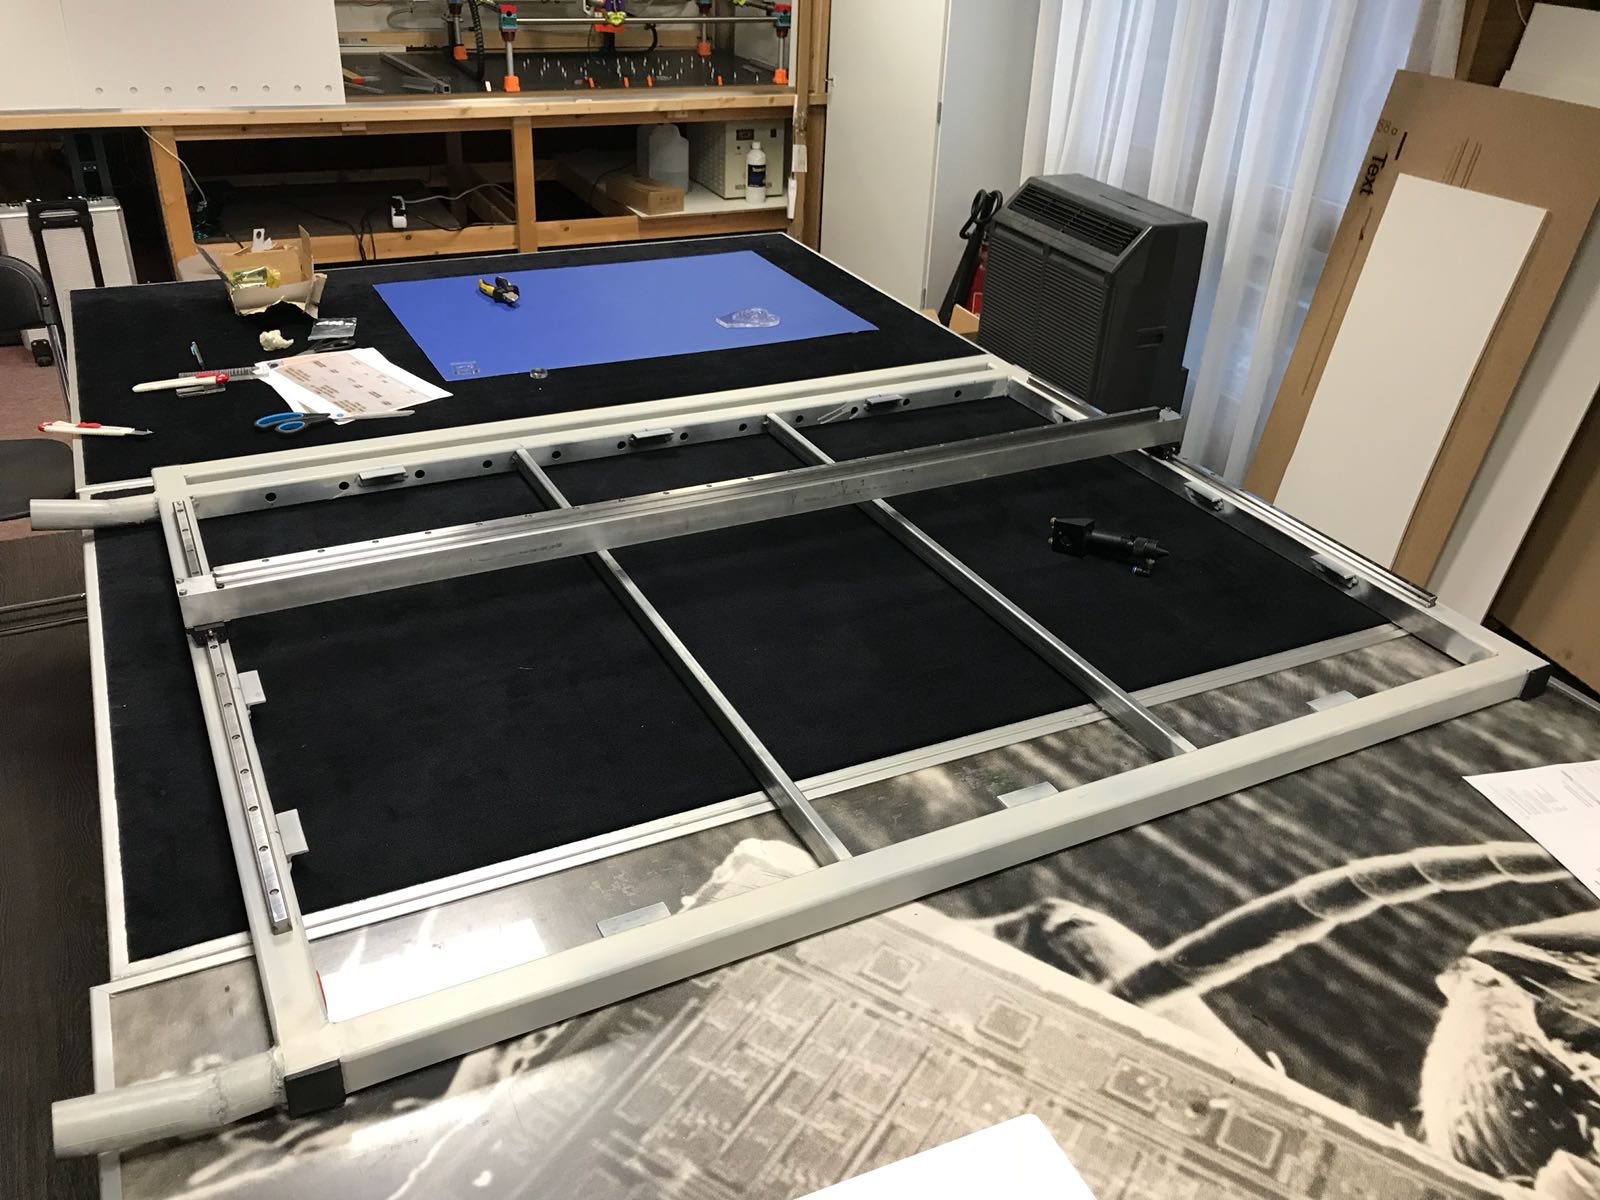
moved the lamp inside the working space with official spacers
created a workspace with pin heads for the object to laser, we experienced little reflection from the raster below the object.
we needed to adjust and align everything again and broke the first lens it got dirty, dirt means that the laser will burn it so it got too hot.
but there are also positive news, engraving is getting better and better the images will show little pieces from the work because of the copyright. It is work for clients and they are very happy with it. Also trying led lighting with the plexi engraving should give nice results it sill need some little tweaking the start and endpoint is going further into the plexi you see a little pinch.
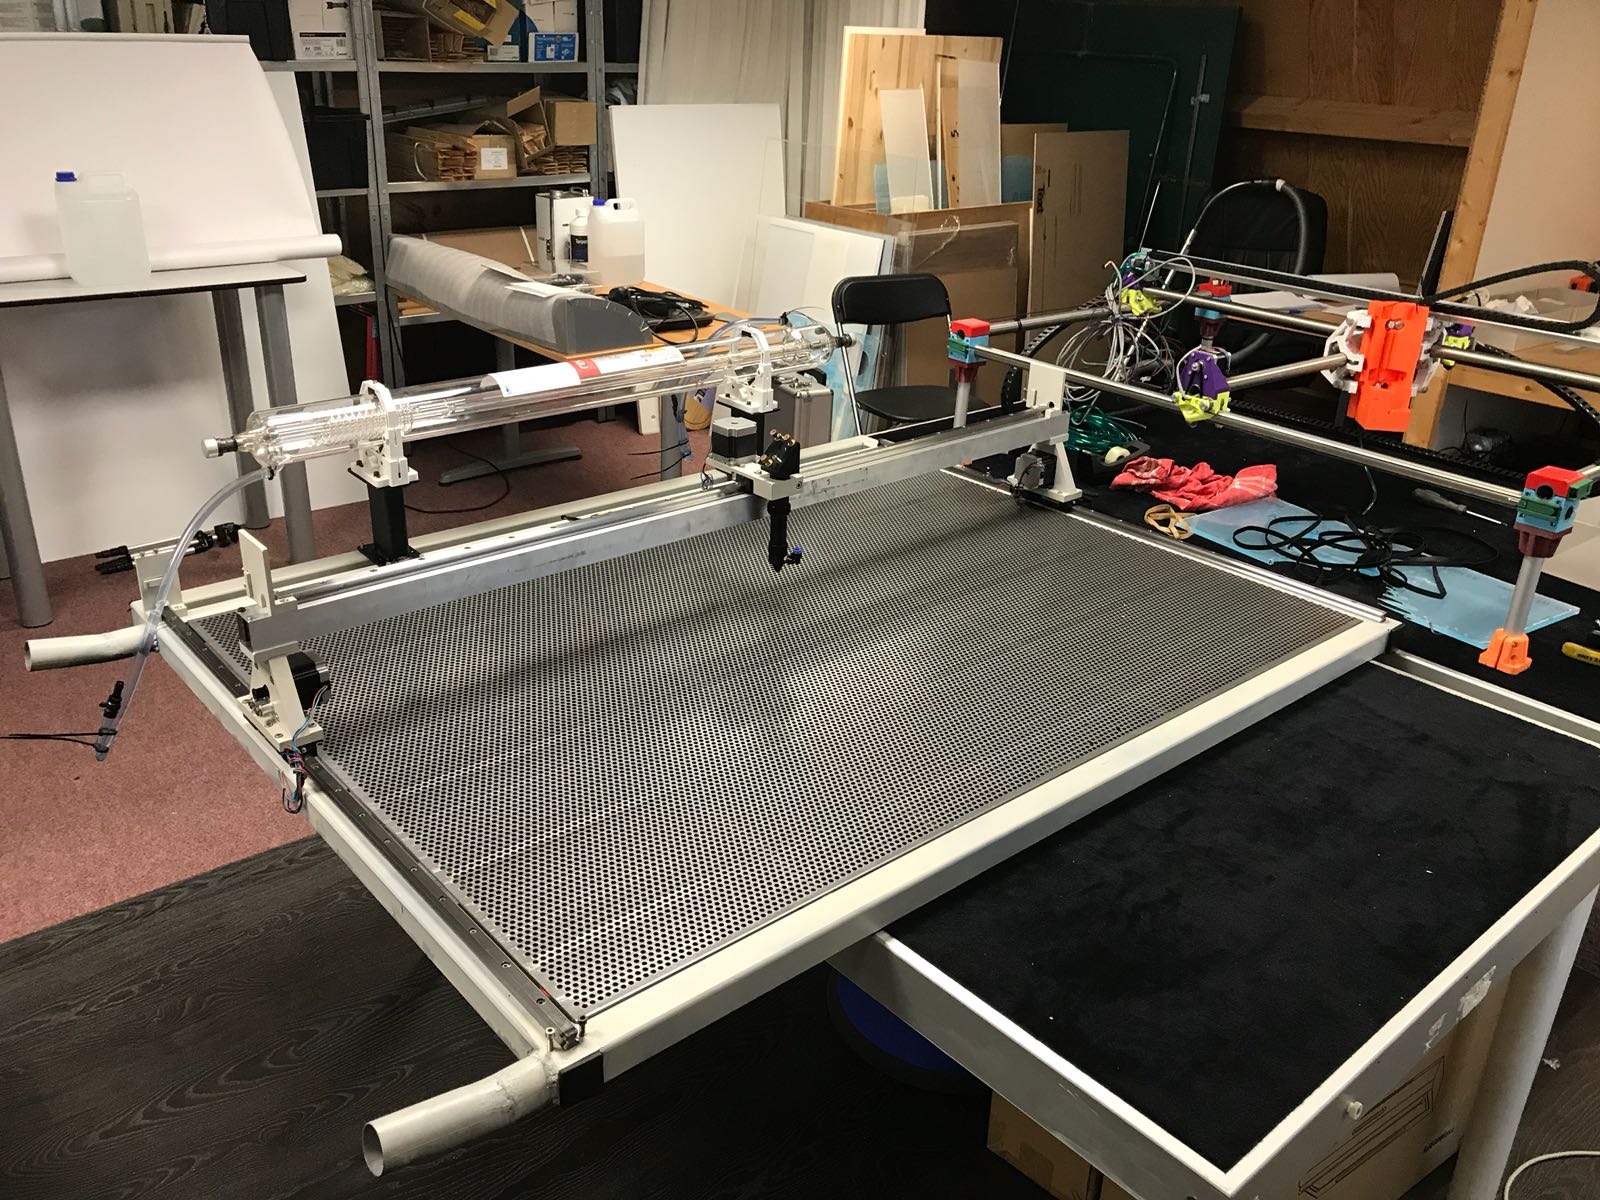
-Also trying to figure out the re-arm board. almost there, got some pulse motors are already working. This board is so much faster, and that speed is needed for the engraving. Also received a Mach3, going to build a in height movable work space but this is for later, first finishing this.
@Mike , I don’t know that project looks also very interesting, will read it and let you know what i think.
What spikes are these? Self-made? I’m looking for something better than my honeycomb table.
But be careful using those without proper enclosure, in case your (focused) beam hits the edge and deflects. I have burned the shirt I was wearing once with a non-focused beam by a 50w tube (I repeat: before it hit the lense).
Awesome build… I am going to be adding a 75-80 watt co2 to my machine in the new year.
As for setting it up with with Arduino and Ramps 1.4 did you use the same procedure by remapping the 5 v pins to fan control like the tutorial for the diode lasers? That is currently how I have my 6 watt diode set up and was kinda hoping a co2 would be almost a drop in is far as firmware is concerned.
What have you experiences with the new Re Arm board been since we last hear from you? I am thinking that is going to be a must for me as I do a lot of engraving of glass/mirrors etc
Why don’t you just drop down the microstepping to gain speed instead of going through the hassle of using another card?
For a laser cutter you don’t need much torque, so you could go for 1/8 step without losing any accuracy, that would allow you to go quite a bit faster. You can even try 1/4 or lower.
And if it is still not enough, just put bigger pulleys.
I’ve set my MPCNC to 1/8 steps for 3D printings to make a few tests and it was pretty fast, I was only limited by my extruder motor’s torque. But you don’t have an extruder…so no problem!
Going to switch from the arduino mega to the MKS-SBASE board. Almost got everything working (demo situation)
And we also found someone that made some improvements on the frame
I know it isn’t really the printed version anymore but love to share the results:
 motors are already working. This board is so much faster, and that speed is needed for the engraving. Also received a Mach3, going to build a in height movable work space but this is for later, first finishing this.